3CX
This guide outlines the steps to configure your 3CX PBX for making and receiving phone calls using didlogic. Before calling, ensure you have an active phone number and a SIP account created on your didlogic account.
Configure Digest Trunk in 3CX PBX
The Digest didlogic SIP account refers to the Register-Based Trunk in 3CX PBX.
Follow these steps to set it up:
- Log in to the 3CX Web Portal using an admin account.
- Navigate to the bottom-left corner and click the Gear Icon labelled "Admin", then click the "Voice & Chat" field.
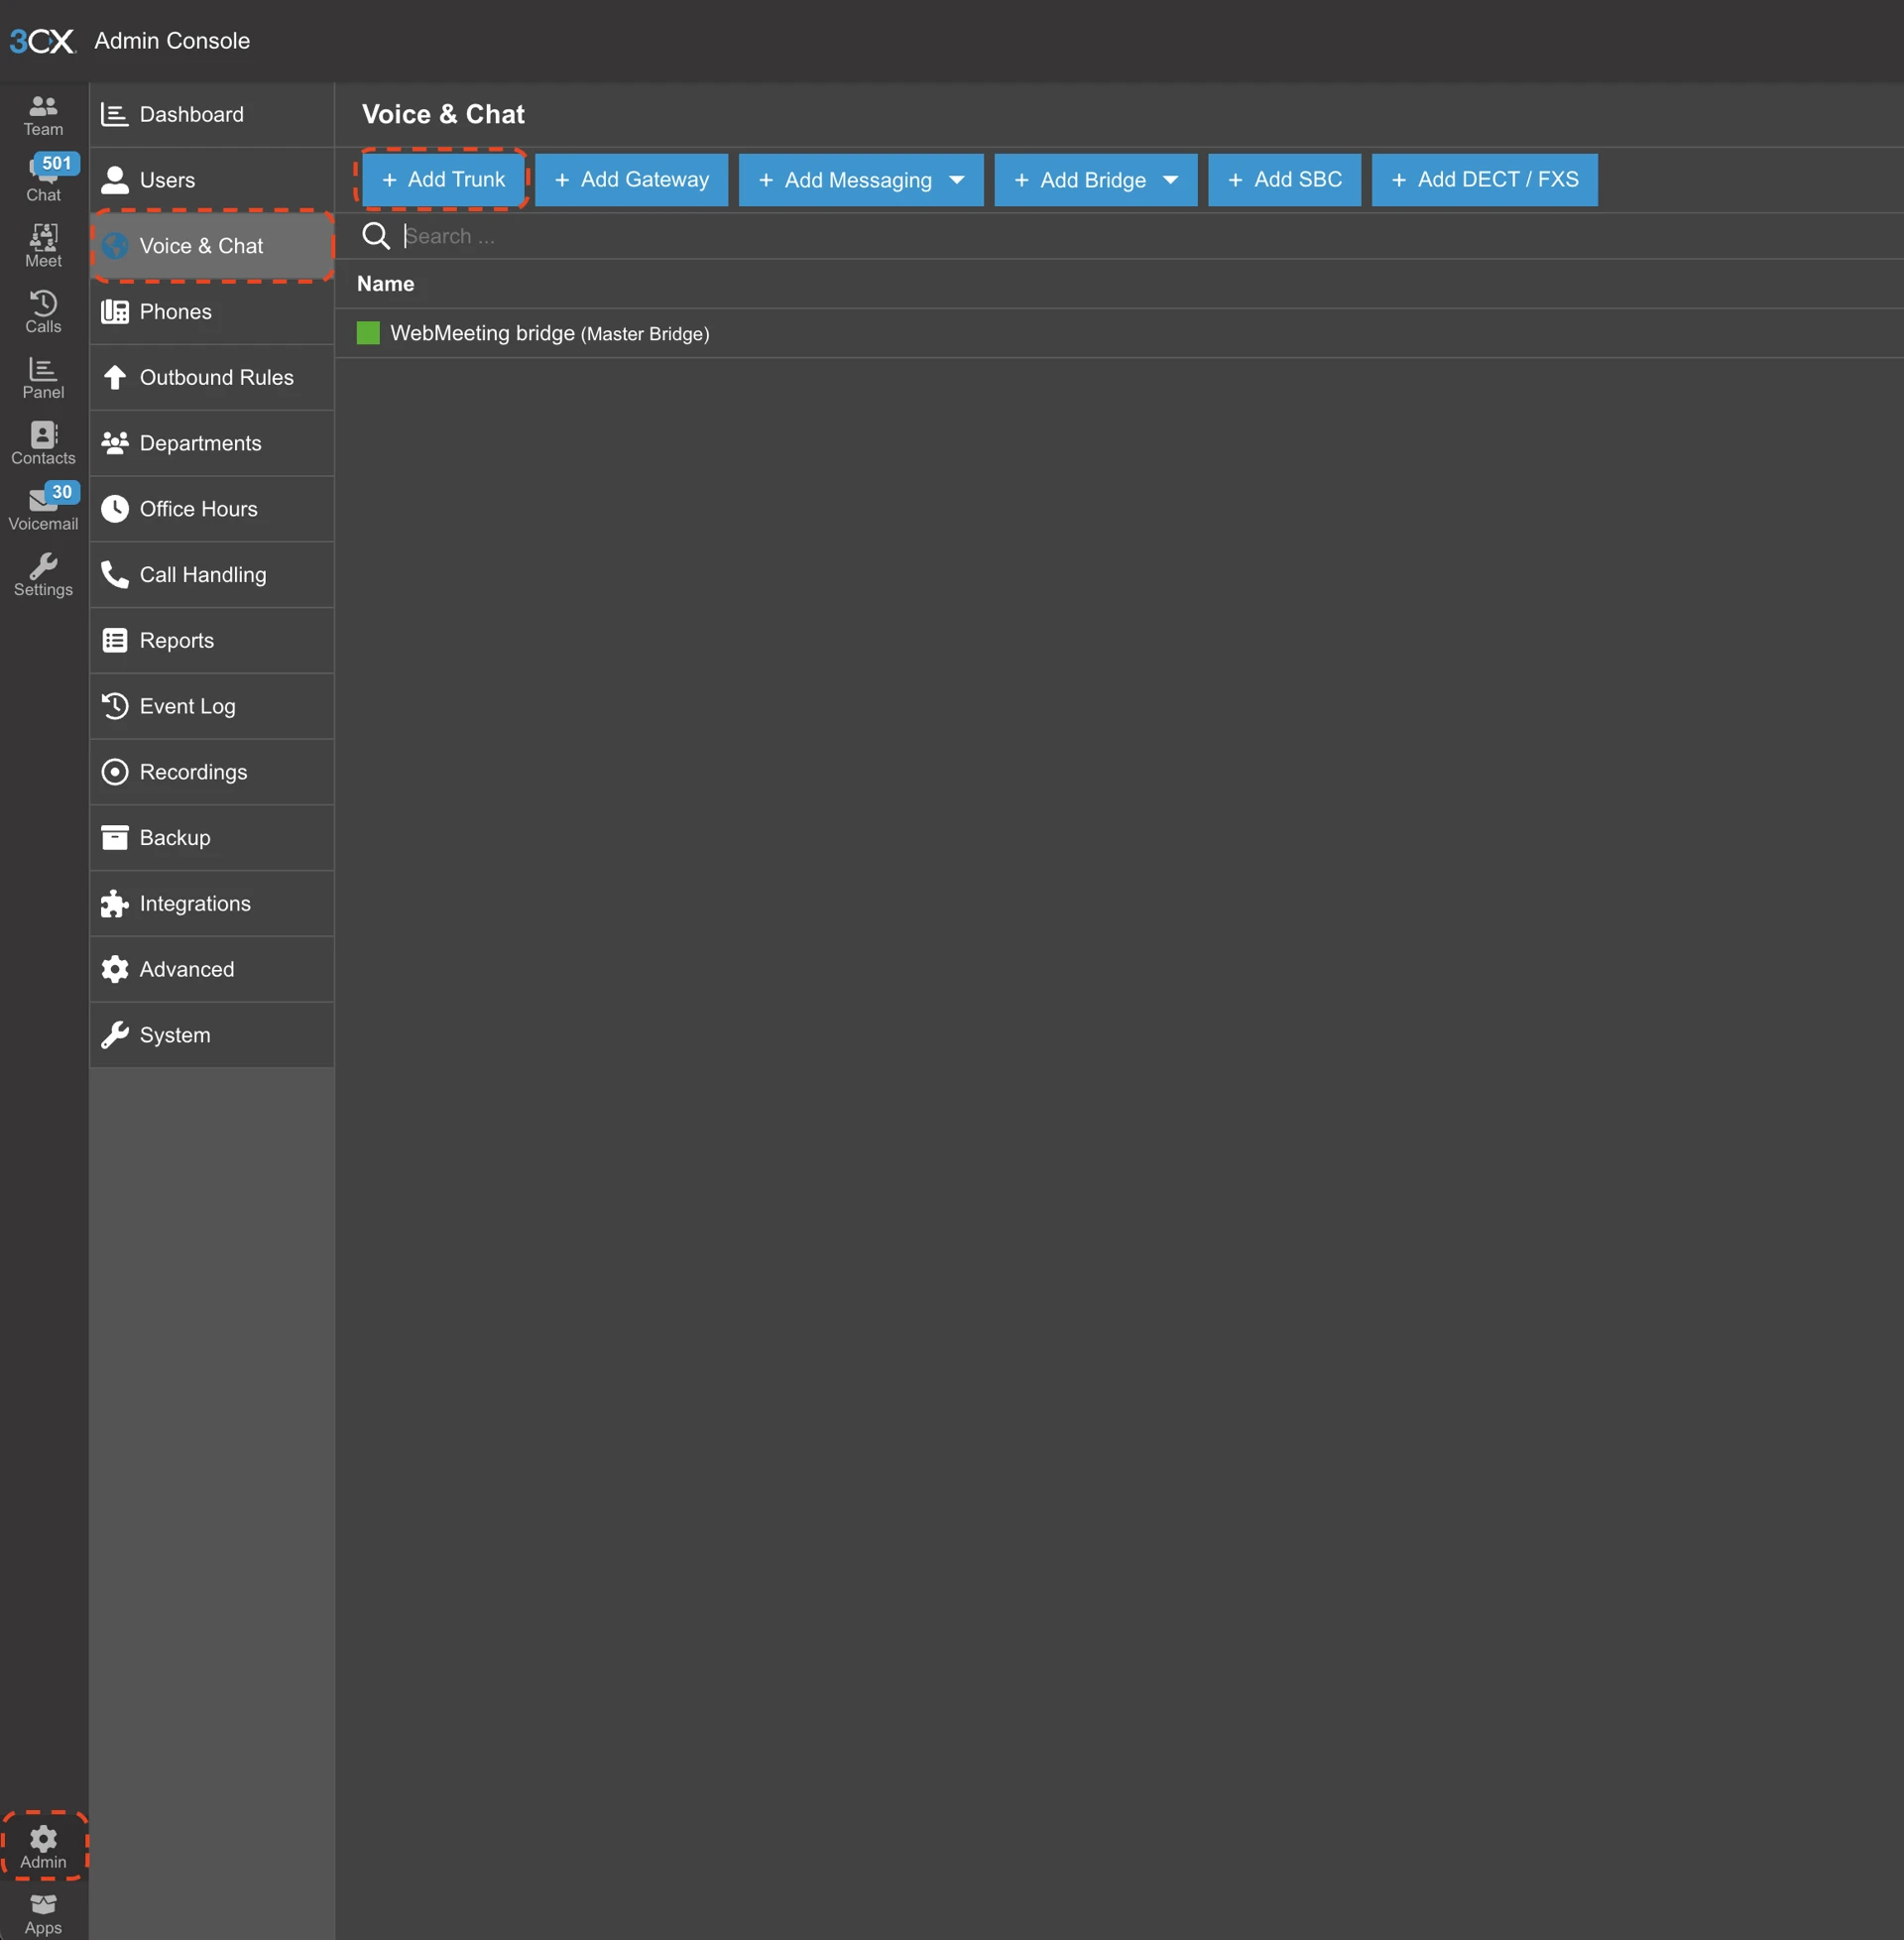
- Click the "Add Trunk" button to open the menu. From the drop-down menus of Country and Provider, select 'Worldwide' and 'Generic VoIP Provider(Registration)', then click on OK.

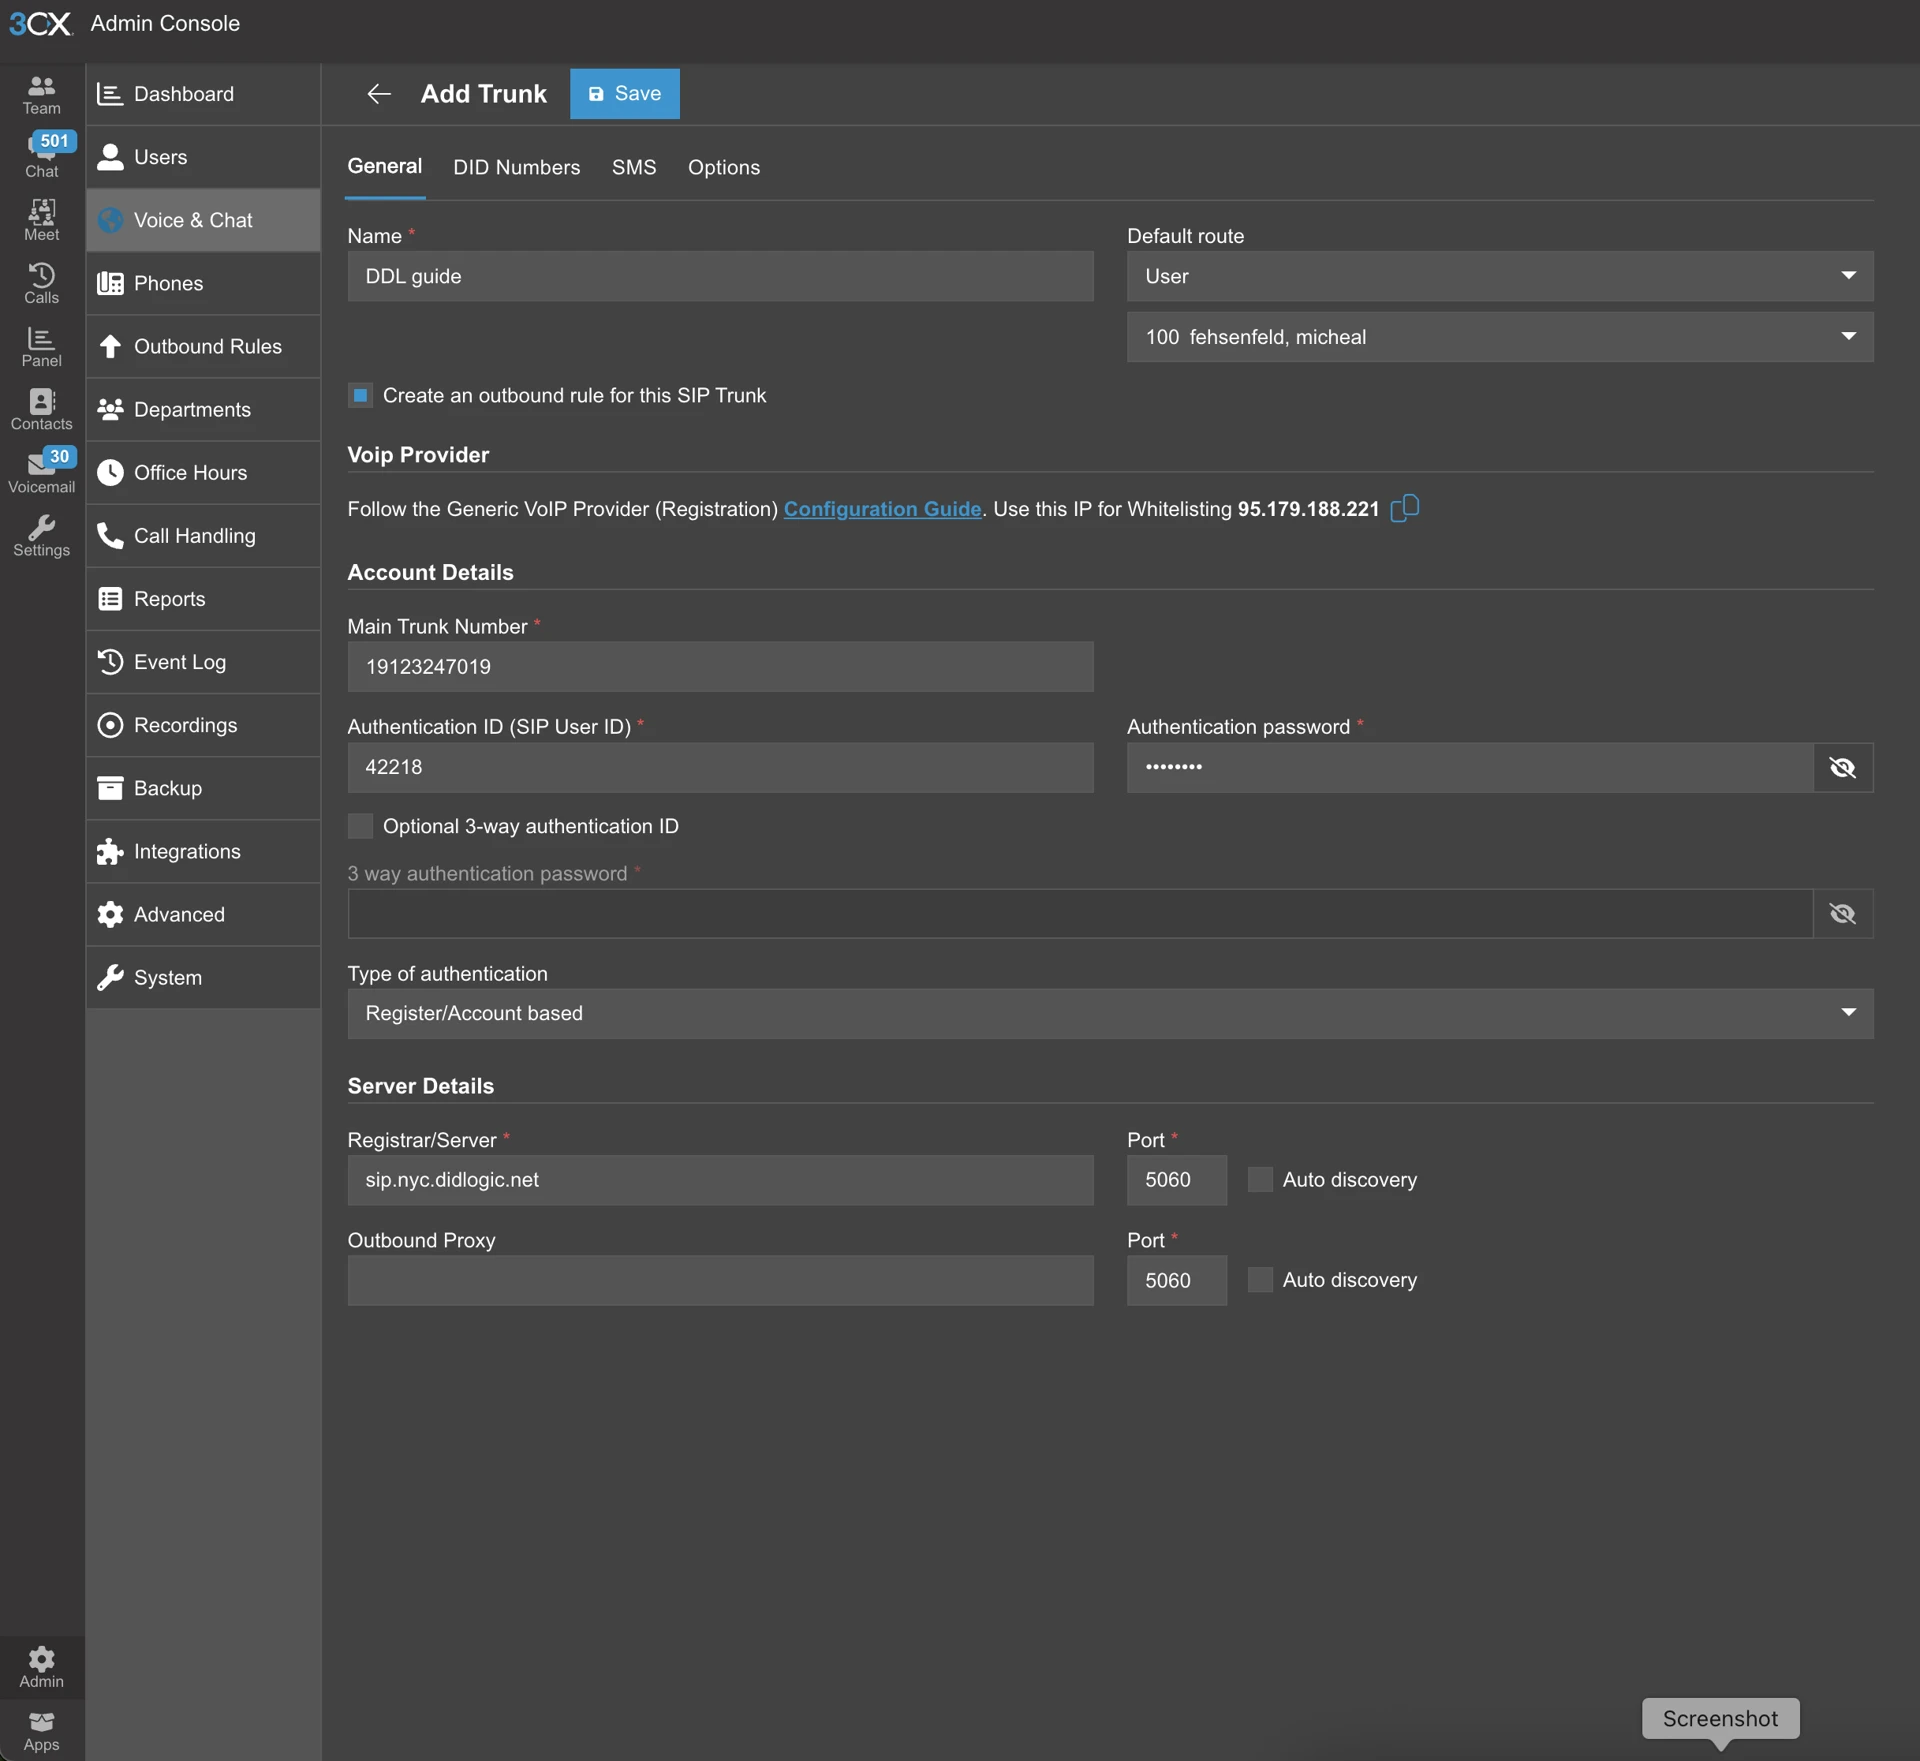
- Enter the trunk name and specify the Hostname or IP address:
- Name: Provide a descriptive name for the trunk.
- Default Route: Set default destination for inbound calls. For our test purposes, we set the default route to a user, but you can choose a destination that best fits your organisation.
- Main Trunk Number: Type the default Caller ID you want to appear on Outbound Calls via this trunk.
- Authentication ID (SIP User ID): 5-digit SIP Account Number that was generated earlier in the didlogic Portal.
- Authentication password: SIP Account Password you created on the didlogic Portal
- Registrar/Server: Enter a didlogic regional gateway that is closest to your location. The list of regional gateways can be found here.
- Click the Save button to save the changes and complete the trunk configuration.
Once 3CX successfully registers the trunk with the didlogic platform, to check the status of the registration, please click on Voice & Chat. If the SIP trunk is successfully registered to didlogic, you will see a green indicator next to the trunk.
Configure didlogic IP Authentication SIP account
Create a SIP account on the didlogic platform
To create a new IP-authenticated SIP account on the didlogic platform, please submit a request to the Support Team at [email protected] and provide the static IP of your 3CX PBX for configuration. Please note that, by default, an IP address can only be associated with one SIP account. If you need multiple didlogic SIP accounts to share the same IP address, please contact the Support Team.
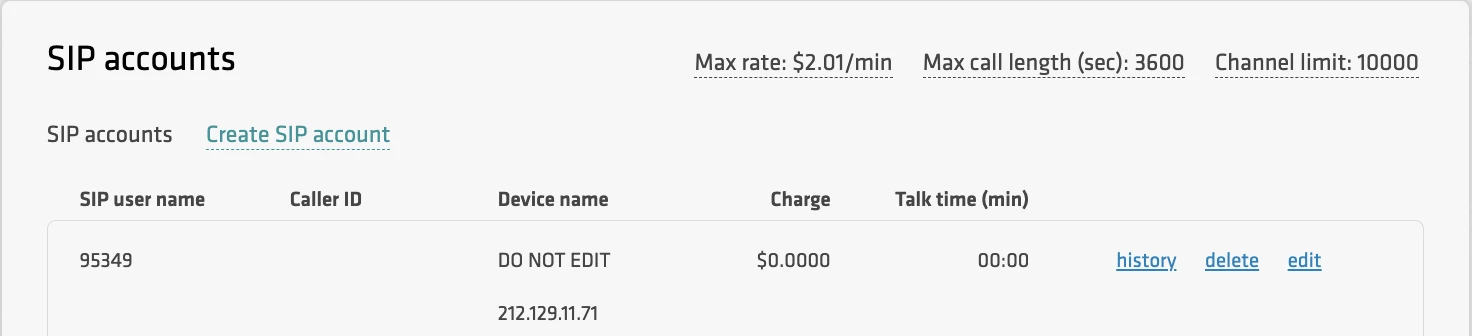
Once the Support Team has created the SIP account, it will appear in your account's list of SIP accounts.
Configure didlogic IP Authentication SIP account
The IP Authentication didlogic SIP account refers to the IP-based trunk in the 3CX PBX. You need to set up the trunk at the system administrator level of the 3CX PBX. Please follow the steps below:
- Log in to the 3CX Web Portal. Navigate to the bottom left, click on 'Admin' and then click on Voice & Chats.
- Click on 'Add trunk', and select the Worldwide option in the Country list and choose Generic SIP Trunk (IP Based) in the Provider list.
- In the Account Details section, enter the SIP user name for the SIP account from the didlogic portal.
- Enter your default Caller ID in the Main Trunk Number field. The Caller ID should be an active or verified phone number from your didlogic account.
- Set the Type of authentication to Do not require - IP-based from the drop-down menu.
- In the Server Details section, enter the address of one of didlogic's regional SIP proxies in the field labelled Registrar/Server. We recommend using the address of the regional SIP proxy closest to you. The full list of didlogic regional gateways can be found at the bottom of the SIP tab in didlogic.
- Add a name for your 3CX Trunk.
- Click Save.
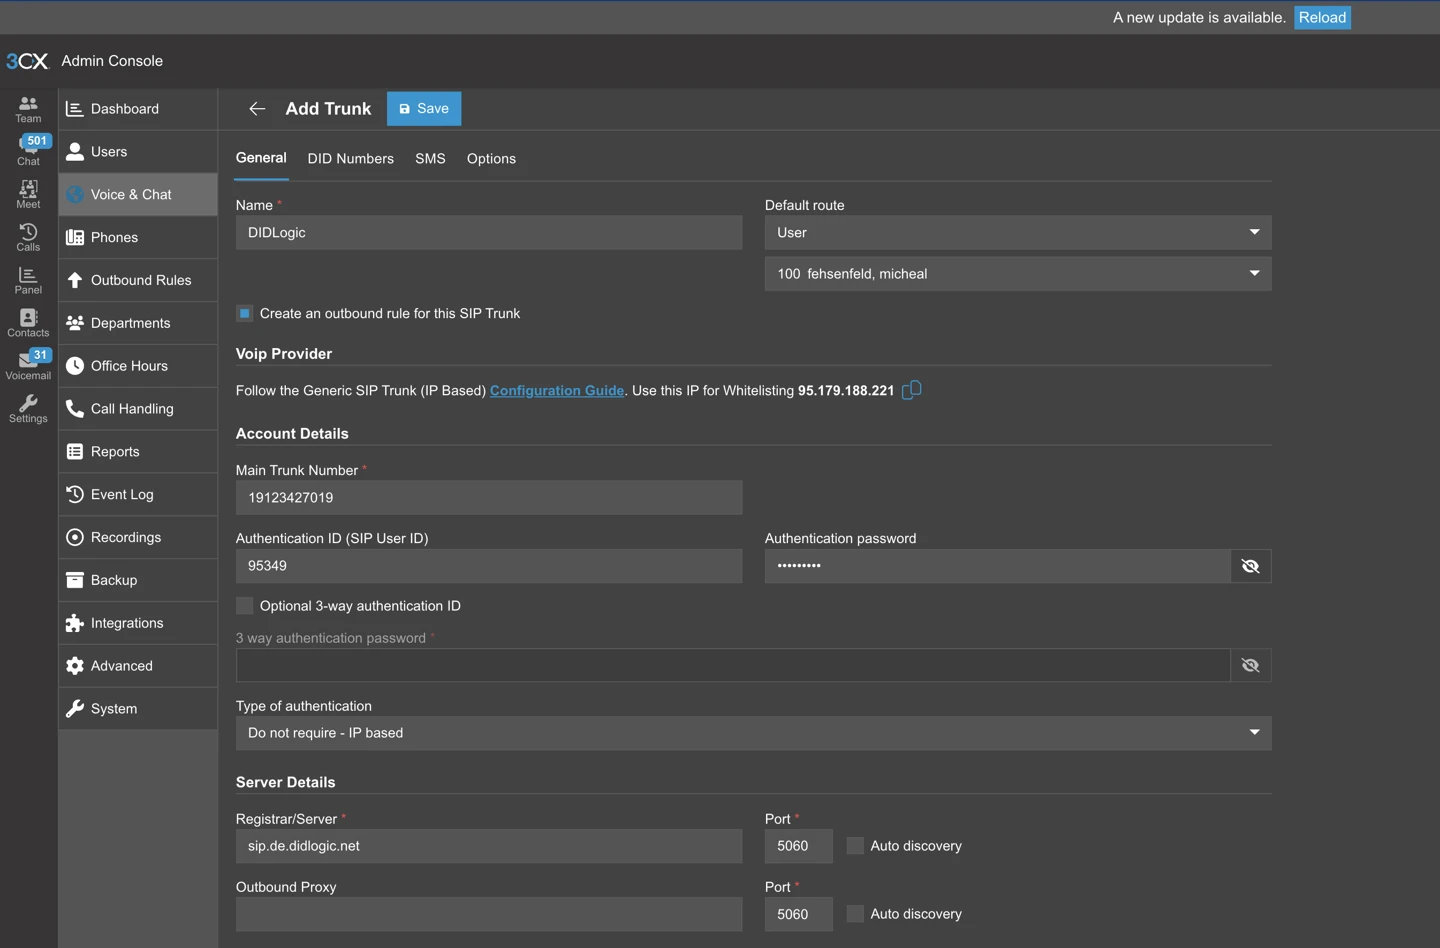
An IP-based trunk cannot be used as a destination for DIDs, meaning it cannot be used for routing inbound calls.
When you click on "Save" for the Trunk settings, it automatically takes you to the "Add Outbound Rules" Settings.
Configure Outbound & Inbound Calls
Configure Outbound Rules
You can manually go to Outbound rules by following these steps:
-
From the left-hand menu, make your way to Outbound Rules
-
Click on Outbound Rules, then provide the following information:
a. Rule Name: Choose a name that makes your route easily identifiable b. Calls from Departments: Select the department which can use this outbound rule c. Make outbound calls on: Set the routes on which the calls should be placed.
For more information on Outbound Rules, please review the documentation from 3CX.
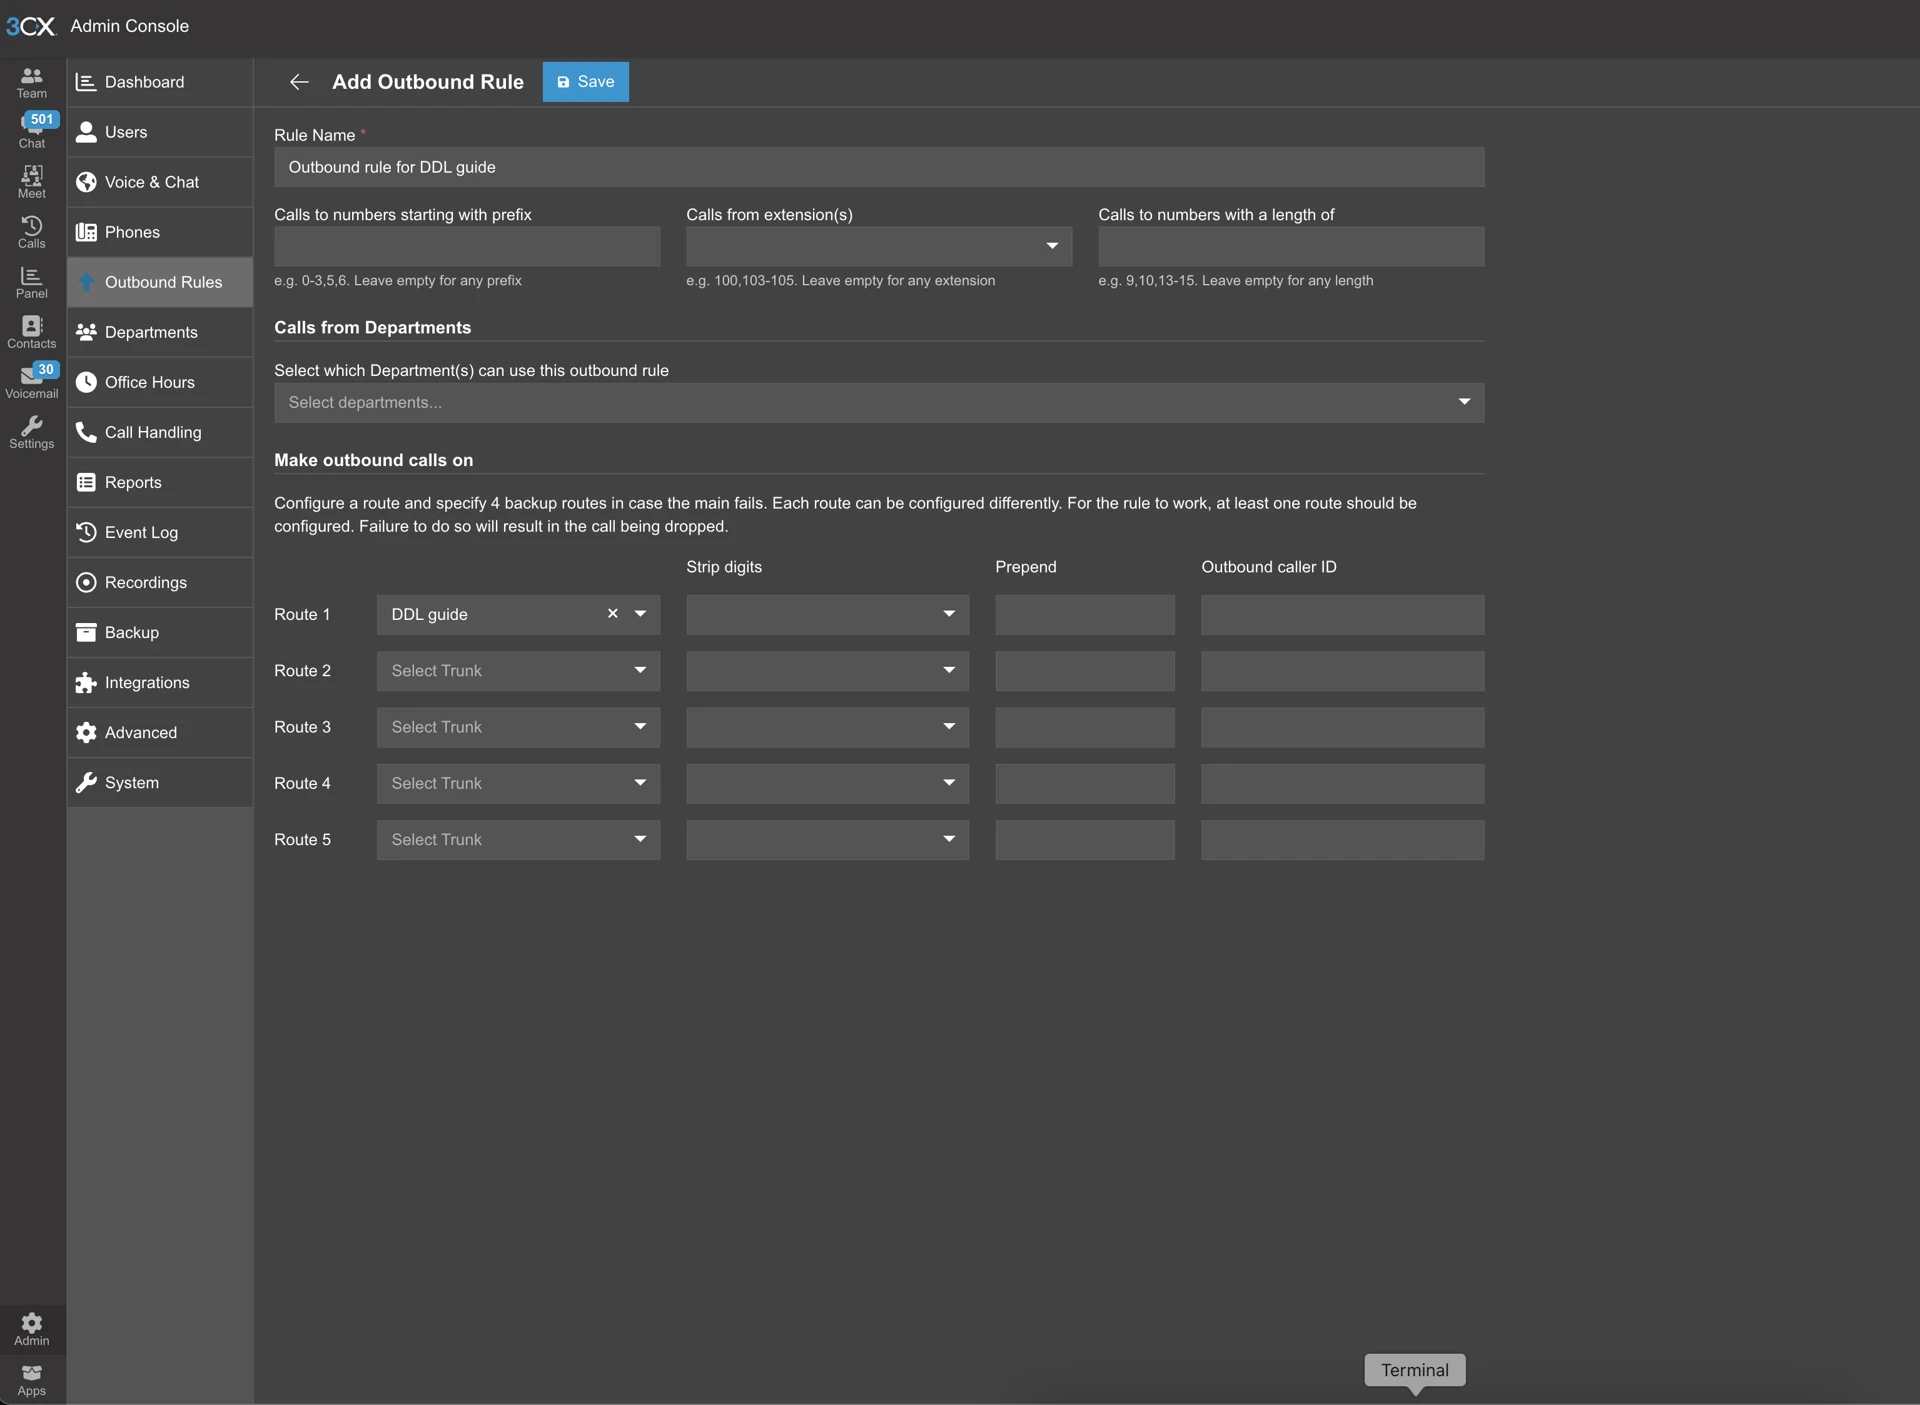
- Click Save to configure the Outbound Rule settings.
When making outbound calls through the didlogic SIP account, all destination phone numbers must be in the E.164 international format. E.164 numbers can be up to fifteen digits long and are typically structured as: [+][country code][subscriber number with area code]. For example, a US number in E.164 format would be +18312011936. The didlogic platform will reject calls to numbers that do not include a country code or use national access codes.
Below are typical examples of phone numbers incorrectly formatted according to the E.164 international standard:

Configure Inbound Rules
In this section, you'll configure the inbound calling rules that will manage your incoming calls.
-
From the left-hand menu, make your way to Call Handling
-
Click on Inbound Routes, then provide the following information:
a. Description: A description of your route that makes it easily identifiable b. DID number: Enter the number you purchased with didlogic that you want to assign to handle inbound calls. c. Extensions: Specify the extension to which calls should be routed.
For more informatiom on Inbound Rules, please review the documentation from 3CX.
Once you have successfully configured the 3CX PBX and created extensions, you can register the endpoints (such as WebRTC, mobile app, Windows Desktop app, IP phone, or any SIP-based device) to the PBX. This will allow you to make and receive calls.
Configure an Inbound Route in didlogic
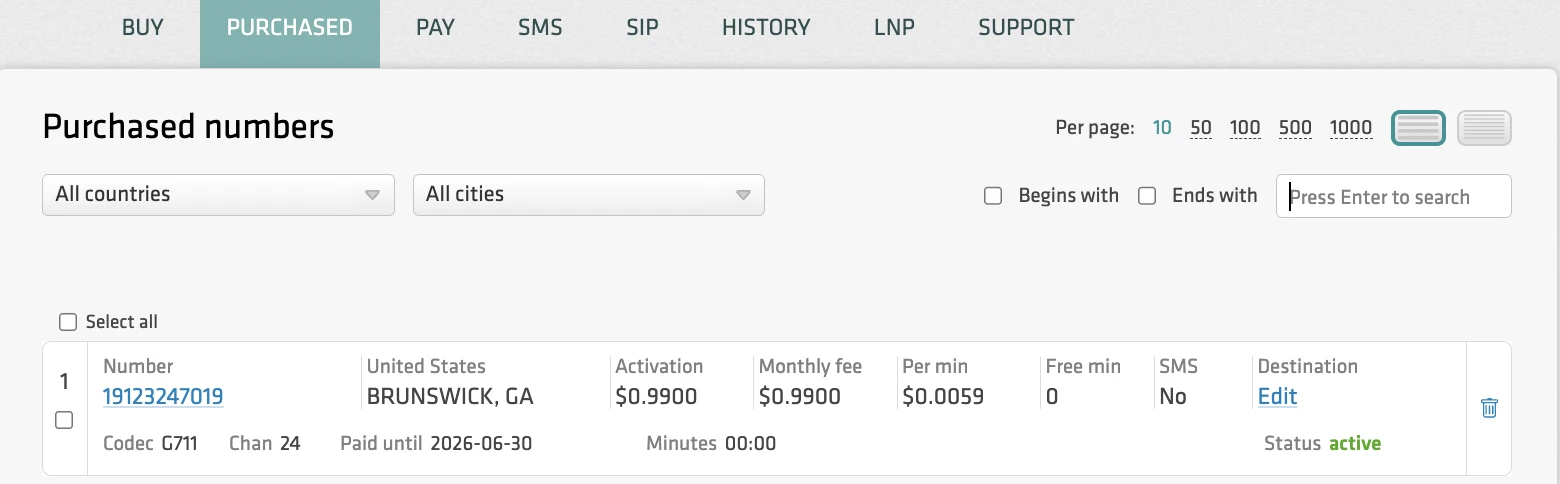
- Log in to your didlogic account and navigate to the PURCHASED tab in the top menu.
- Click Edit under the Destination section.
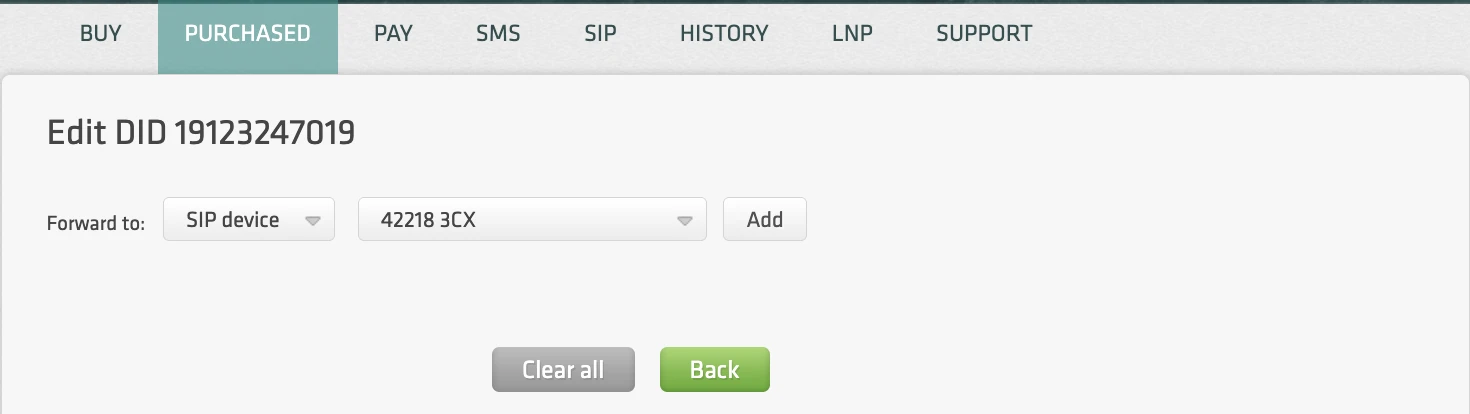
- Select the SIP device and the destination SIP account.
- Click Add to set the destination for the DID.
SIP accounts with IP authentication enabled cannot be used for inbound call routing, as they do not maintain registration with didlogic regional gateways. To set up inbound routing for your numbers, you must use a valid SIP URI address instead.
Set up inbound calls using a SIP URI
Follow these steps to set up the routing:
-
Follow these steps to set up the routing:
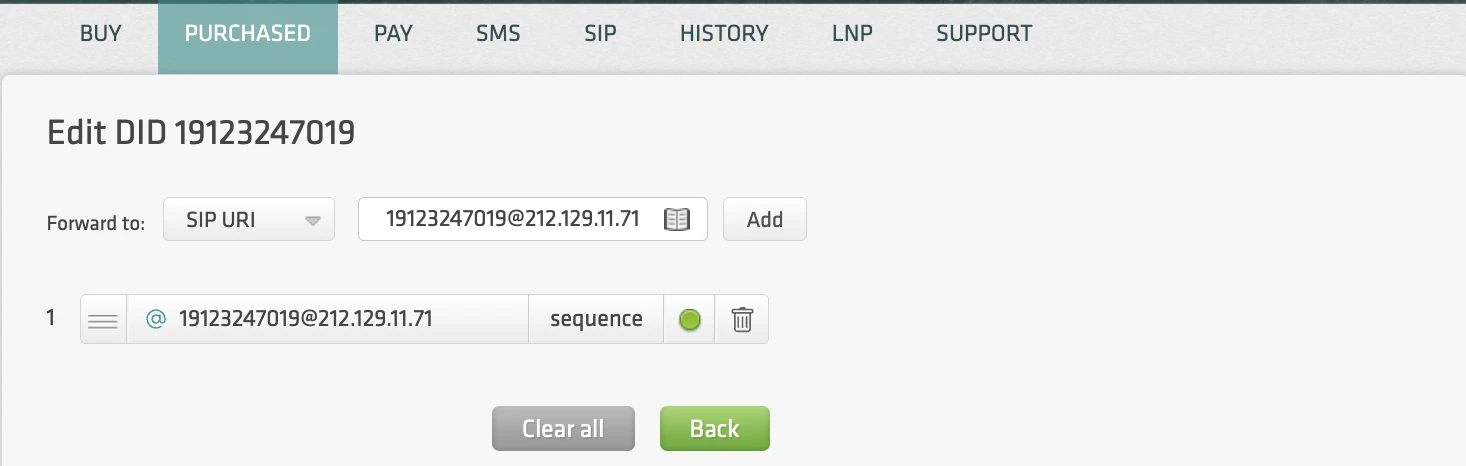
a. Log in to your didlogic account and navigate to the PURCHASED tab in the top menu b. Click Edit under the Destination section c. Select the SIP URI and enter a valid SIP URI in the following format:
+[did]@FQDN:port;transport=connection, where:- FQDN is the fully qualified domain name or IP address of your 3CX PBX.
- Port is the SIP port used by the PBX.
- A connection can be
udp,tcp, ortls, withudpas the default transport.
For example, the PBX's static IP address is 212.129.11.71, and it uses port 5060 over UDP to communicate with the didlogic SIP account. The SIP URI can be formatted as follows:
[email protected]:5060;transport=udp[email protected]:5060;transport=udp
Click Add to set the destination for the DID.
Configuring SIP over TLS with didlogic for 3CX
-
Download the ISRG Root X1 root certificate (PEM format) from https://letsencrypt.org/certificates/
-
Import the certificate into your PBX, SBC, softswitch, or IP phone's trusted certificate store.
Note: Some platforms already include the required root certificates and may not require manual installation.
-
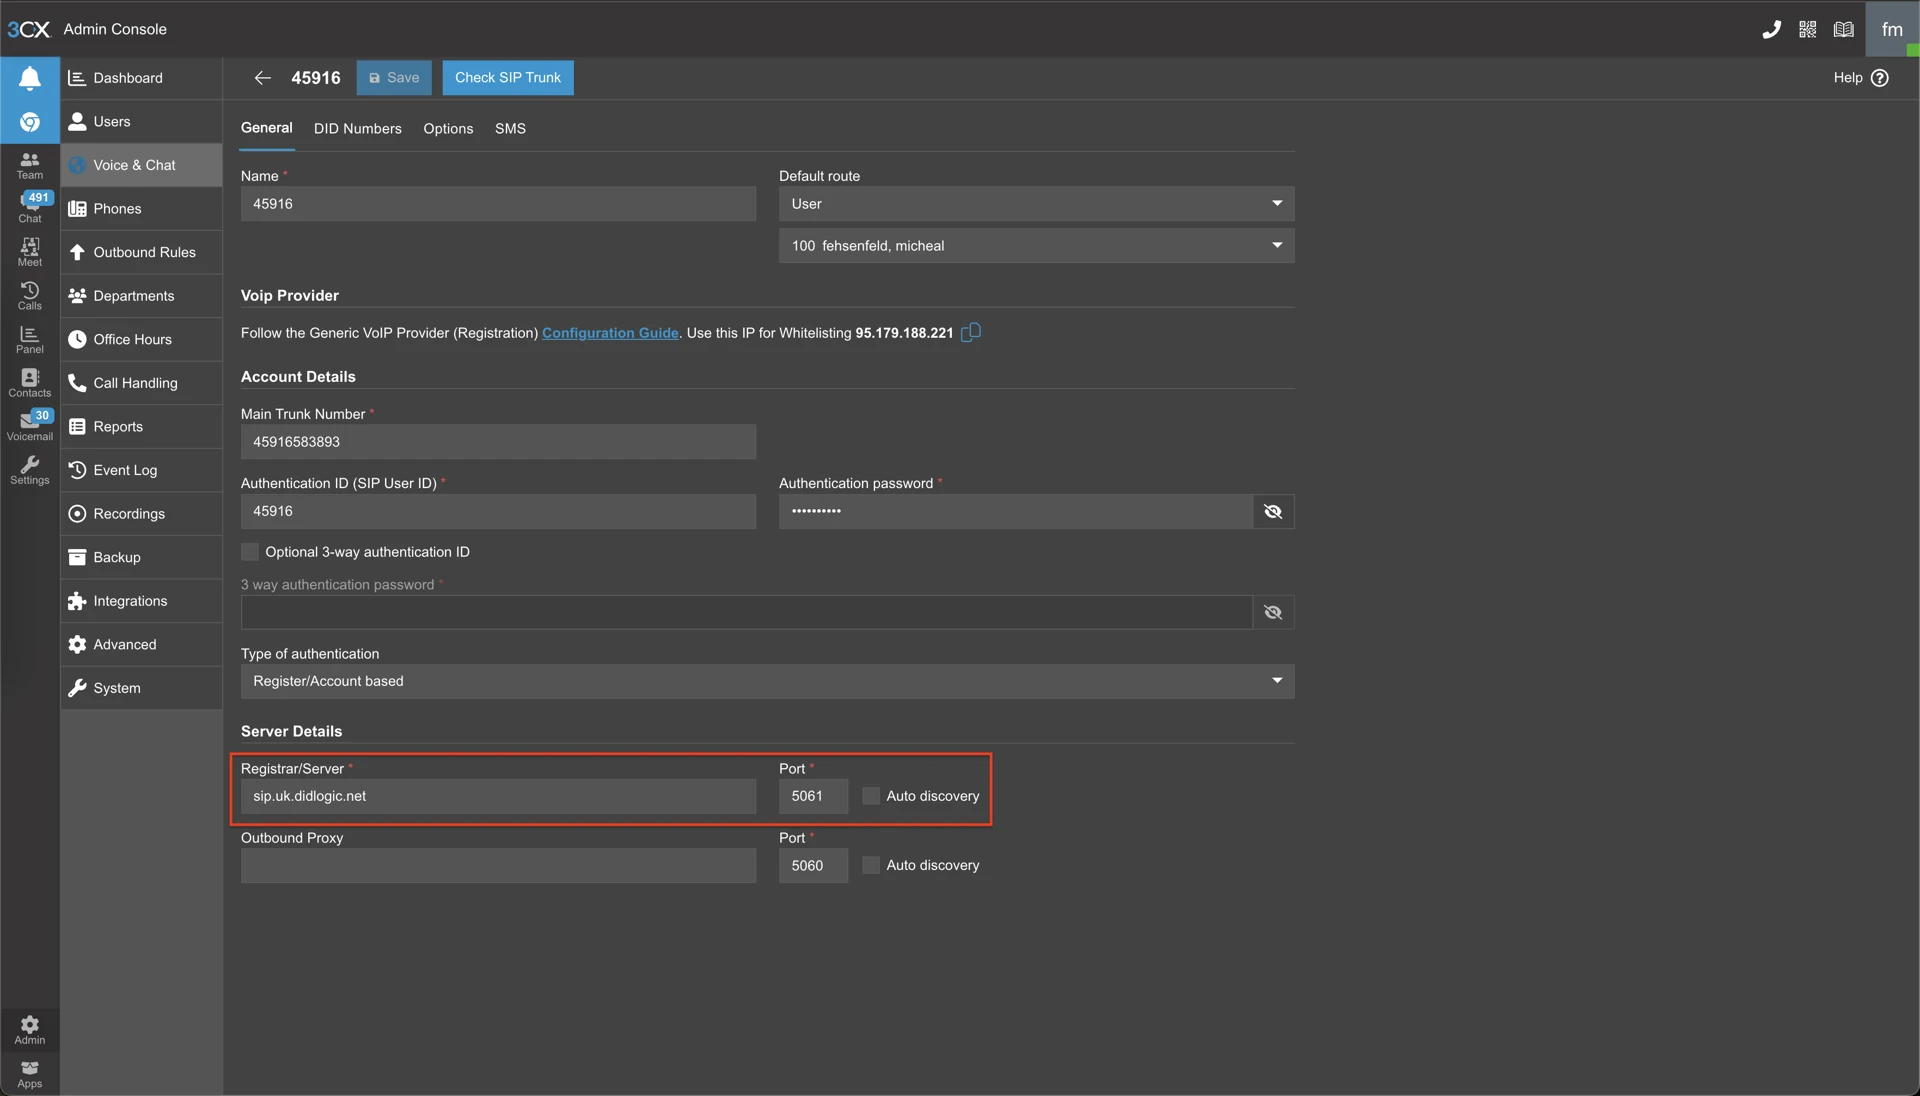
Update the SIP trunk settings in the General section as follows:
Registrar/Server - sip.uk.didlogic.net
Port - 5061
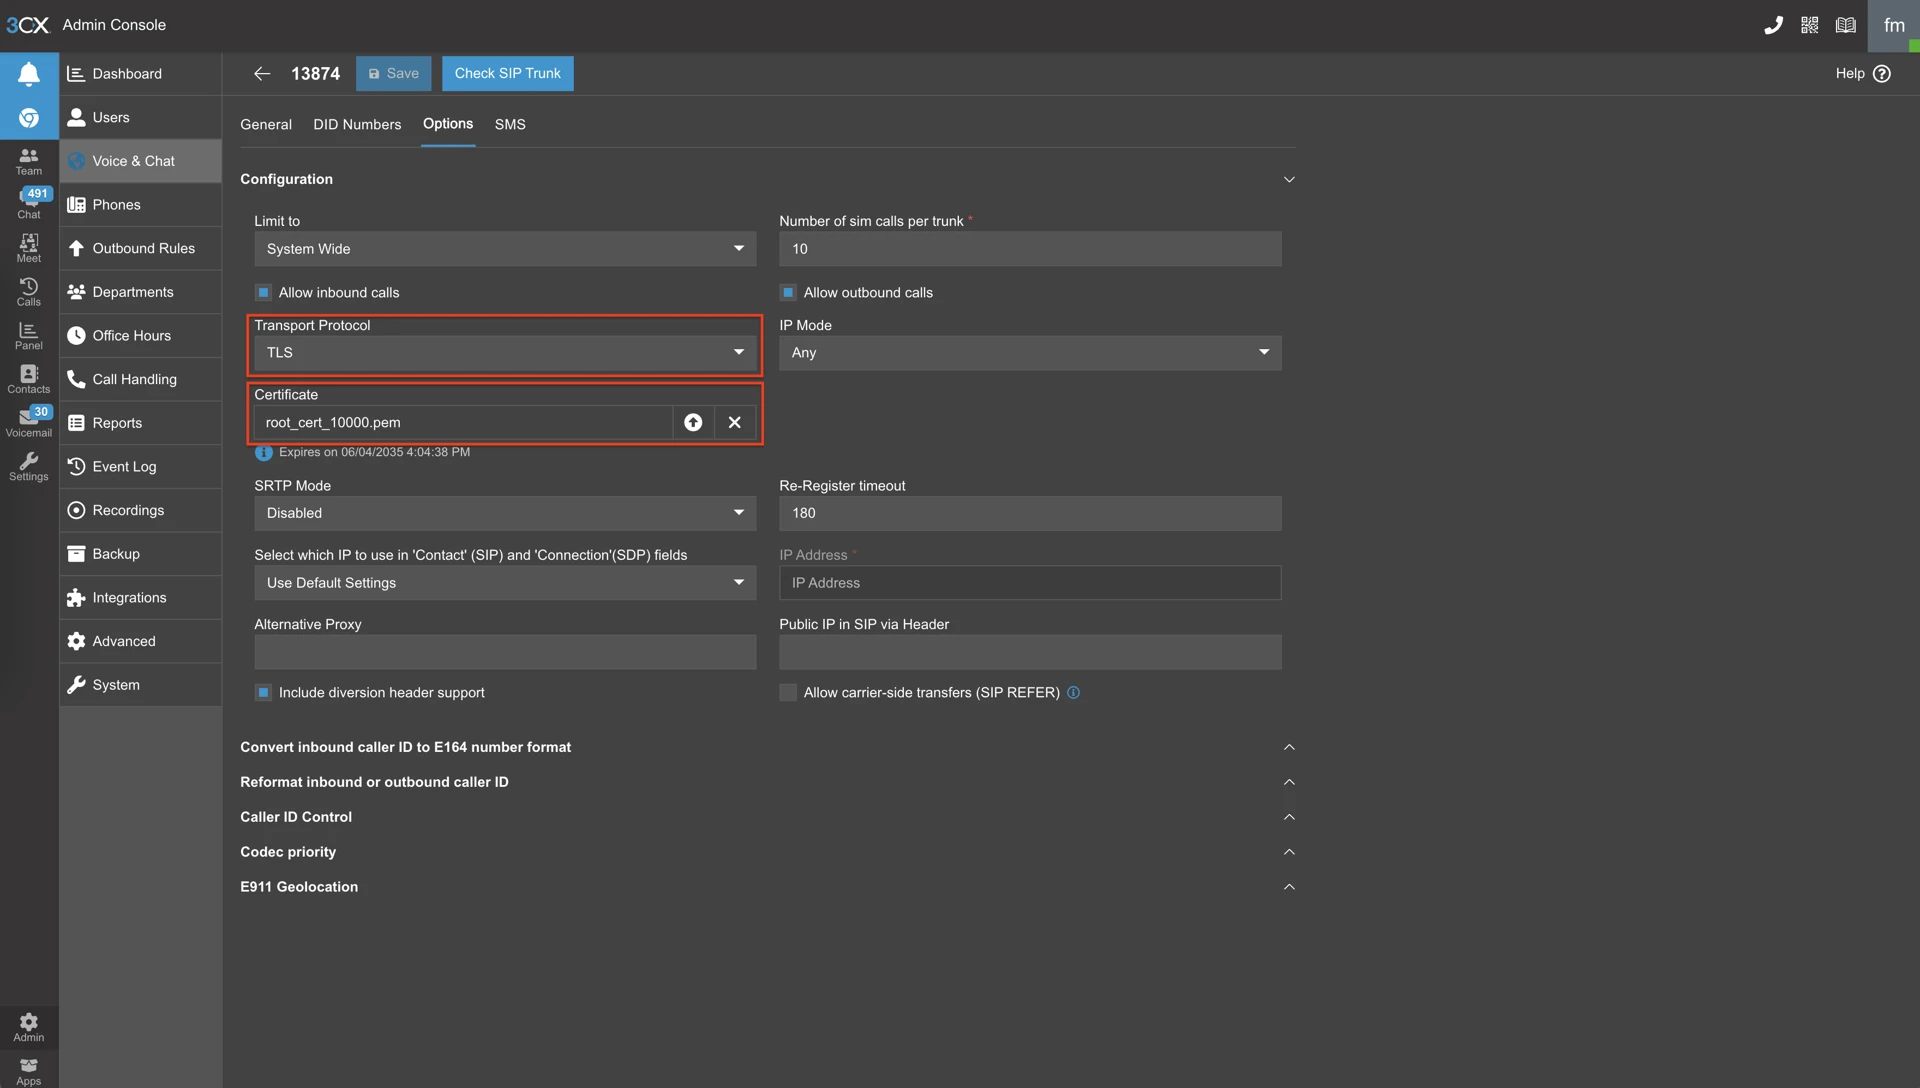
- In the Options section, select TLS in the Transport Protocol drop-down menu and upload the downloaded root certificate to the Certificates field.
- Save the changes and restart or reload the SIP service if required by your platform.
- Once configured, didlogic will automatically communicate using TLS.
Failover Routing
When your PBX is configured with a single outbound SIP gateway, you have a single point of failure. If the SIP gateway becomes unavailable due to network issues, maintenance, or an outage, SIP registrations may fail, and inbound or outbound calls can be disrupted.
For businesses, this can result in missed customer calls, lost revenue, and reduced service availability.
By configuring a failover SIP gateway with active monitoring, the PBX can detect when the primary gateway is no longer reachable and automatically switch call routing to a backup gateway. This provides seamless service continuity without requiring manual intervention.
In 3CX, there are two ways to configure SIP failover.
Alternative Proxy option
This can be enabled in the SIP Trunk settings under the Options tab. The Alternative Proxy field accepts either an IP address or an FQDN and serves as a backup to the primary SIP gateway configured in the General tab. 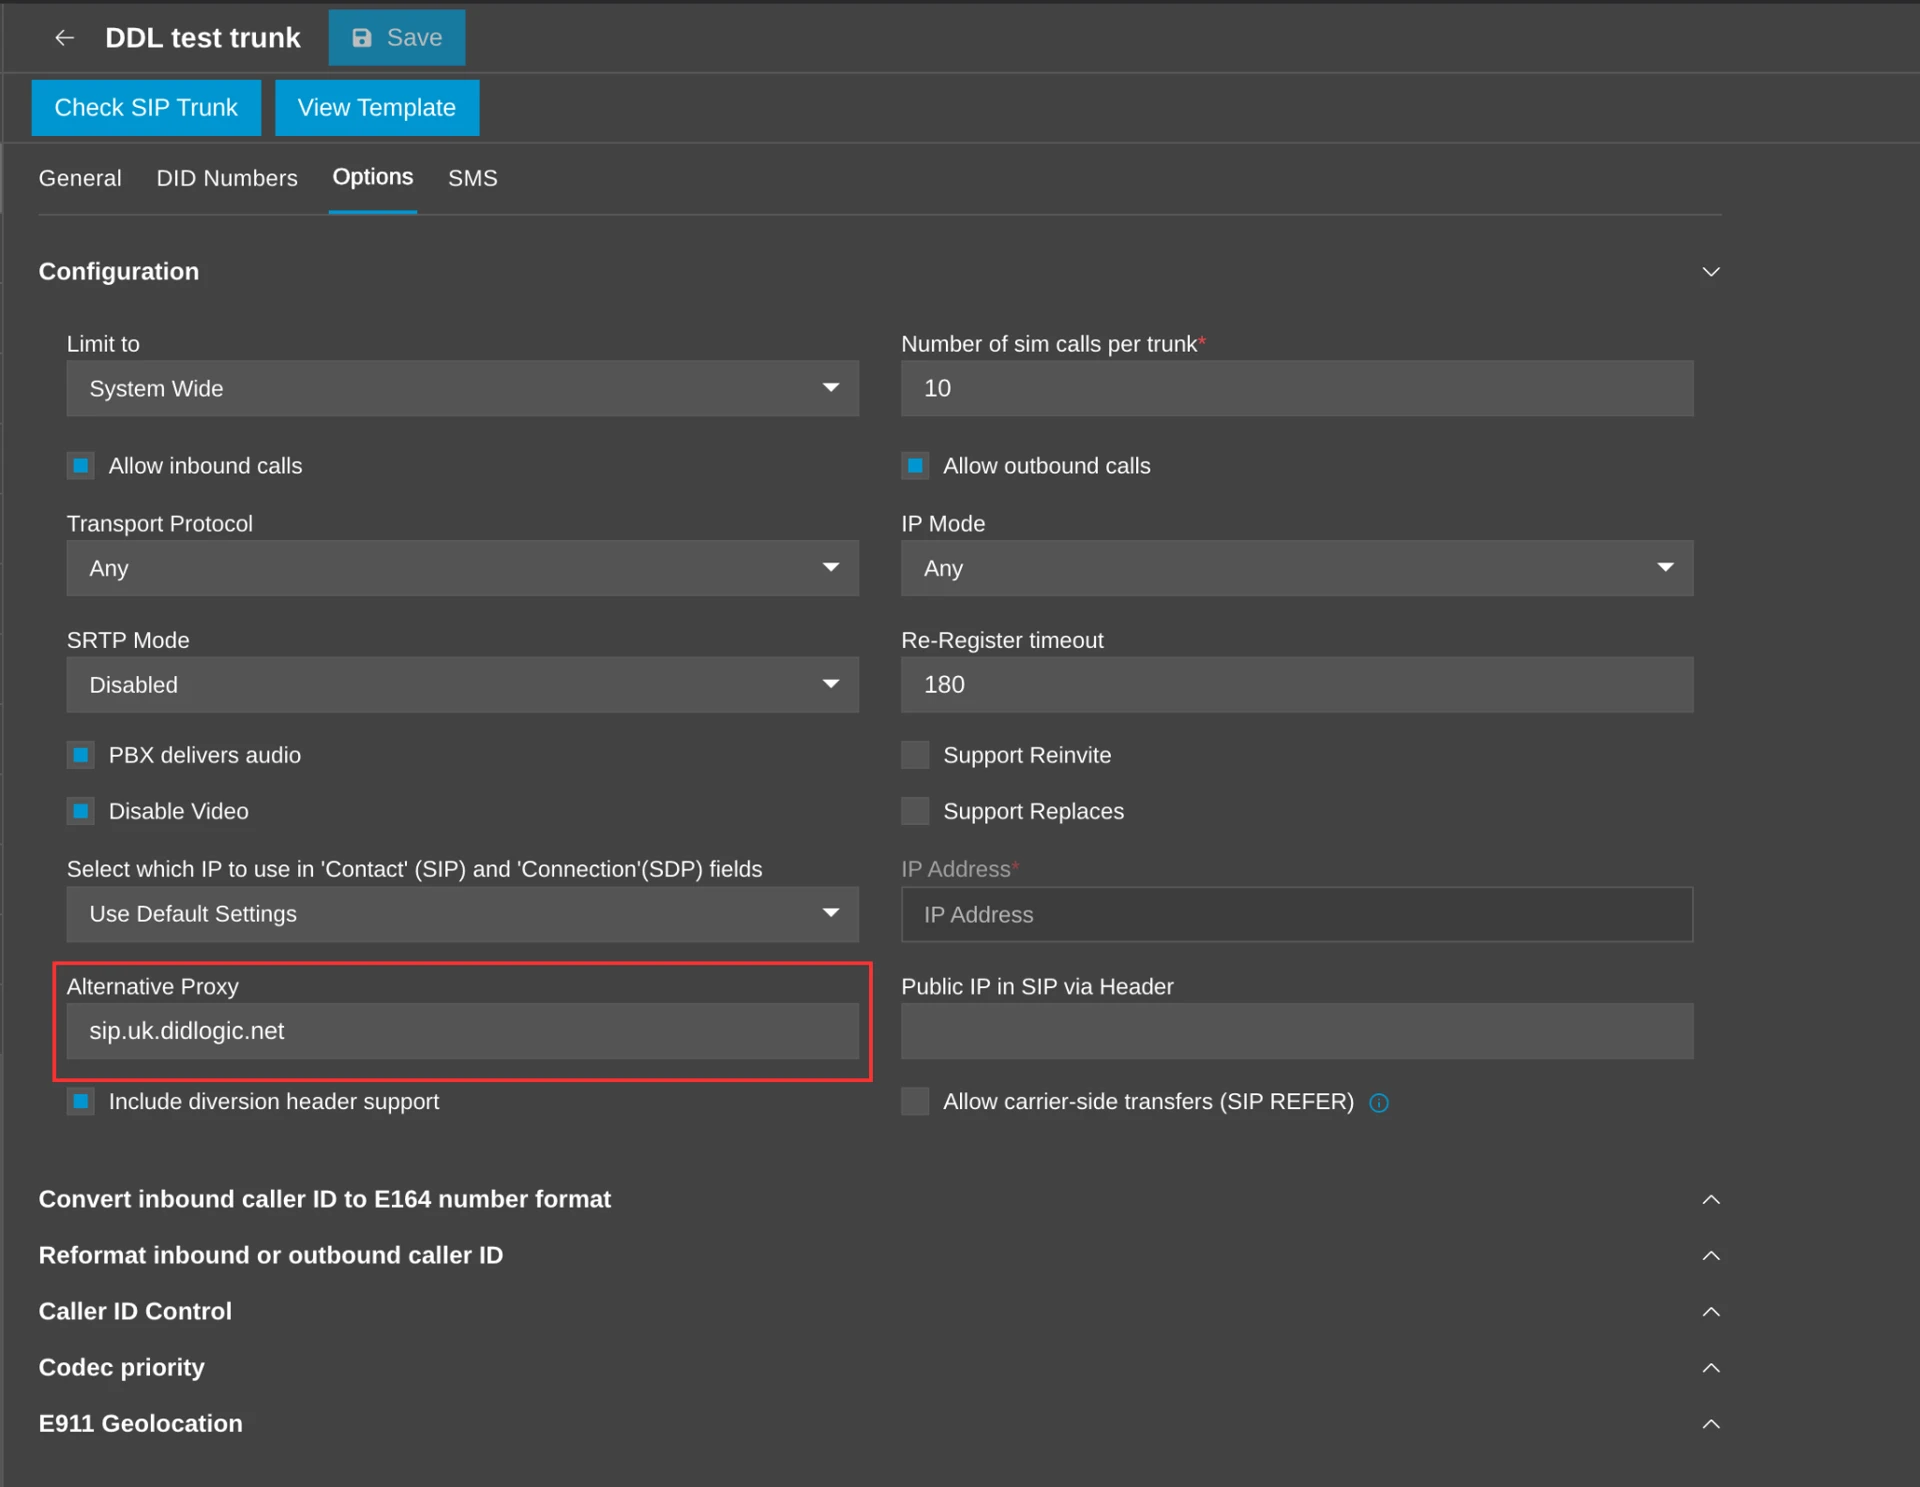
Redundancy through Outbound Rules
- To set this up, first create an additional SIP account in DID Logic.
- Create a new SIP trunk in 3CX by navigating to Admin → Voice&Chat → Add Trunk and following the SIP trunk configuration guide.
- When configuring the new trunk, enter the failover SIP gateway in the Registrar/Server field.
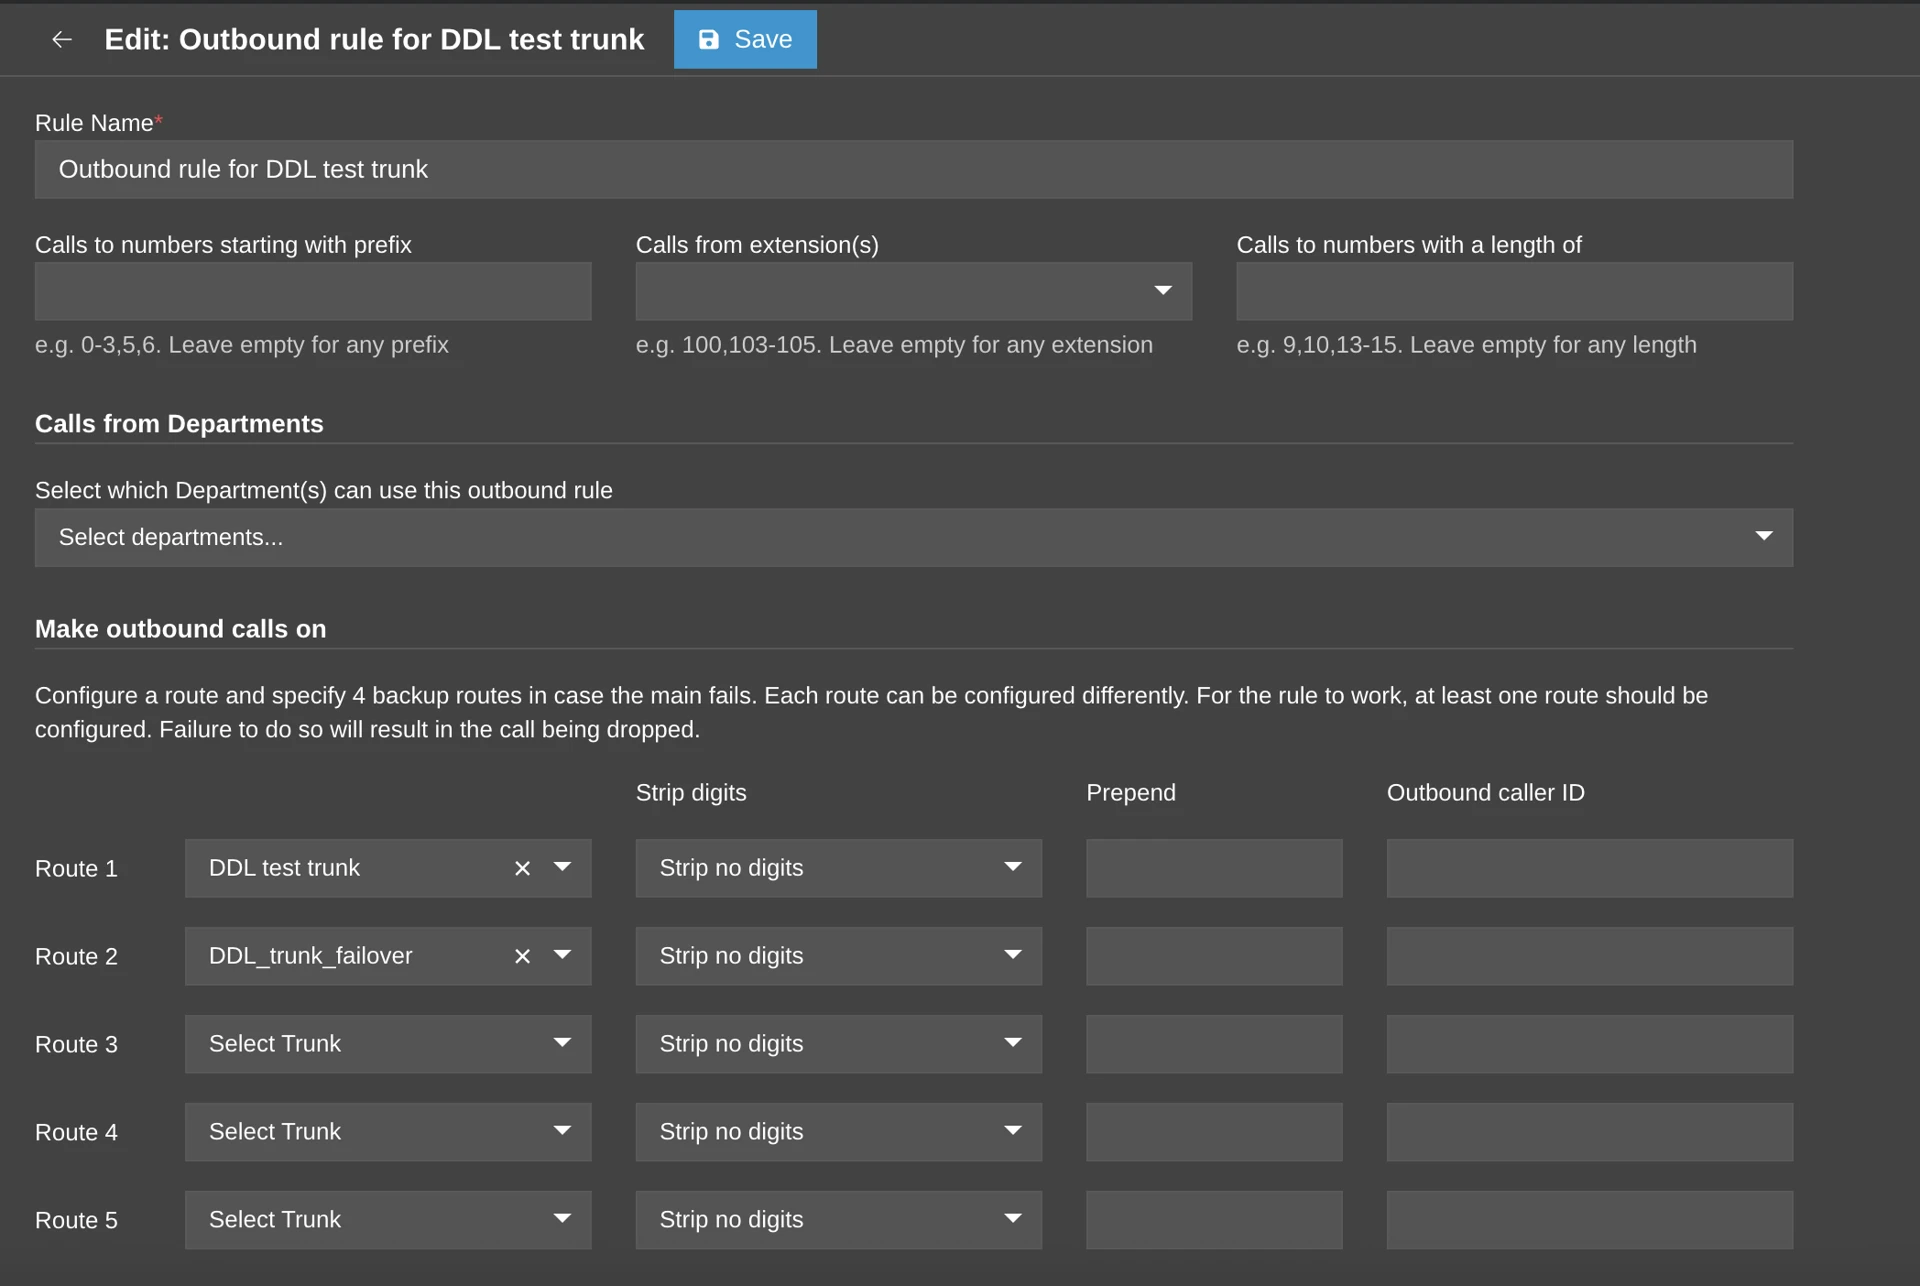
- Once the backup SIP trunk has been created, navigate to Admin → Outbound Rules and either create a new rule or edit an existing one.
- Configure your primary SIP trunk as Route 1 and select the newly created backup trunk as Route 2. If the primary trunk becomes unavailable, 3CX will automatically attempt to route calls through the backup trunk, ensuring continued service availability.
Troubleshooting
After setting everything up, we recommend testing inbound and outbound calling. The most common causes of issues are registration-related. To troubleshoot, we suggest reviewing logs to see if there are any error messages.
| Issue | Likely Cause | Solution |
|---|---|---|
| 603 Declined | Registration Failed | Verify that Registration Required is checked and credentials match. |
| 603 Declined | Max Rate Limit | Ensure the destination rate doesn't exceed your account's "Max Rate" setting. If you would like to increase it, please contact [email protected]. |
| No Audio | Firewall/NAT | Ensure UDP ports 10000-20000 are open for RTP traffic. |
| Calls Fail | Wrong Format | Use E.164. Never dial 00 or + unless your ARS handles the conversion. |
| Inbound Calls Don't Come Through | Firewall/NAT or Setup Issue | Make sure IP addresses of didlogic regional gateways are allowed on the firewall. Verify Line Group ID: Ensure the correct Line Group ID is assigned to both the trunk and the route. Use System Monitor in IP Office to see how the call is being presented. This can help you verify the format of the incoming DID and troubleshoot mismatches. |
PCAP extraction
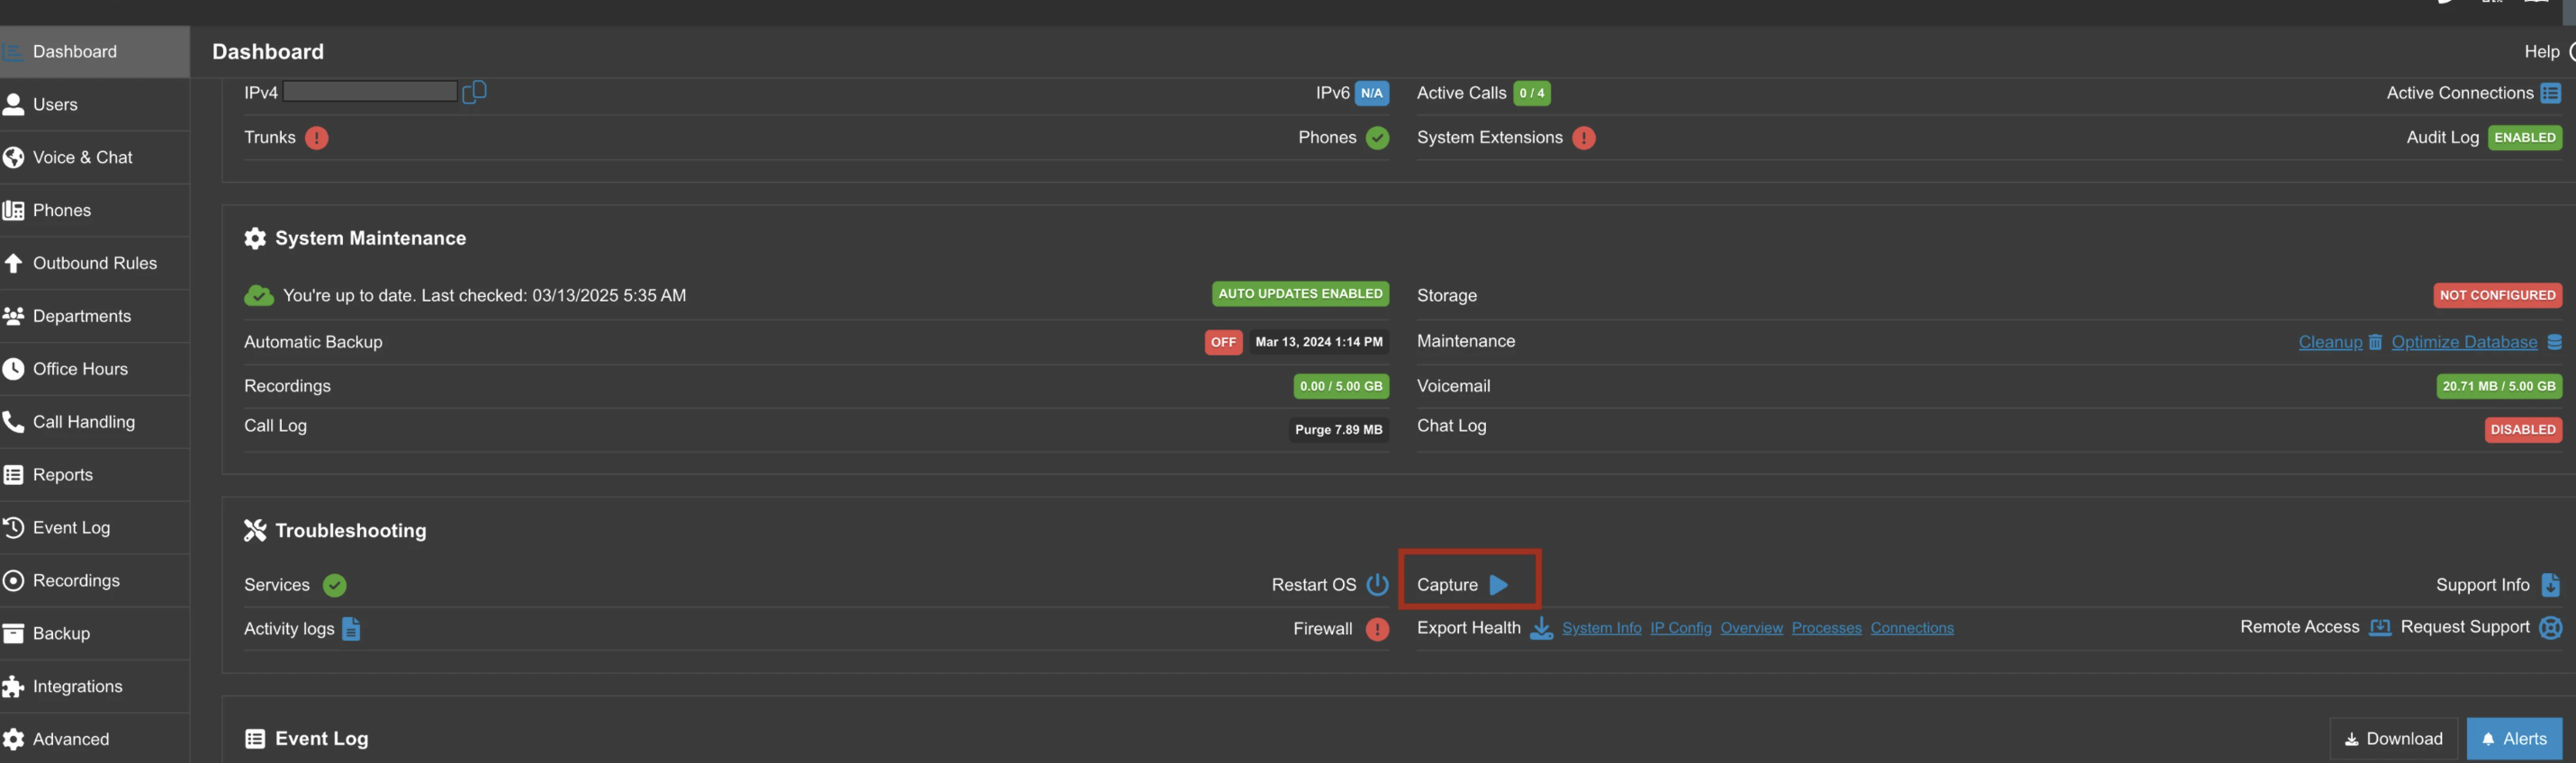
- Log in via the admin account and open "Dashboard"
- Click on the "Capture" label on the "Troubleshooting" field
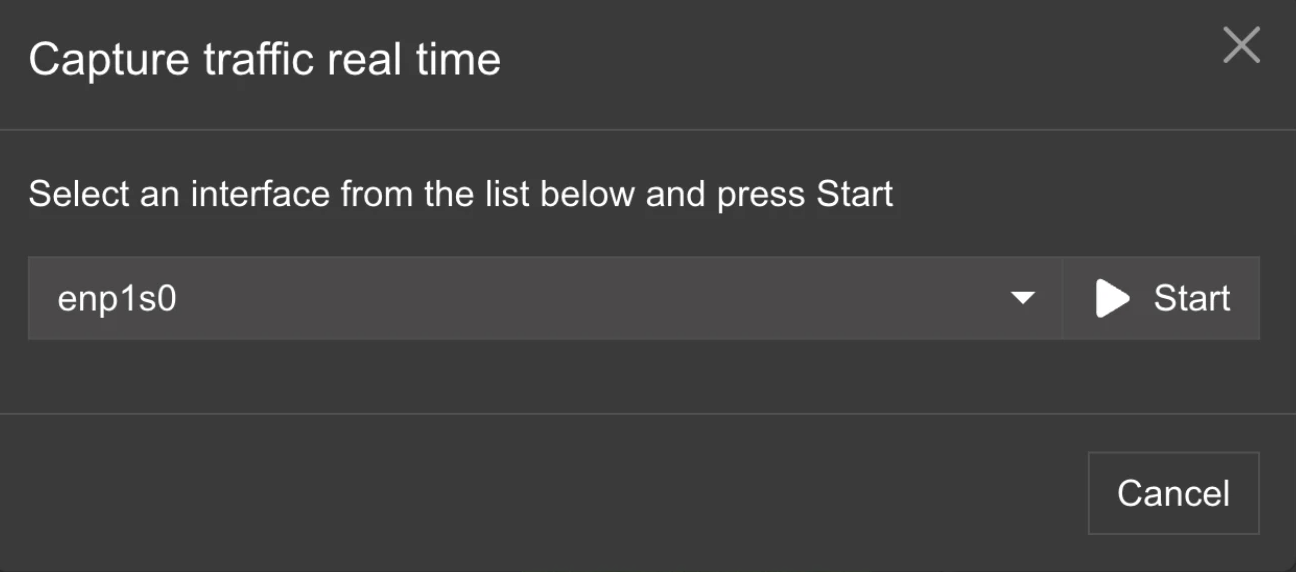
- Select "enp1s0" from the dropdown and click "Start"
- Do test calls or SIP account registration, once completed, click on "Stop"
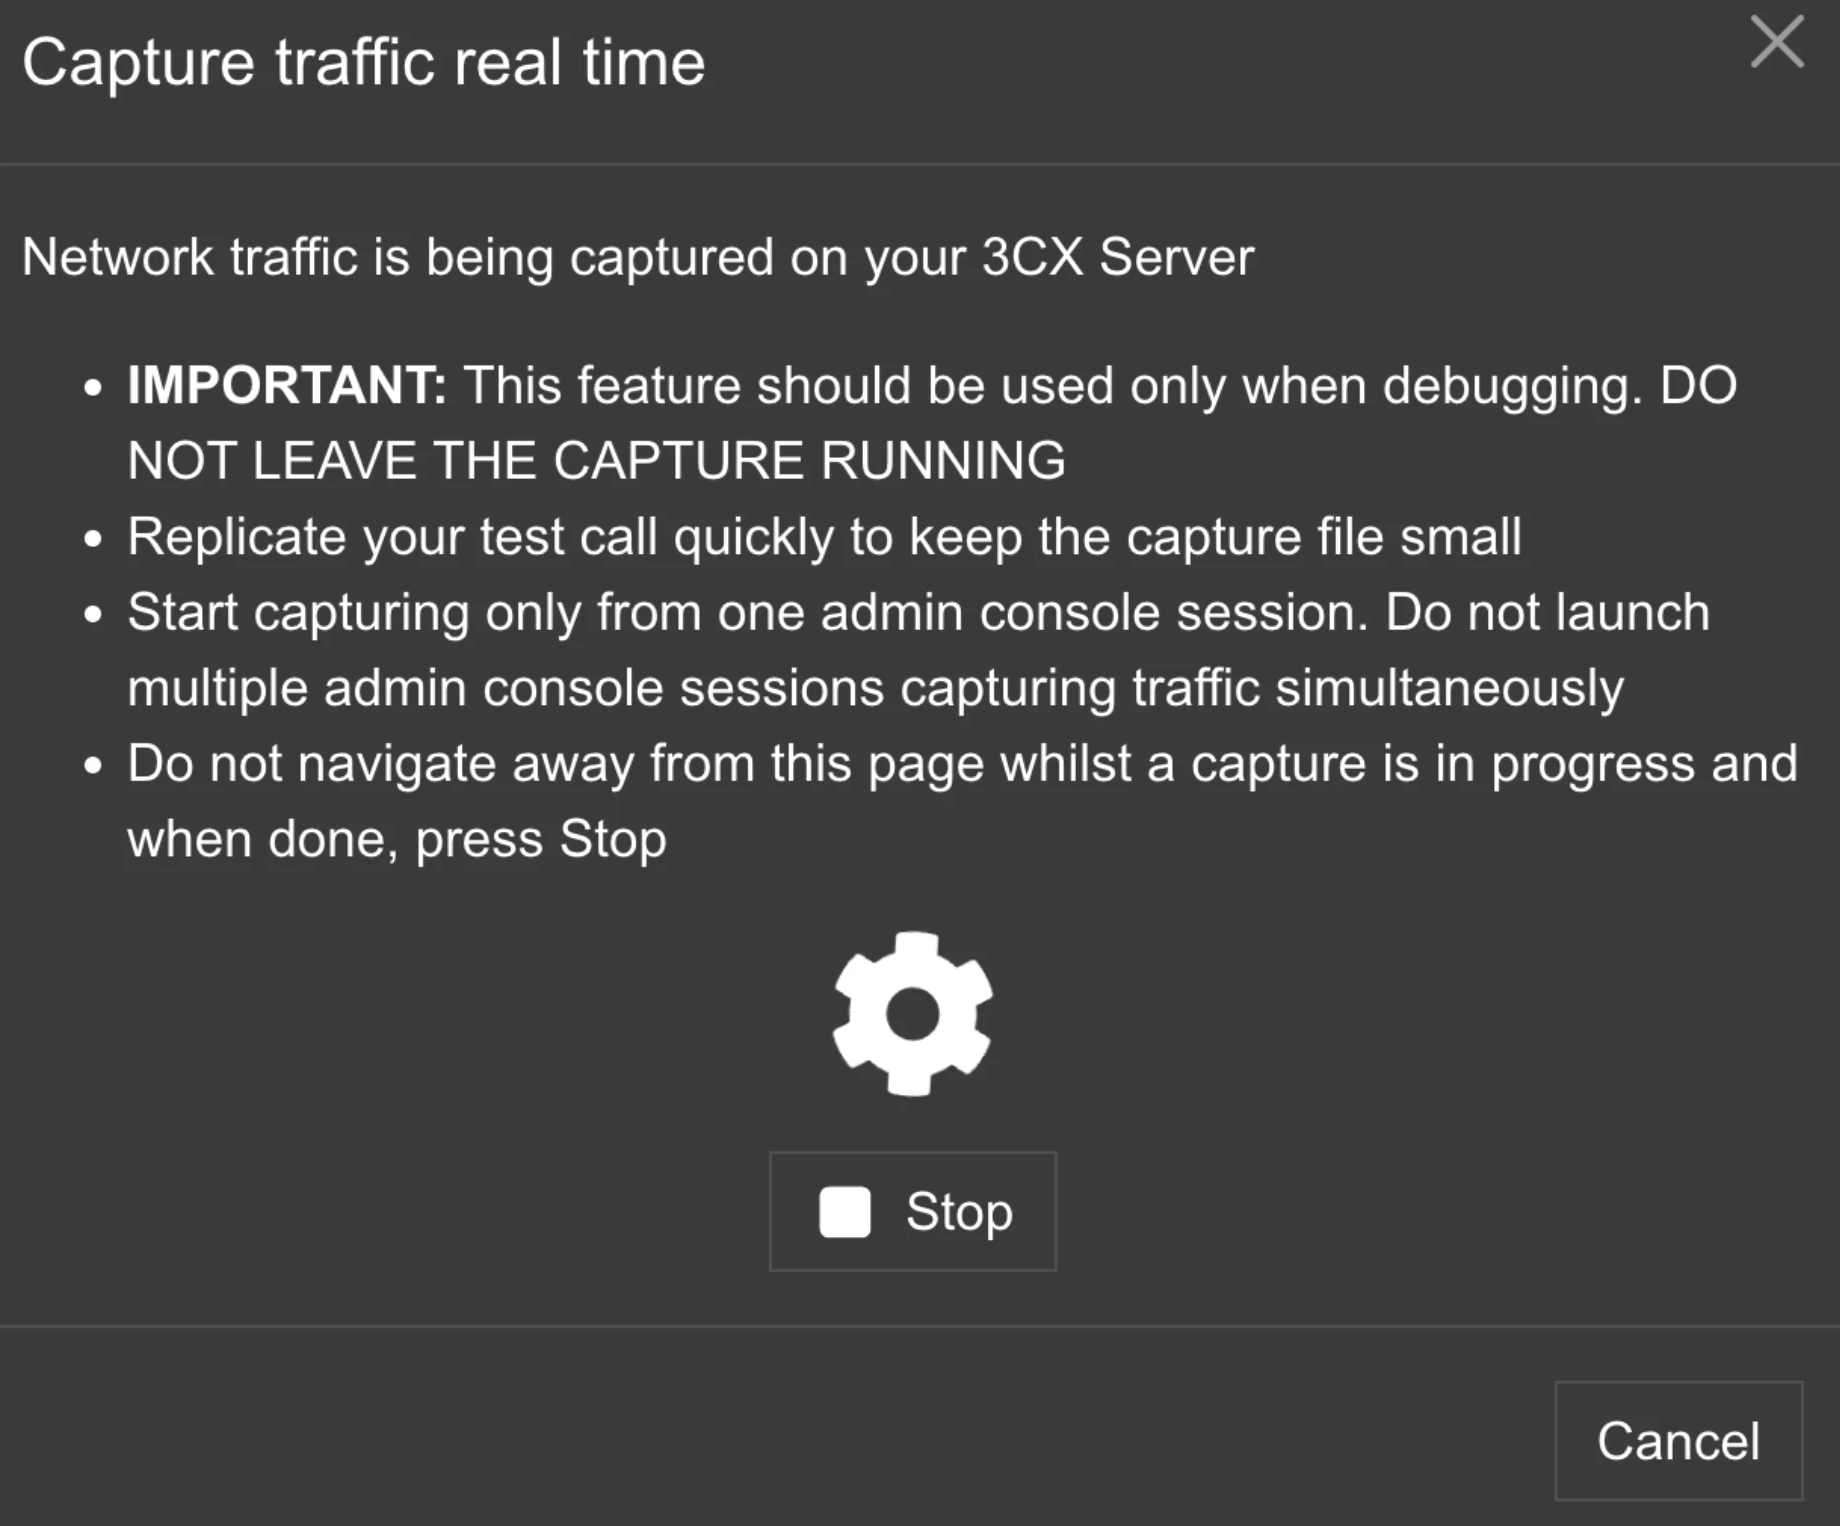
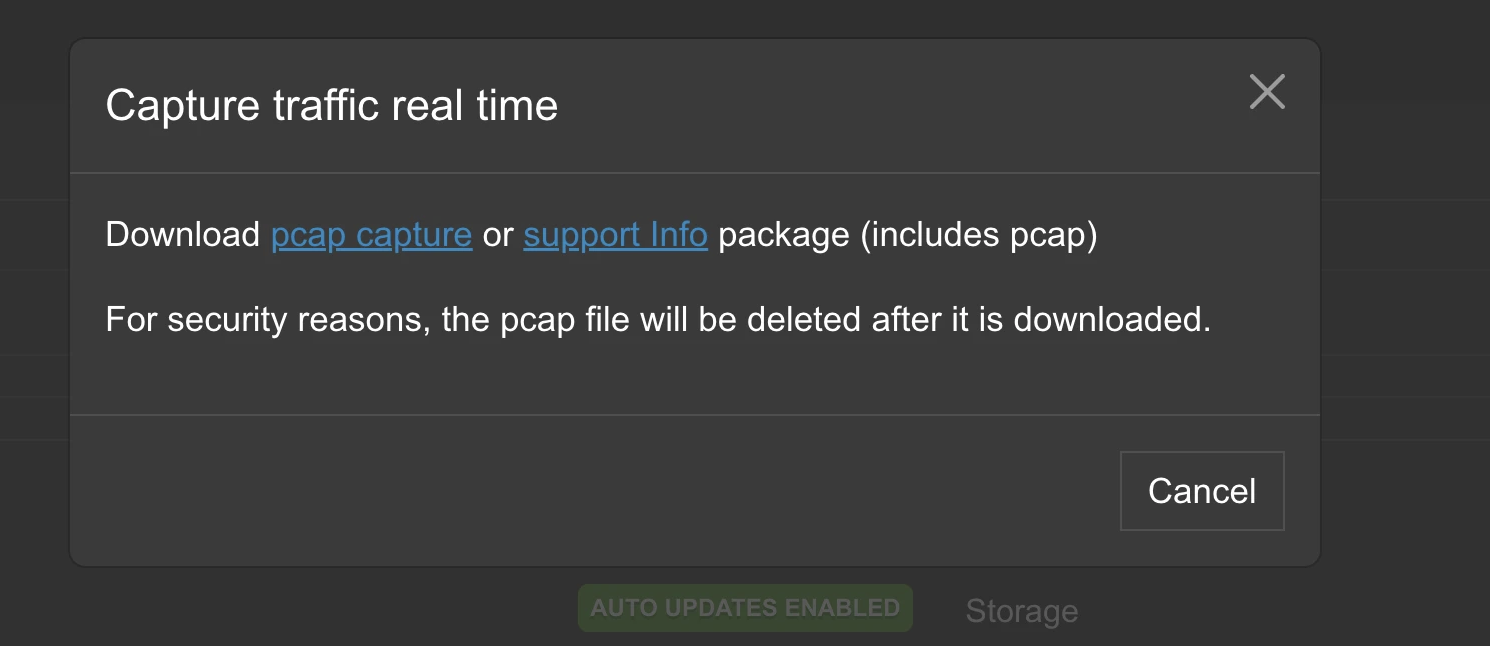
- Click on the "pcap capture" link to download the pcap file