PortSIP PBX
This guide outlines the steps to configure PortSIP PBX to make and receive phone calls using the didlogic trunks. Before placing or receiving a call, ensure you have an active phone number and a SIP account created on your didlogic account.
Option A: Digest Authentication
Register Based Trunks can be configured at the System Administrator level (shareable across multiple tenants) or the Tenant Admin level (exclusive to a single tenant).
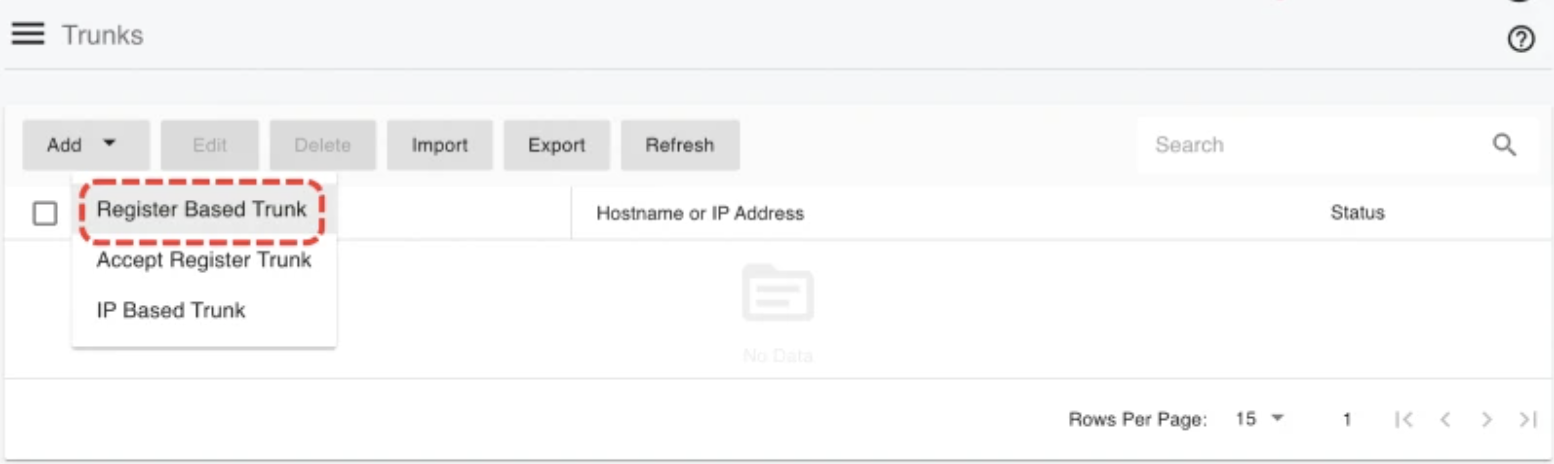
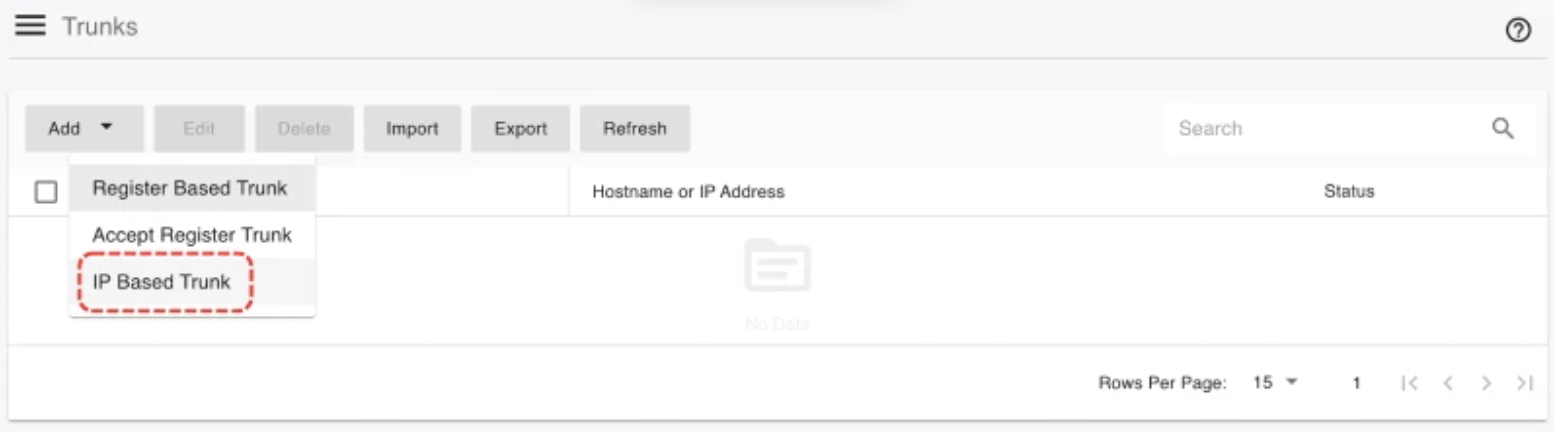
- Log in to the PortSIP PBX Web Portal as a System Administrator or Tenant Admin. Navigate to the left menu and select Call Manager → Trunks.
- Click the Add button to open the menu, then select Register Based Trunk.
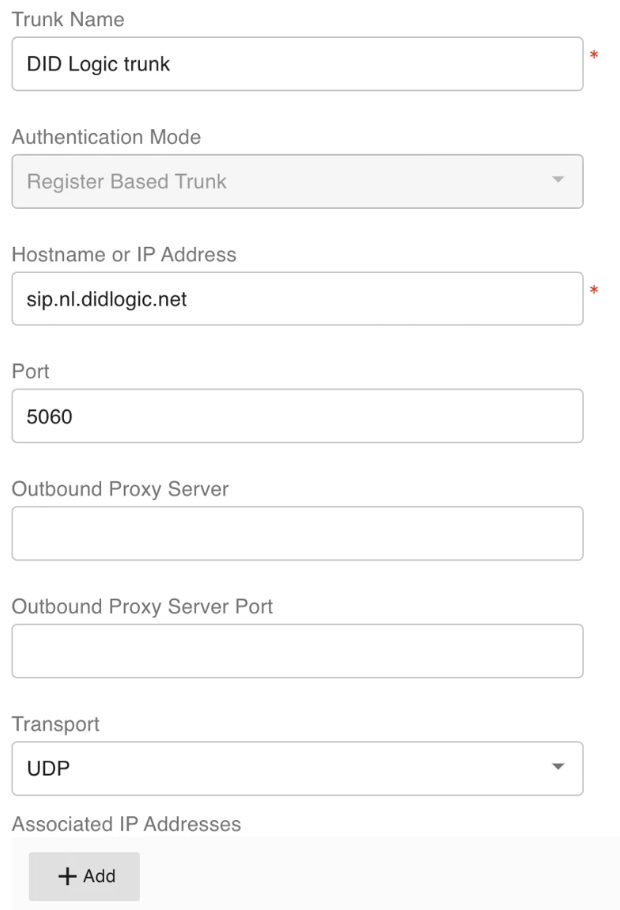
- Enter the trunk name and specify the Hostname or IP address:
- Name: Provide a descriptive name for the trunk.
- Hostname or IP Address: Enter a didlogic regional gateway that is closest to your location. The list of regional gateways can be found under SIP Accounts in the SIP tab on the user portal.
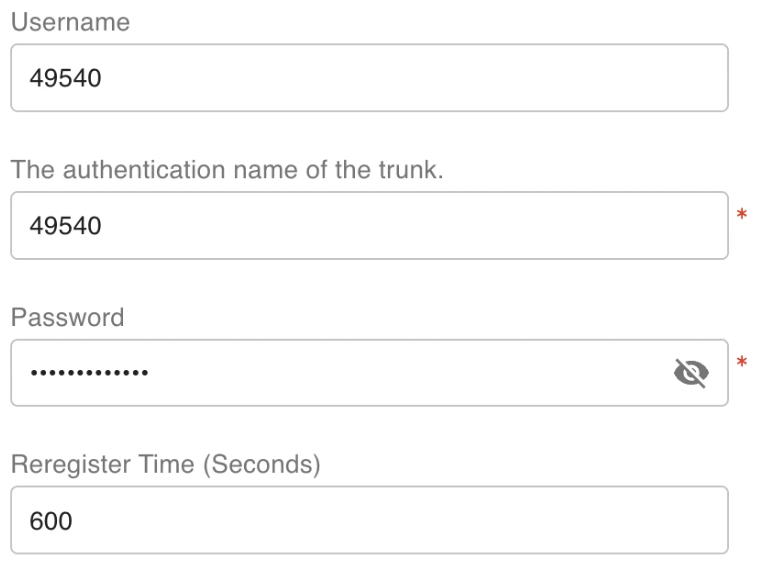
- Click Next and enter the SIP account username and password from the didlogic platform.
- Click Next to define trunk limits:
- Max Concurrent Calls: Define the maximum number of simultaneous calls that PortSIP can handle using this trunk. Adjust this value as needed.
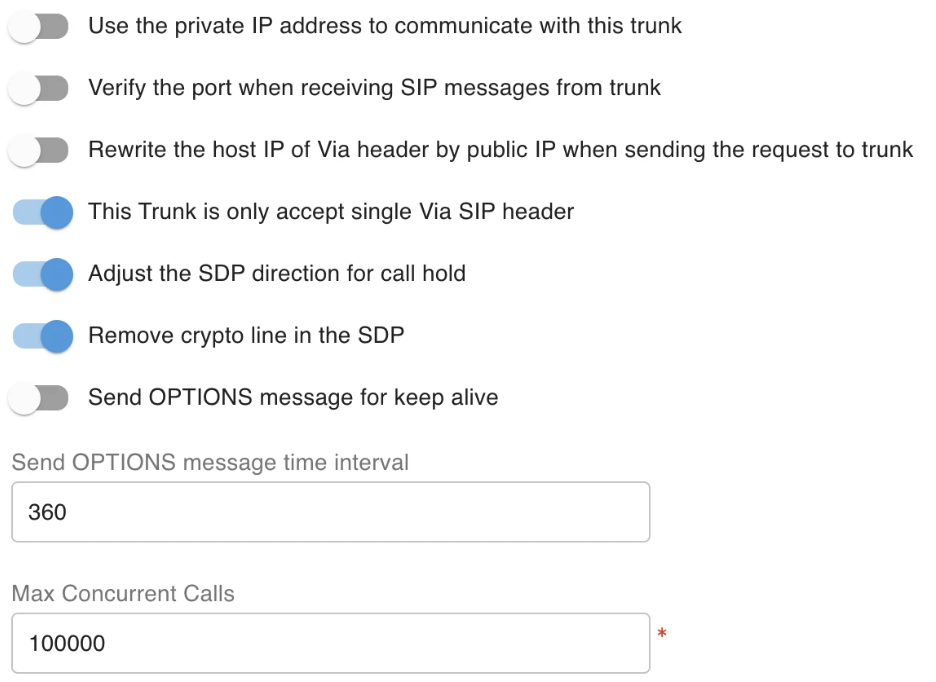
- For other options, it is recommended to retain the default settings unless you have specific requirements.
- This step applies only when configuring the Register Based Trunk at the System Administrator Level. Click the Next button to assign this trunk to tenants and allocate your didlogic DIDs/Numbers to them using the DID Pool. Note that each DID can only be assigned to one tenant.
- Tenants assigned to this trunk can use the DID numbers within the DID pool range to set up inbound and outbound rules and configure the outbound caller ID for extensions.
- DID Pool: The DID pool can consist of a single number, a range of numbers, or a combination of both. For example:
1831201193618312011936;1831201193718312011936-18312011940;18312011911

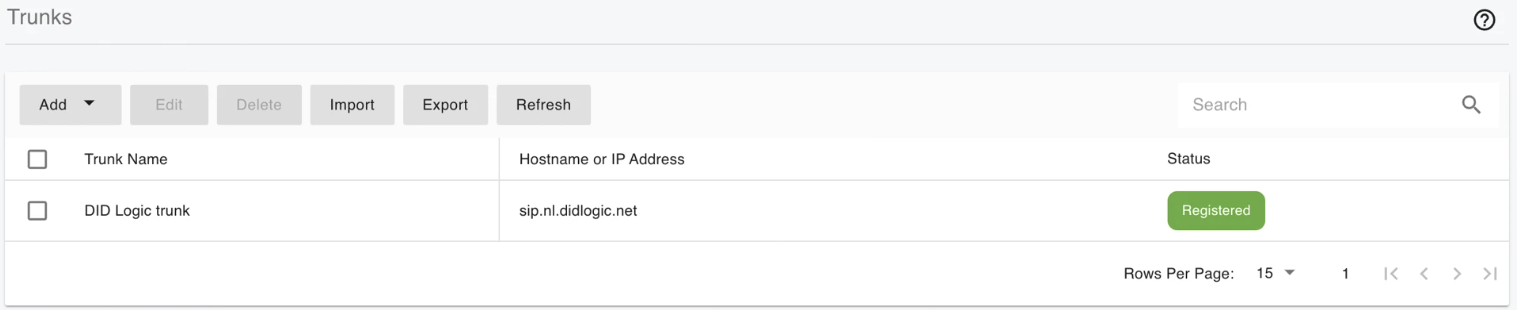
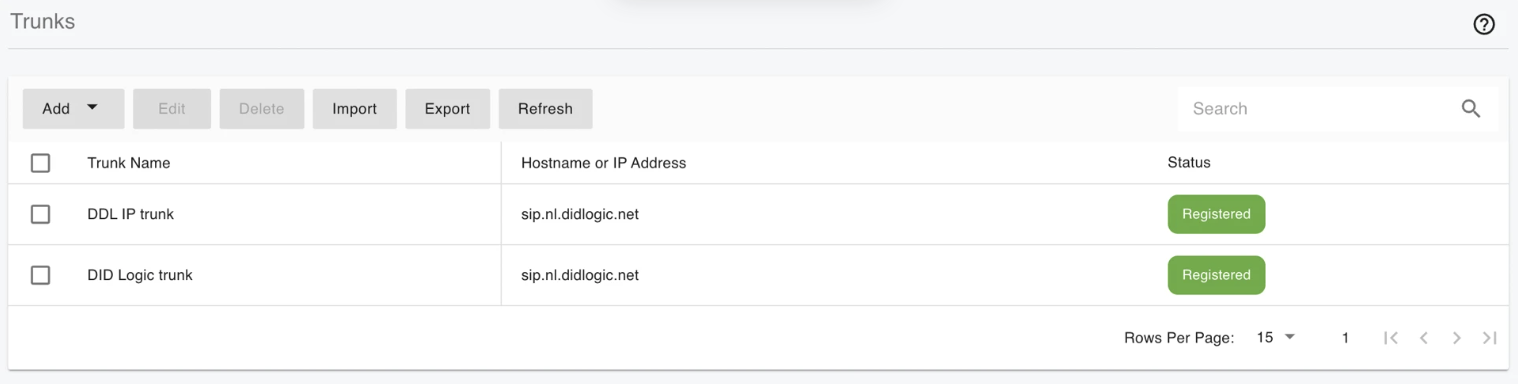
- Click OK to save changes and complete trunk configuration. Once PortSIP PBX successfully registers the trunk with the didlogic platform, the status will appear as Registered on the trunk list page.
Option B: IP Authentication
Use this option for high-volume deployments or multi-tenant traffic routing.
- Request Activation: Email [email protected] with your PortSIP server's public static IP to whitelist it on our network. We will create a dedicated SIP account that will appear in your didlogic account.

-
Sign in to the PortSIP PBX Web Portal as a System Administrator. Navigate to the left menu and select Call Manager → Trunks.
-
Click the Add button to open a menu. From the menu, choose IP Based Trunk.
- Specify the trunk name and add the relevant IP addresses:
- Name: Choose a descriptive name for the trunk.
- Hostname or IP Address: Enter a didlogic regional gateway closest to your location.
- Associated IP Addresses: Input the IP address you wish to permit.
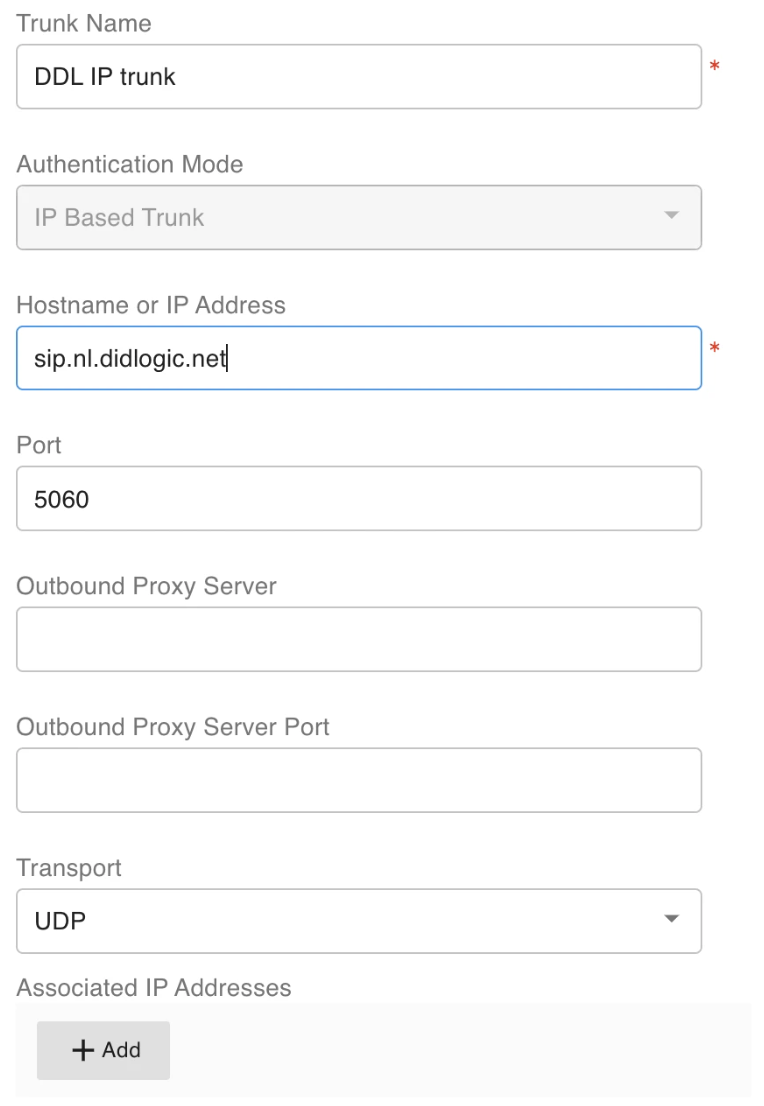
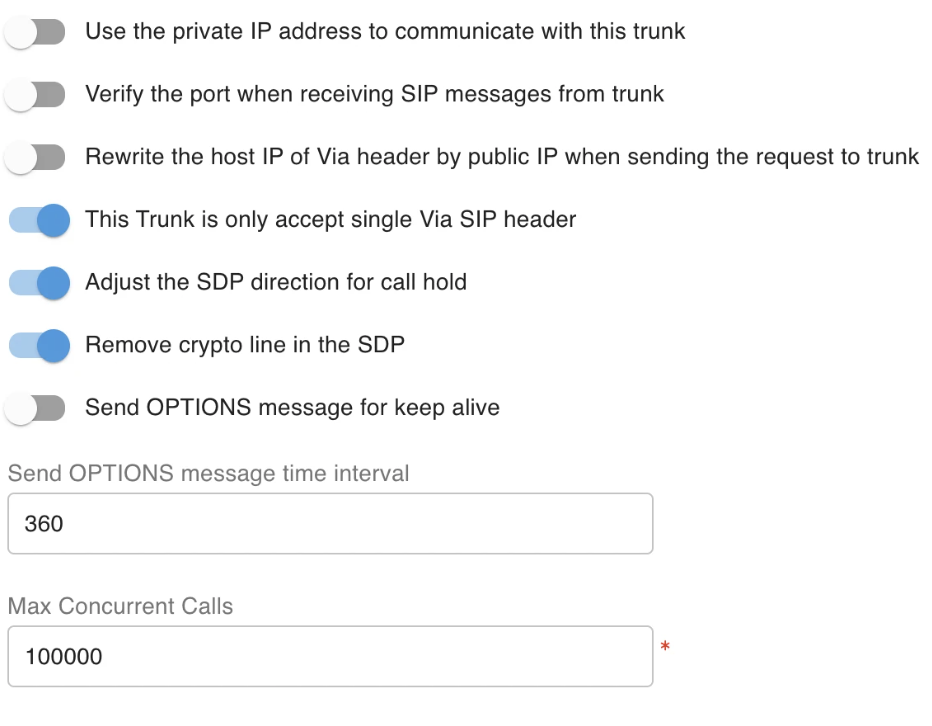
- Click Next to modify trunk limits:
- Max Concurrent Calls: This field determines the maximum number of calls PortSIP can handle with this trunk. Adjust it to an appropriate value as needed.
- We suggest leaving the default settings for the other options unless you have specific requirements.
- Click Next to assign this trunk to tenants and provide them with your didlogic DIDs/Numbers using the DID Pool (DID numbers). Note that each DID can only be assigned to one tenant. A tenant assigned to this trunk can only use the DID numbers within the DID pool range for setting up outbound rules and configuring the outbound caller ID for extensions.

- Click OK to save your changes. The trunk configuration is now complete. In the trunk list, the status will appear as Registered (for IP Based trunks, it will always show as Registered).
Outbound & Inbound Call Routing
Sign in to the PortSIP PBX web portal to configure the outbound and inbound rules for making and receiving calls. You can access the PortSIP PBX Web Portal using one of the following methods:
- As a PBX System Administrator: Log in as the system administrator, navigate to the Tenants menu, select a tenant, and click the Manage button to switch to that tenant.
- As a Tenant Admin: Log in directly as the tenant administrator to manage the tenant.
For more information, please refer to the Tenant Management documentation.
Outbound Rules
To enable outbound calls, you must configure Outbound Rules. Follow these steps:
- Navigate to Call Manager → Outbound Rules in the left-hand menu.
- Click the Add button to create a new rule.
- Provide a name for your Outbound Rule.
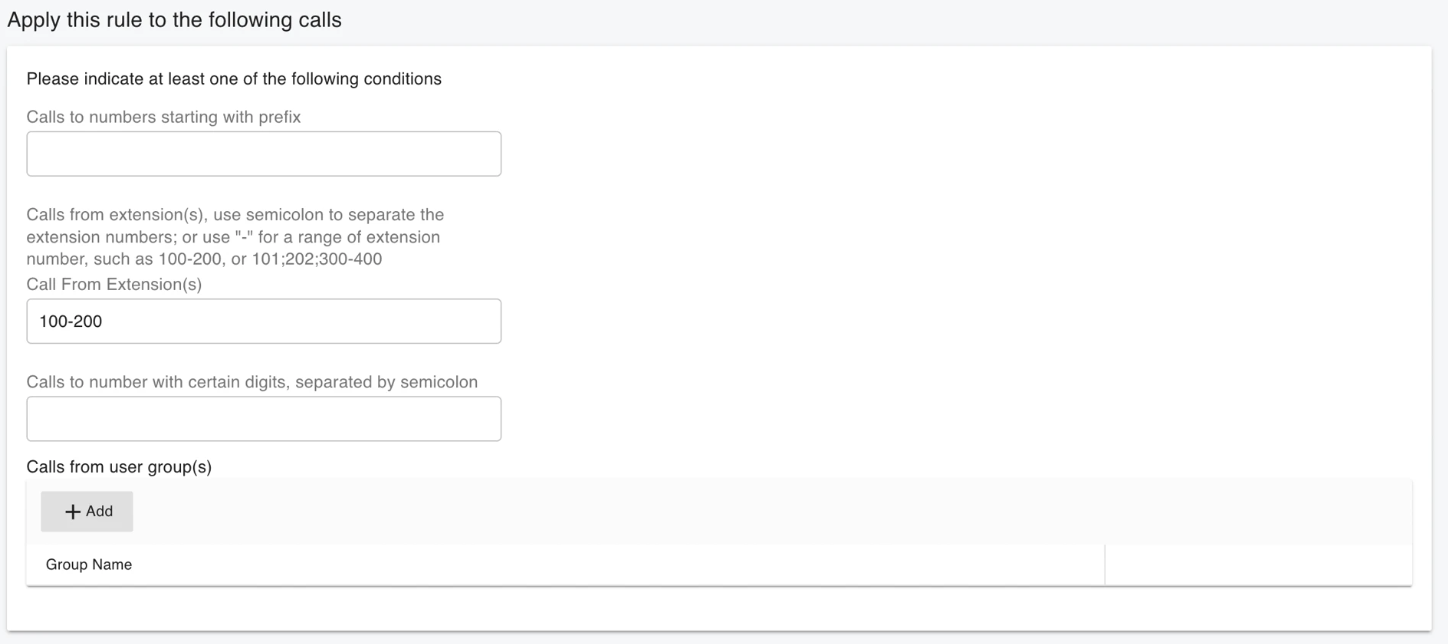
- Define at least one condition for this rule in the Apply this rule to the following calls section.
- Scroll down to the Place outbound calls using the following trunk routes section, click the Add icon, select the didlogic trunk you created, and save the Outbound Rule.
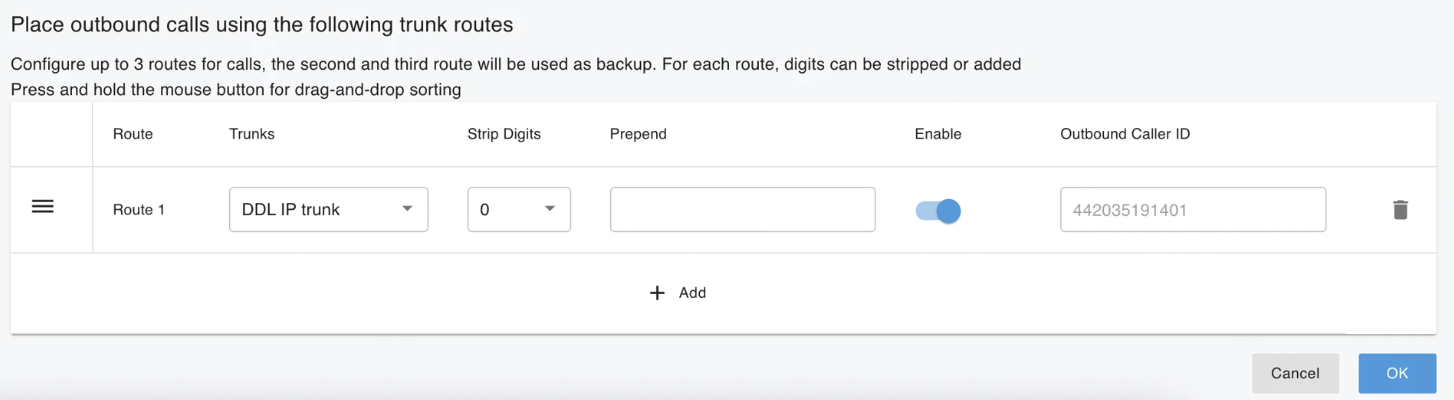
Dialing Format Note: All destination numbers sent via the didlogic trunk must follow the E.164 international standard ([CountryCode][AreaCode][SubscriberNumber], e.g., +18312011936). Local or national formatting will result in rejected calls.
Inbound Rules
- Navigate to Call Manager → Inbound Rules in the left-hand menu and click Add.
- Provide a name for your Inbound Rule.
- Click the Choose a Trunk button to select the appropriate trunk.
- Enter the DID/DDI Number or Number Range in the designated field. The number must fall within the DID pool range of the selected trunk.
- Specify the extension to which calls should be routed.
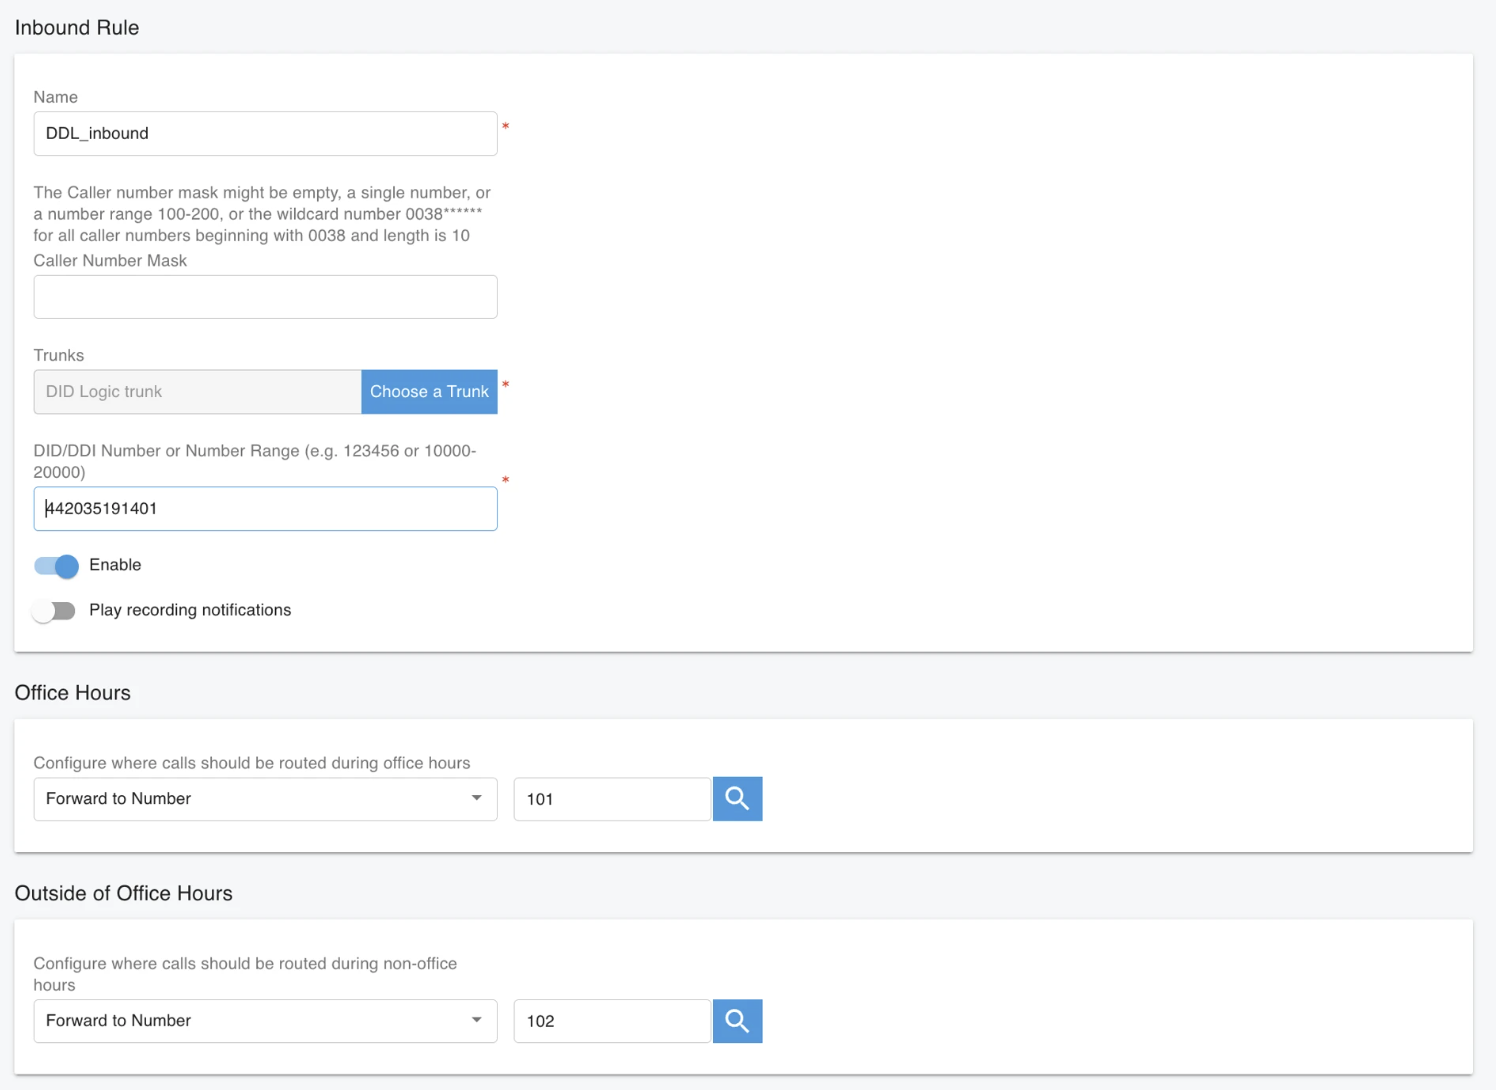
- Click OK to save the rule. Based on your business requirements, you can set specific office hours for the rule, allowing calls to be routed to different extensions, sent to voicemail, or automatically dropped according to the schedule. For more information, please refer to the article on Office Hours and Holiday Schedule.
For more information on configuring outbound and inbound rules, please refer to the Call Route Management article.
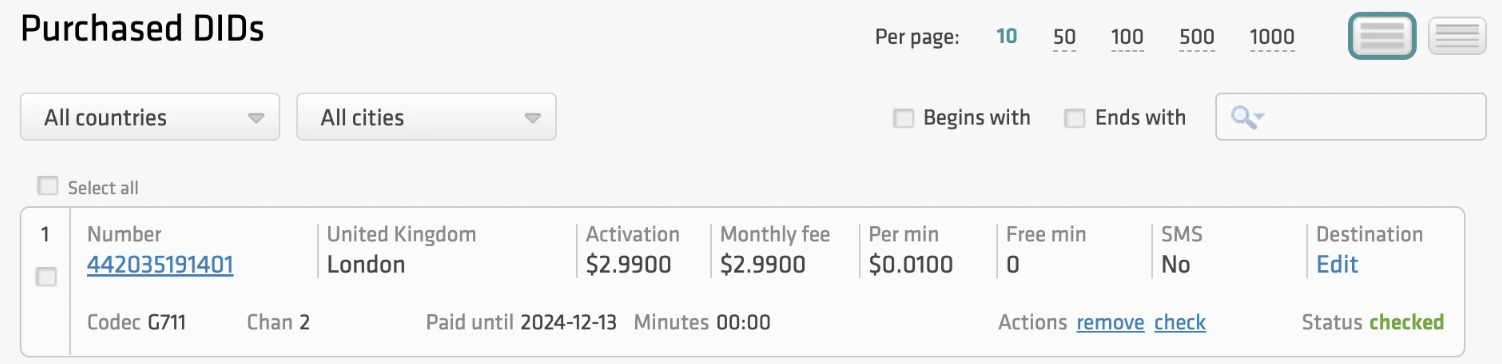
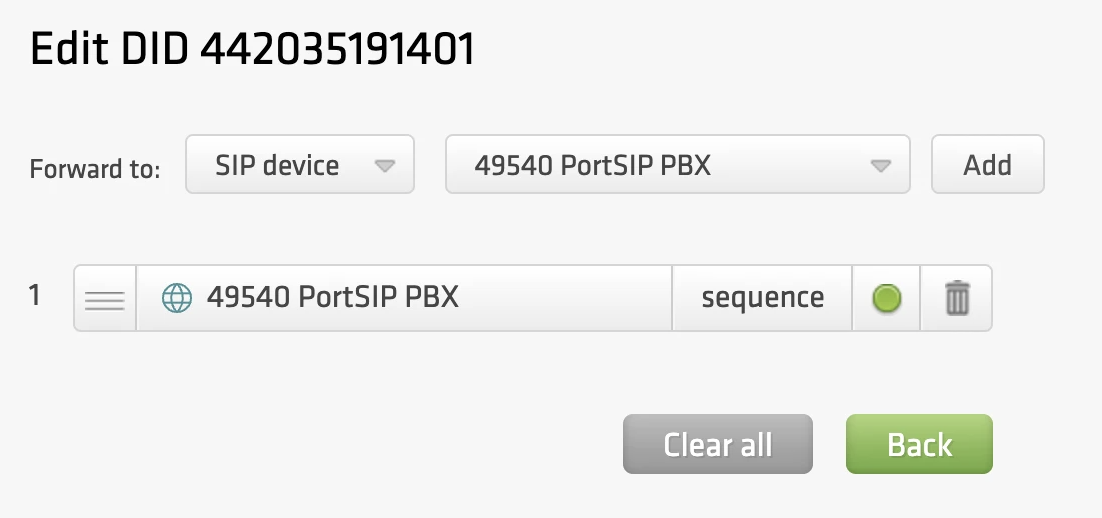
Inbound Routing at didlogic
- Log in to your didlogic account and navigate to the PURCHASED tab in the top menu.
- Click Edit under the Destination section.
- Select the SIP device and the destination SIP account.
- Click Add to set the destination for the DID.
SIP trunks with IP authentication enabled cannot be used for inbound call routing, as they do not maintain registration with didlogic regional gateways. To set up inbound routing for your numbers, you must use a valid SIP URI address instead, e.g. [email protected]:5060;transport=udp
Once you have successfully configured the PortSIP PBX and created the tenants and extensions, you can register the endpoints (such as WebRTC, mobile app, Windows Desktop app, IP phone, or any SIP-based device) to the PBX. This will allow you to make and receive calls. For more details, please refer to the article How to Configure the Endpoints?
Troubleshooting
| Issue | Likely Cause | Solution |
|---|---|---|
| 603 Declined | Registration Failed | Verify that Registration Required is checked and credentials match. |
| 603 Declined | Max Rate Limit | Ensure the destination rate doesn't exceed your account's "Max Rate" setting. If you would like to increase it, please contact [email protected]. |
| No Audio | Firewall/NAT | Ensure UDP ports 10000-20000 are open for RTP traffic. |
| Calls Fail | Wrong Format | Use E.164. Never dial 00 or + unless your ARS handles the conversion. |
| Inbound Calls Don't Come Through | Firewall/NAT or Setup Issue | Make sure IP addresses of didlogic regional gateways are allowed on the firewall. Verify Line Group ID: Ensure the correct Line Group ID is assigned to both the trunk and the route. Use System Monitor in IP Office to see how the call is being presented. This can help you verify the format of the incoming DID and troubleshoot mismatches. |