Grandstream CloudUCM
This guide outlines the steps to configure Grandstream CloudUCM to make and receive phone calls using the didlogic trunk provider. Before placing or receiving a call, you should have an active phone number and a SIP account on your didlogic account
Register SIP Trunk in CloudUCM
Follow these steps to set it up:
- Log in to the CloudUCM Admin Portal and select Extension/Trunk → VOIP Trunks → Add SIP Trunk.
- Click the Add button to open the menu, then select Register SIP Trunk.
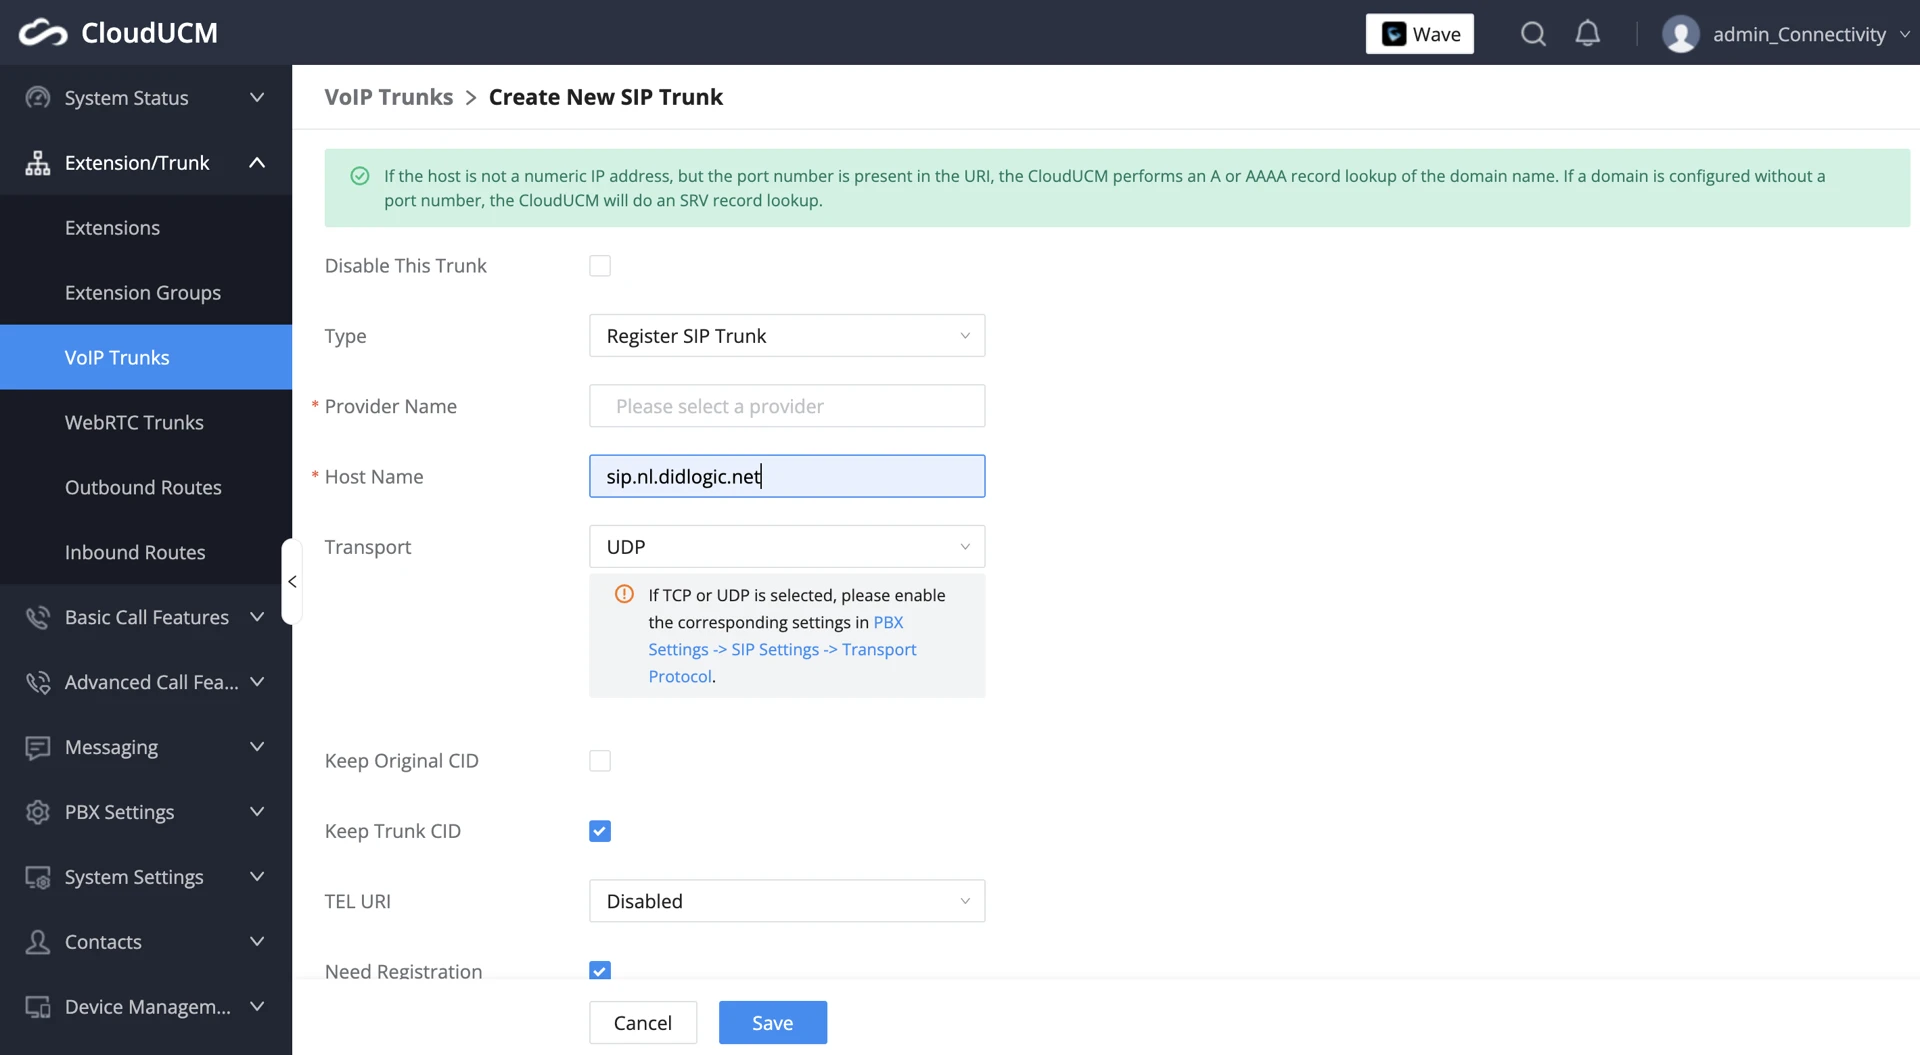
- Enter the trunk name and specify the Hostname or IP address:
- Name: Provide a descriptive name for the trunk.
- Provider Name: didlogic
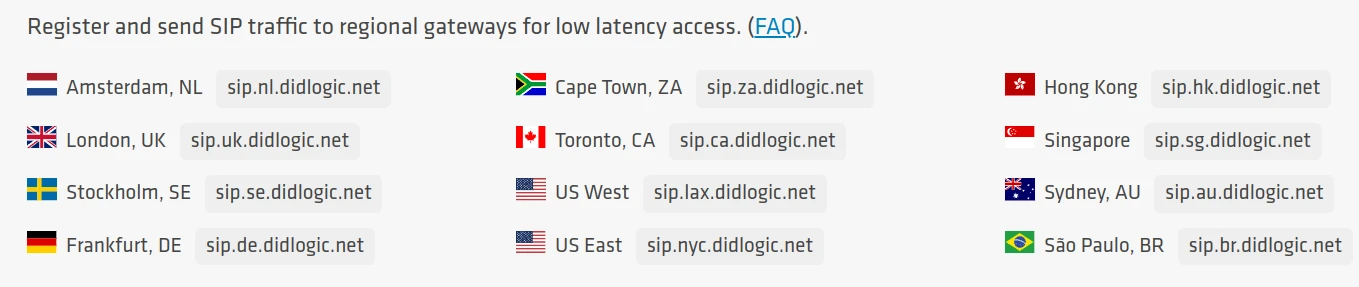
- Hostname or IP Address: Enter a didlogic regional SIP gateway closest to your location. The list of regional gateways can be found here or under SIP Accounts in the SIP tab on the user portal.
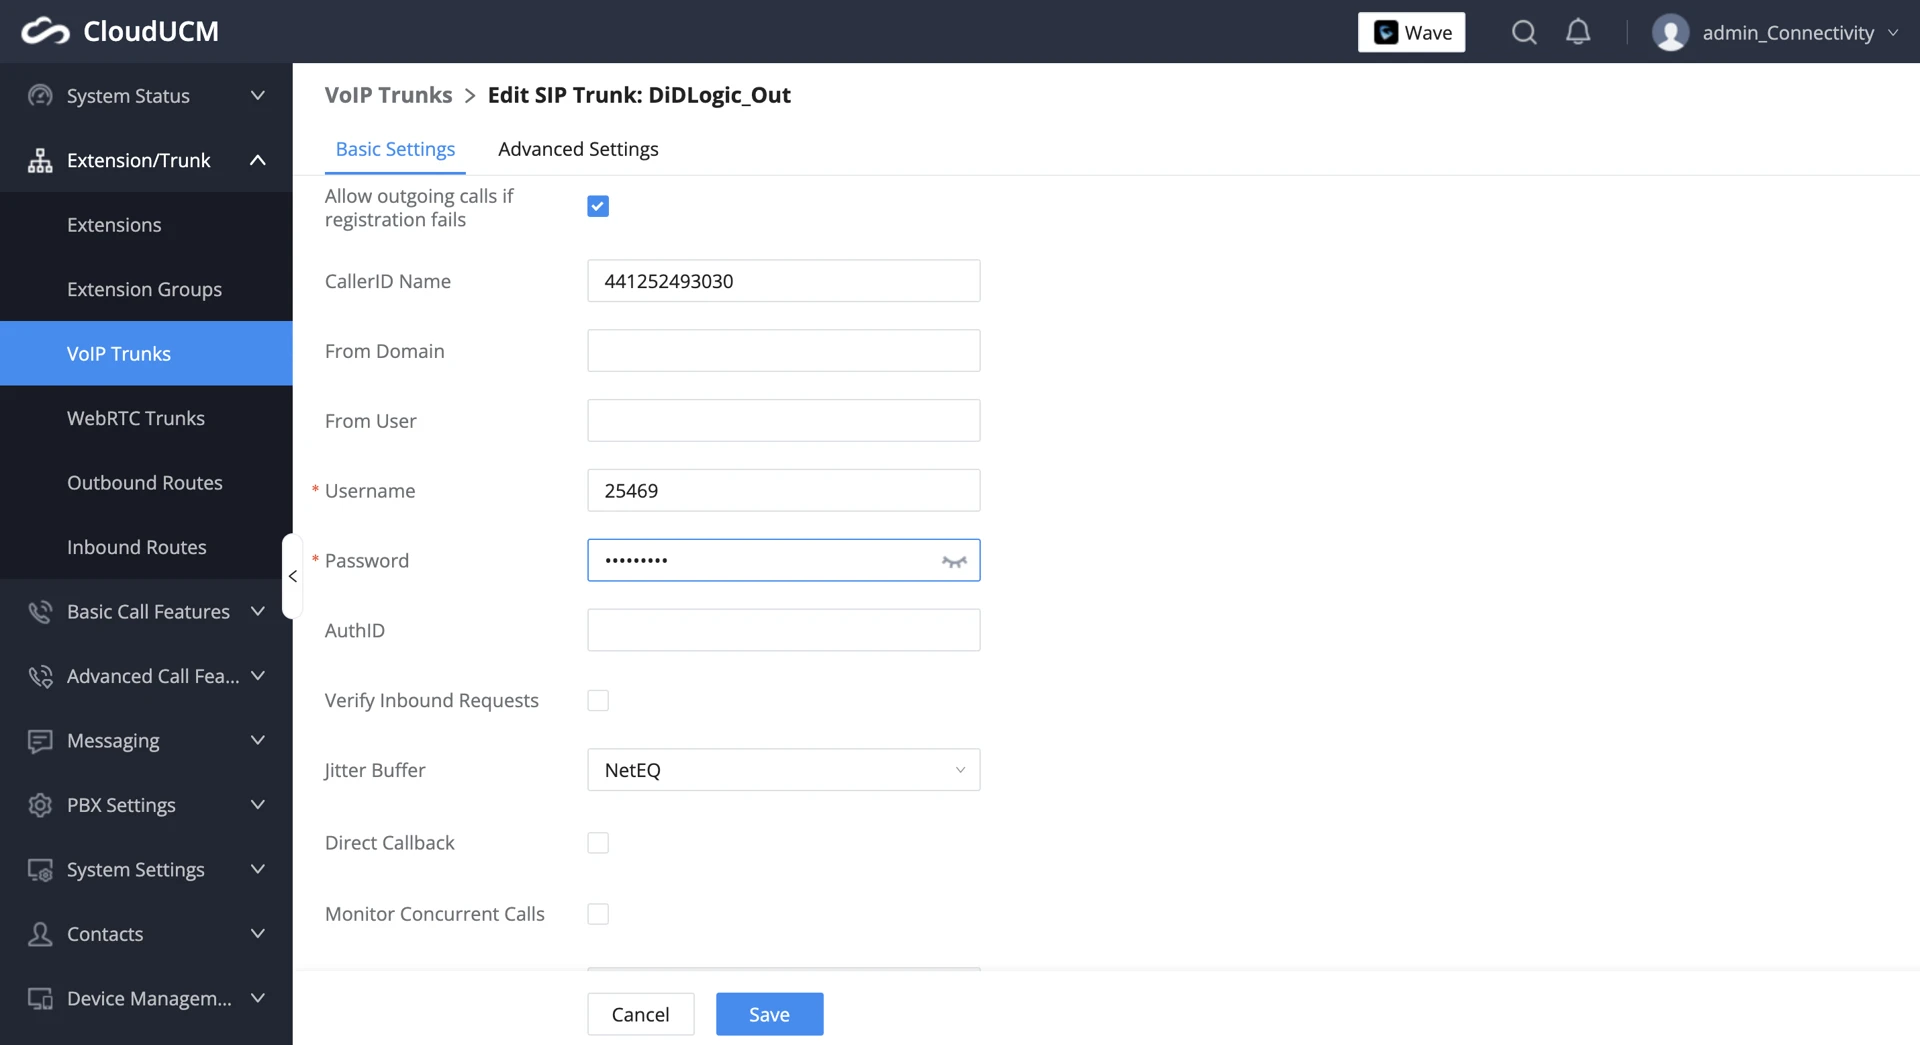
- Enter the SIP account username, password, and CallerID Name configured for the SIP account on the didlogic platform:
- Click Save to complete the trunk configuration.
Configure didlogic IP Authentication SIP account
Create a SIP account on the didlogic platform
To create a new IP-authenticated SIP account on the didlogic platform, please submit a request to the Support Team at [email protected] or open a ticket on the Support tab and provide the static IP of your CloudUCM for configuration. By default, an IP address can be associated with one SIP account. If you need multiple didlogic SIP accounts to share the same IP address, please contact the Support Team.
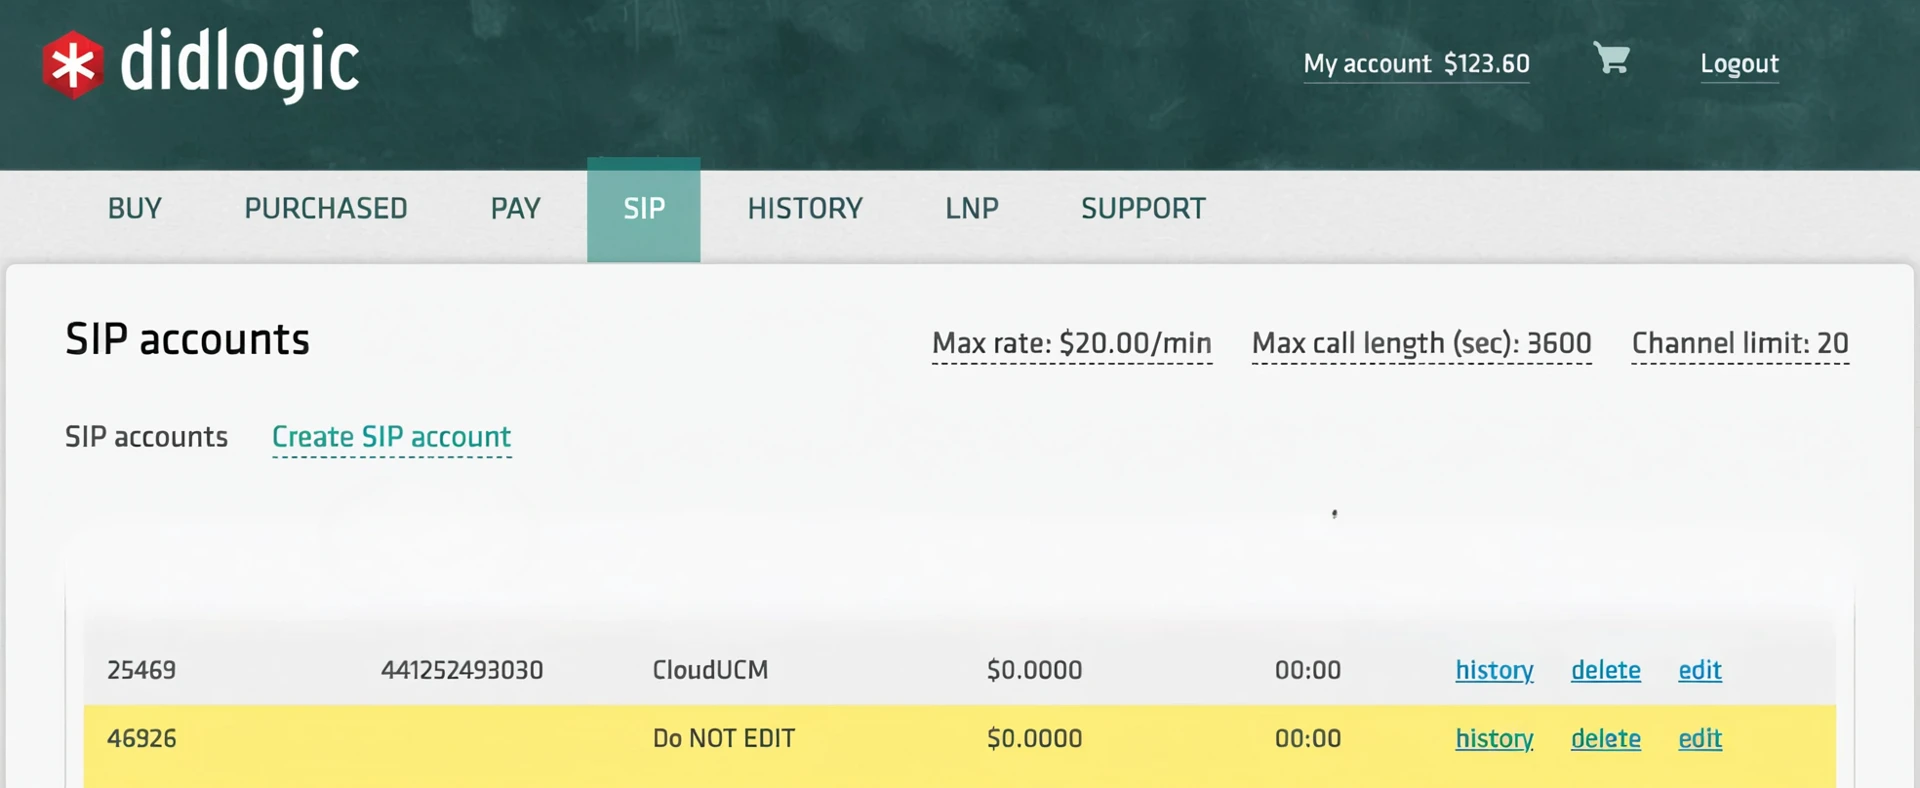
Once the SIP account is created, it will appear in the list of SIP accounts in your account.
Register Peer SIP Trunk in CloudUCM
To pass IP authentication on the didlogic platform, you should create a Peer SIP Trunk. Follow these steps to set it up:
- Log in to the CloudUCM Admin Portal and select Extension/Trunk → VOIP Trunks → Add SIP Trunk.
- Click the Add button to open the menu, then select Peer SIP Trunk.
- Enter the trunk name and specify the Hostname or IP address.
- Provider Name: didlogic
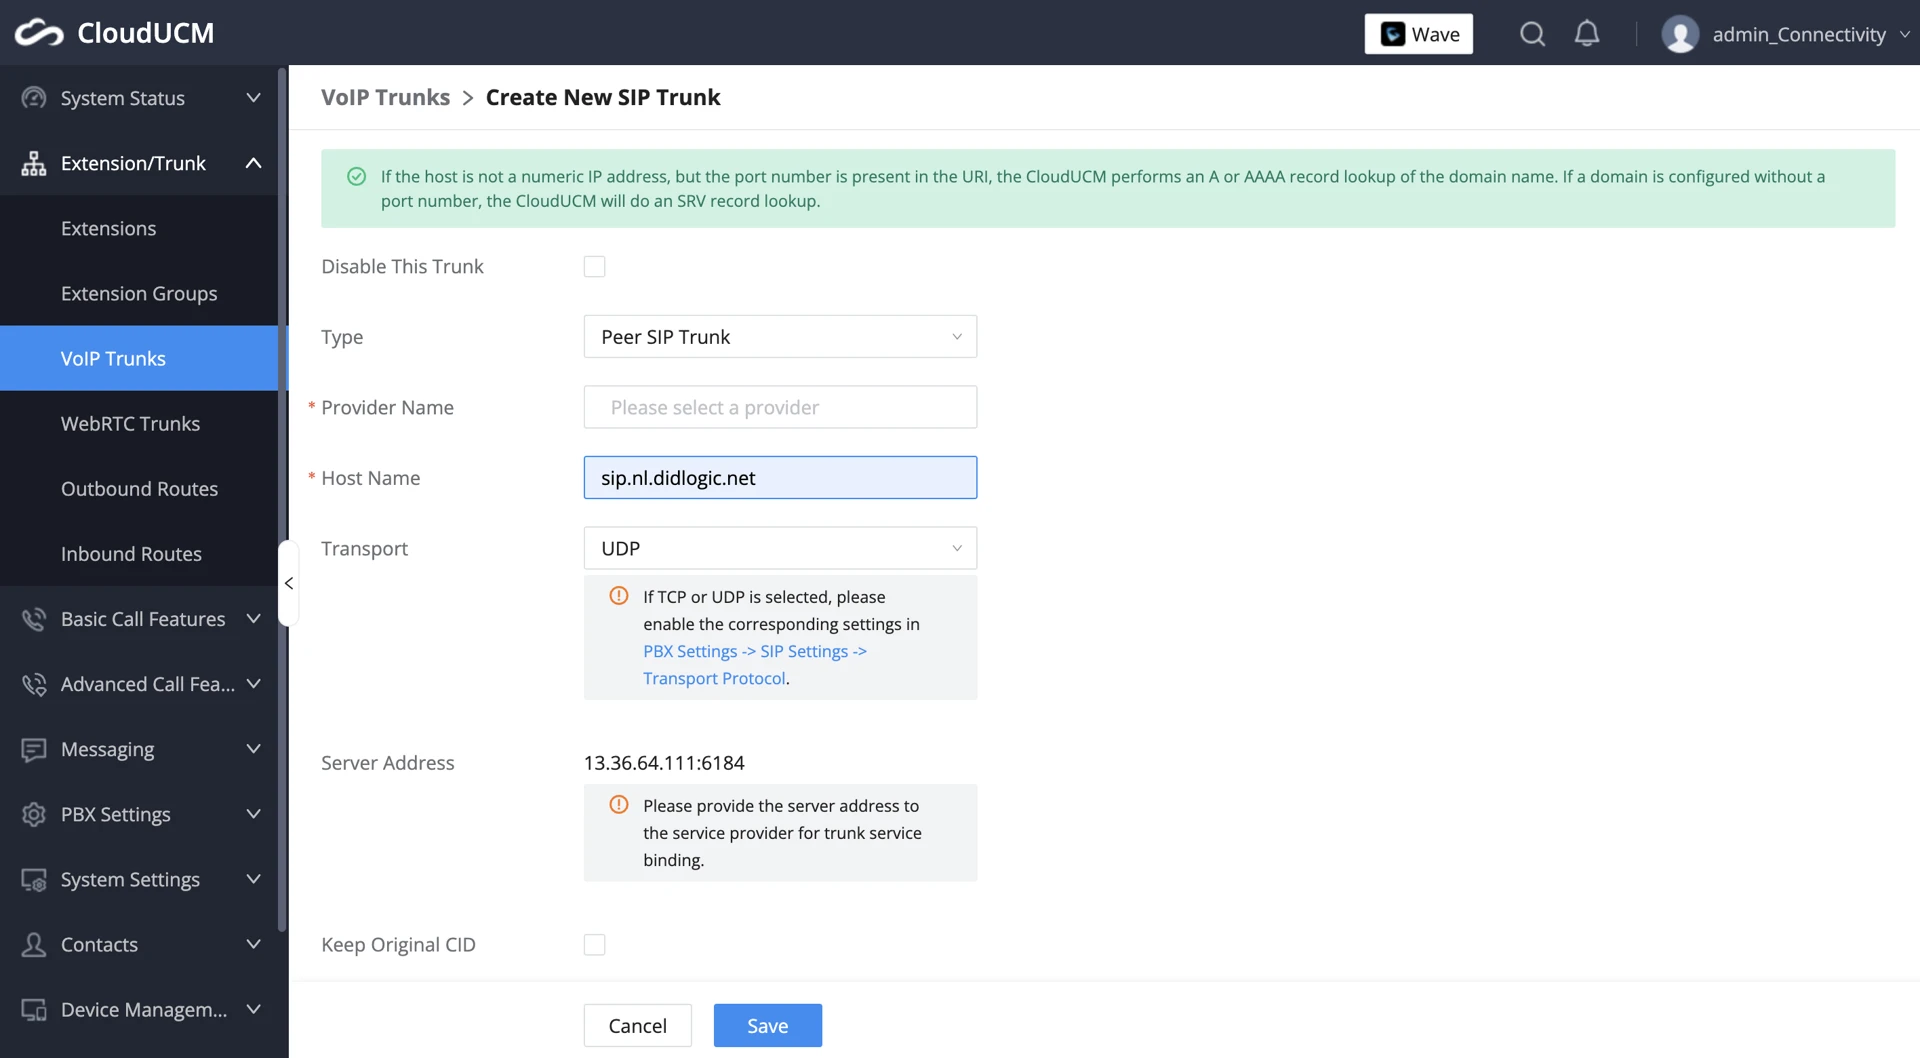
- Click Save to adjust the trunk options and apply changes.
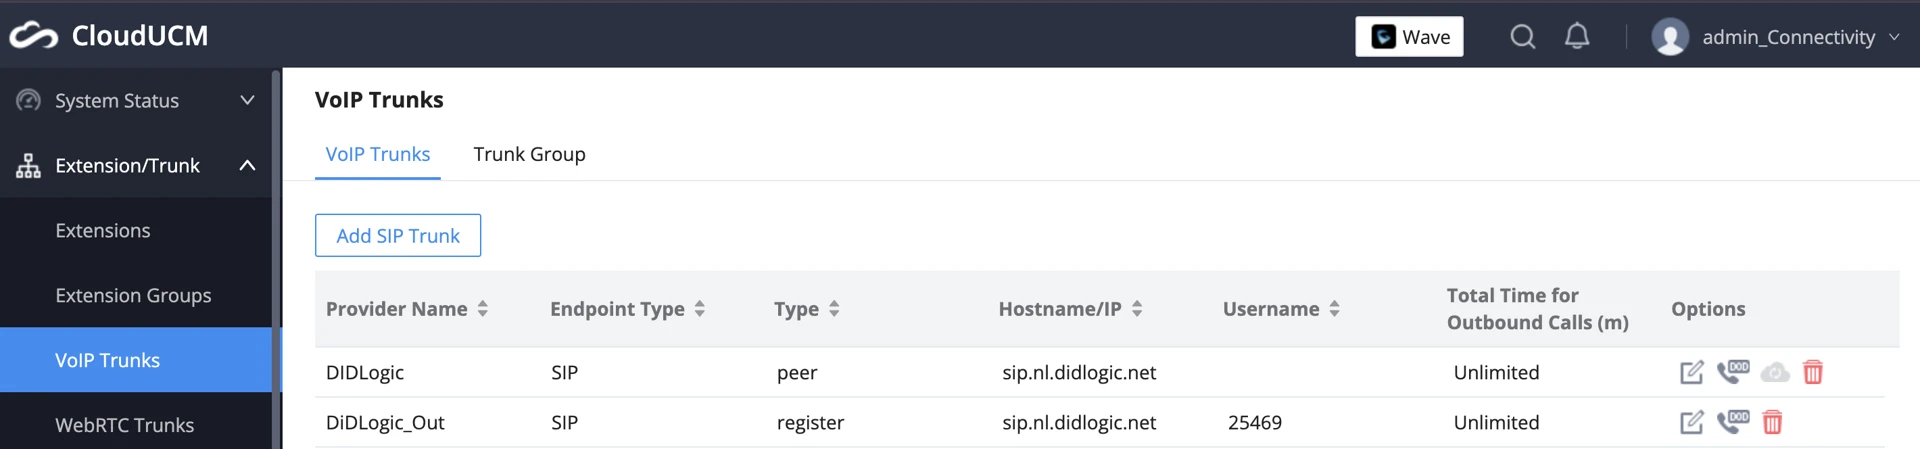
Once the Trunks are successfully registered, you will be able to see their status on the VoIP Trunks list page.
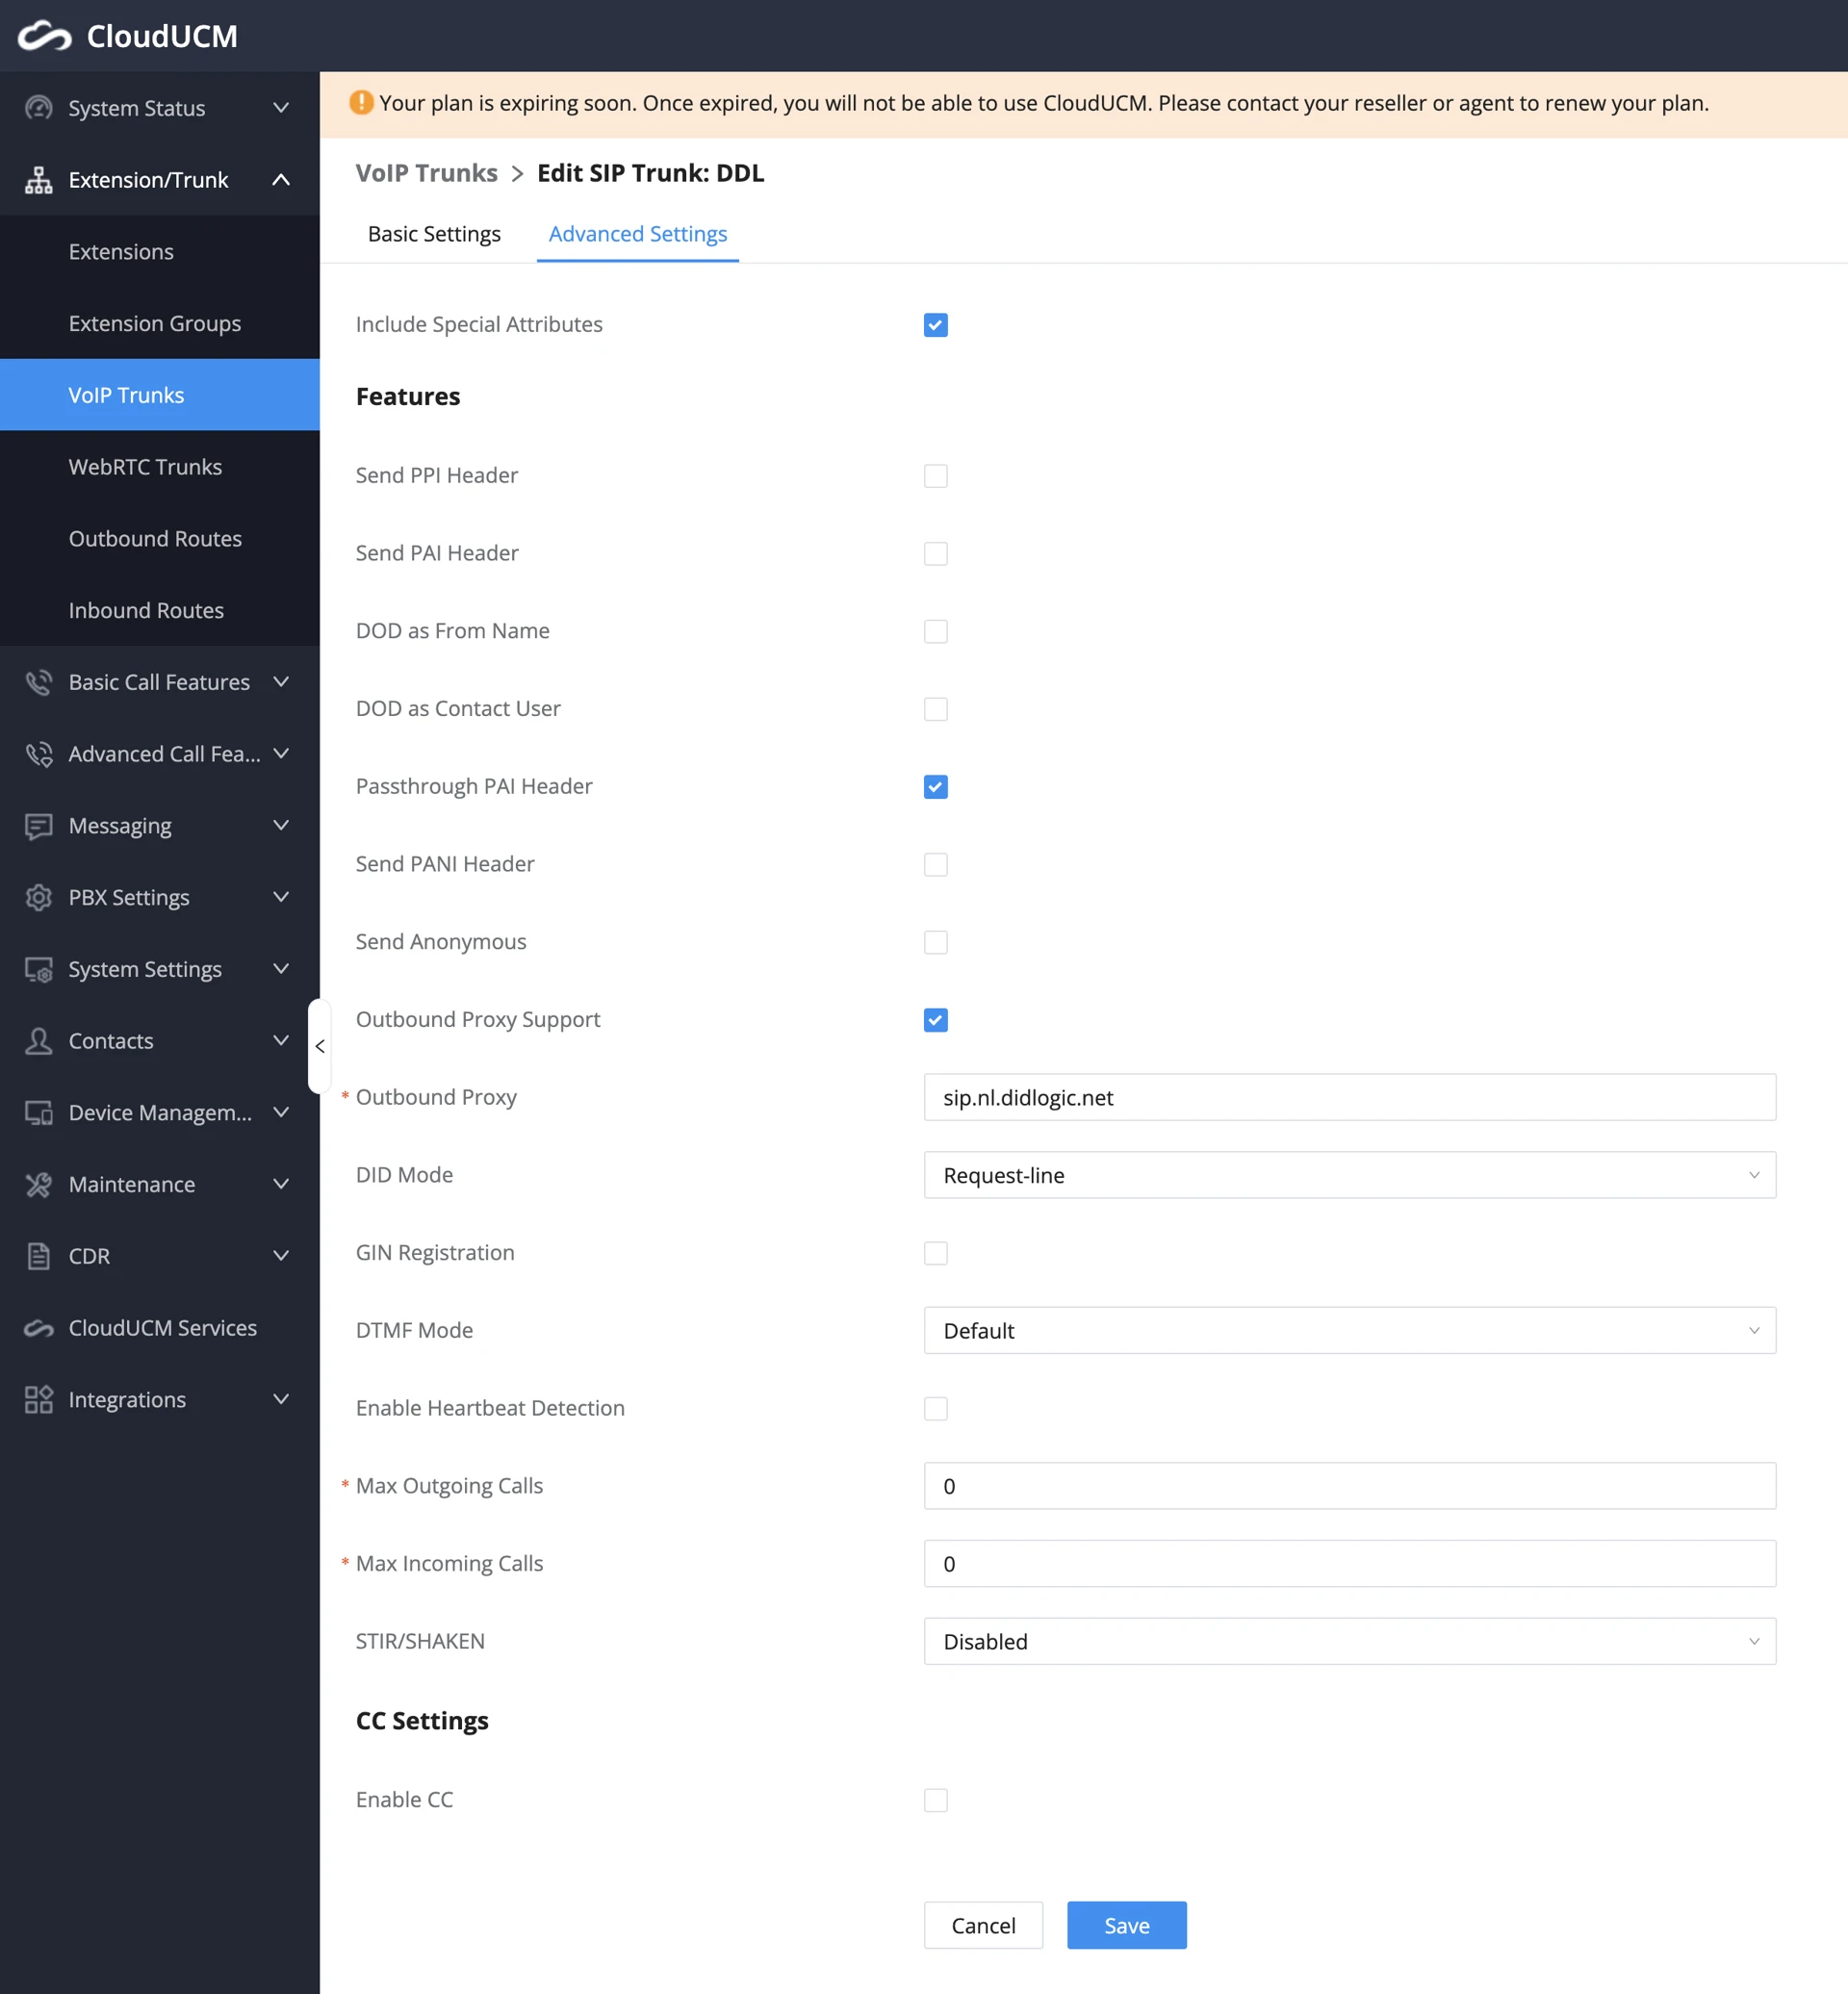
Once the trunk is open, click Advanced Settings at the top, then scroll down to Outbound Proxy Support and enable it. Then type in your Outbound Proxy as needed:
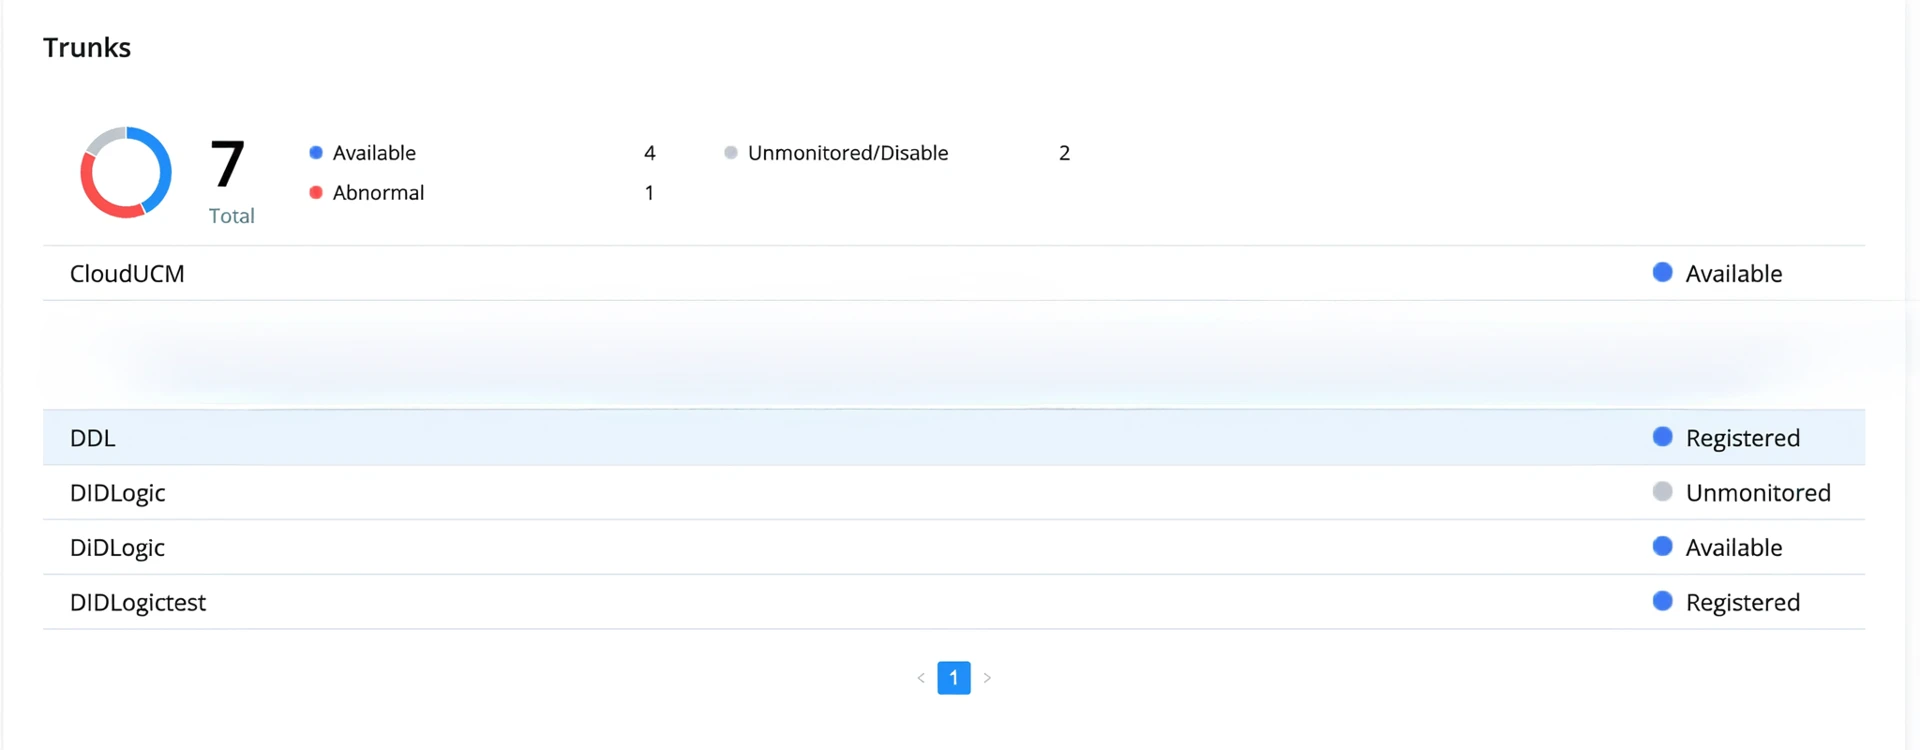
Once done, click Save. You will be returned to the Trunk dashboard. Click on Apply Changes. To confirm if the SIP Trunk is registered, go to the main dashboard under System Status → Dashboard. In the bottom right corner, you will see that your new SIP Trunk is registered and ready to use:
Configure Outbound Calls
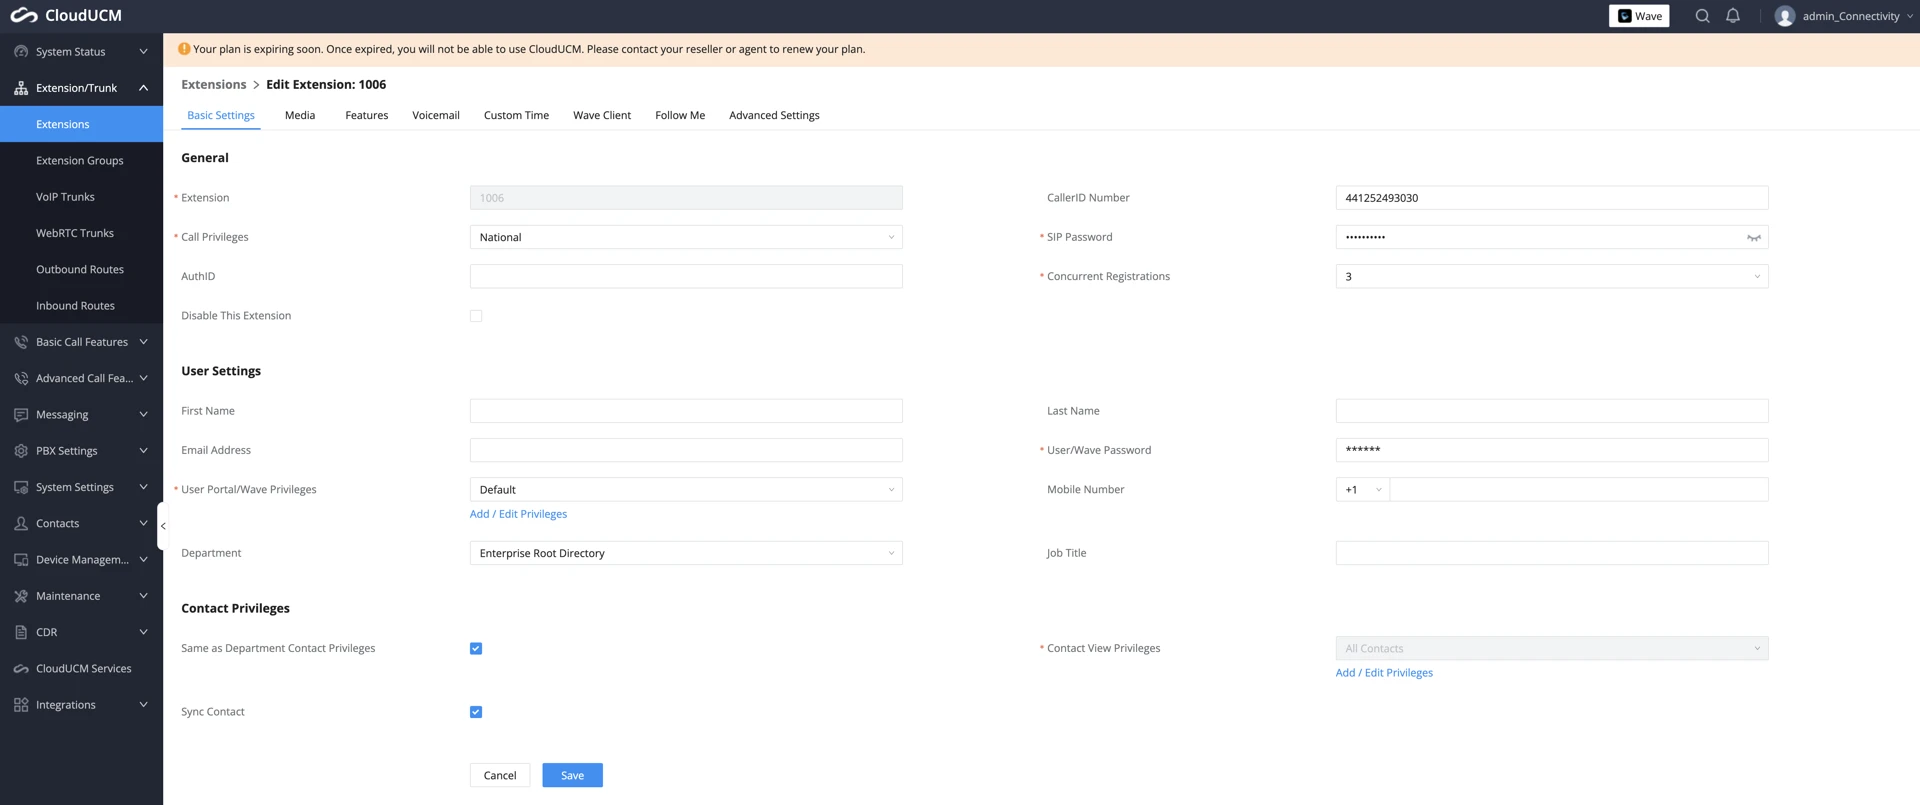
Start by adding an Extension. Navigate to Extension/Trunk in the menu options on the left, click on Extensions → Add:
- Choose Privilege Level.
- Enter the Caller ID Name and password.
- Save settings.
The following is a guide on using the extension with the Grandstream Wave app. Enter the password in the "User/Wave Password" field.
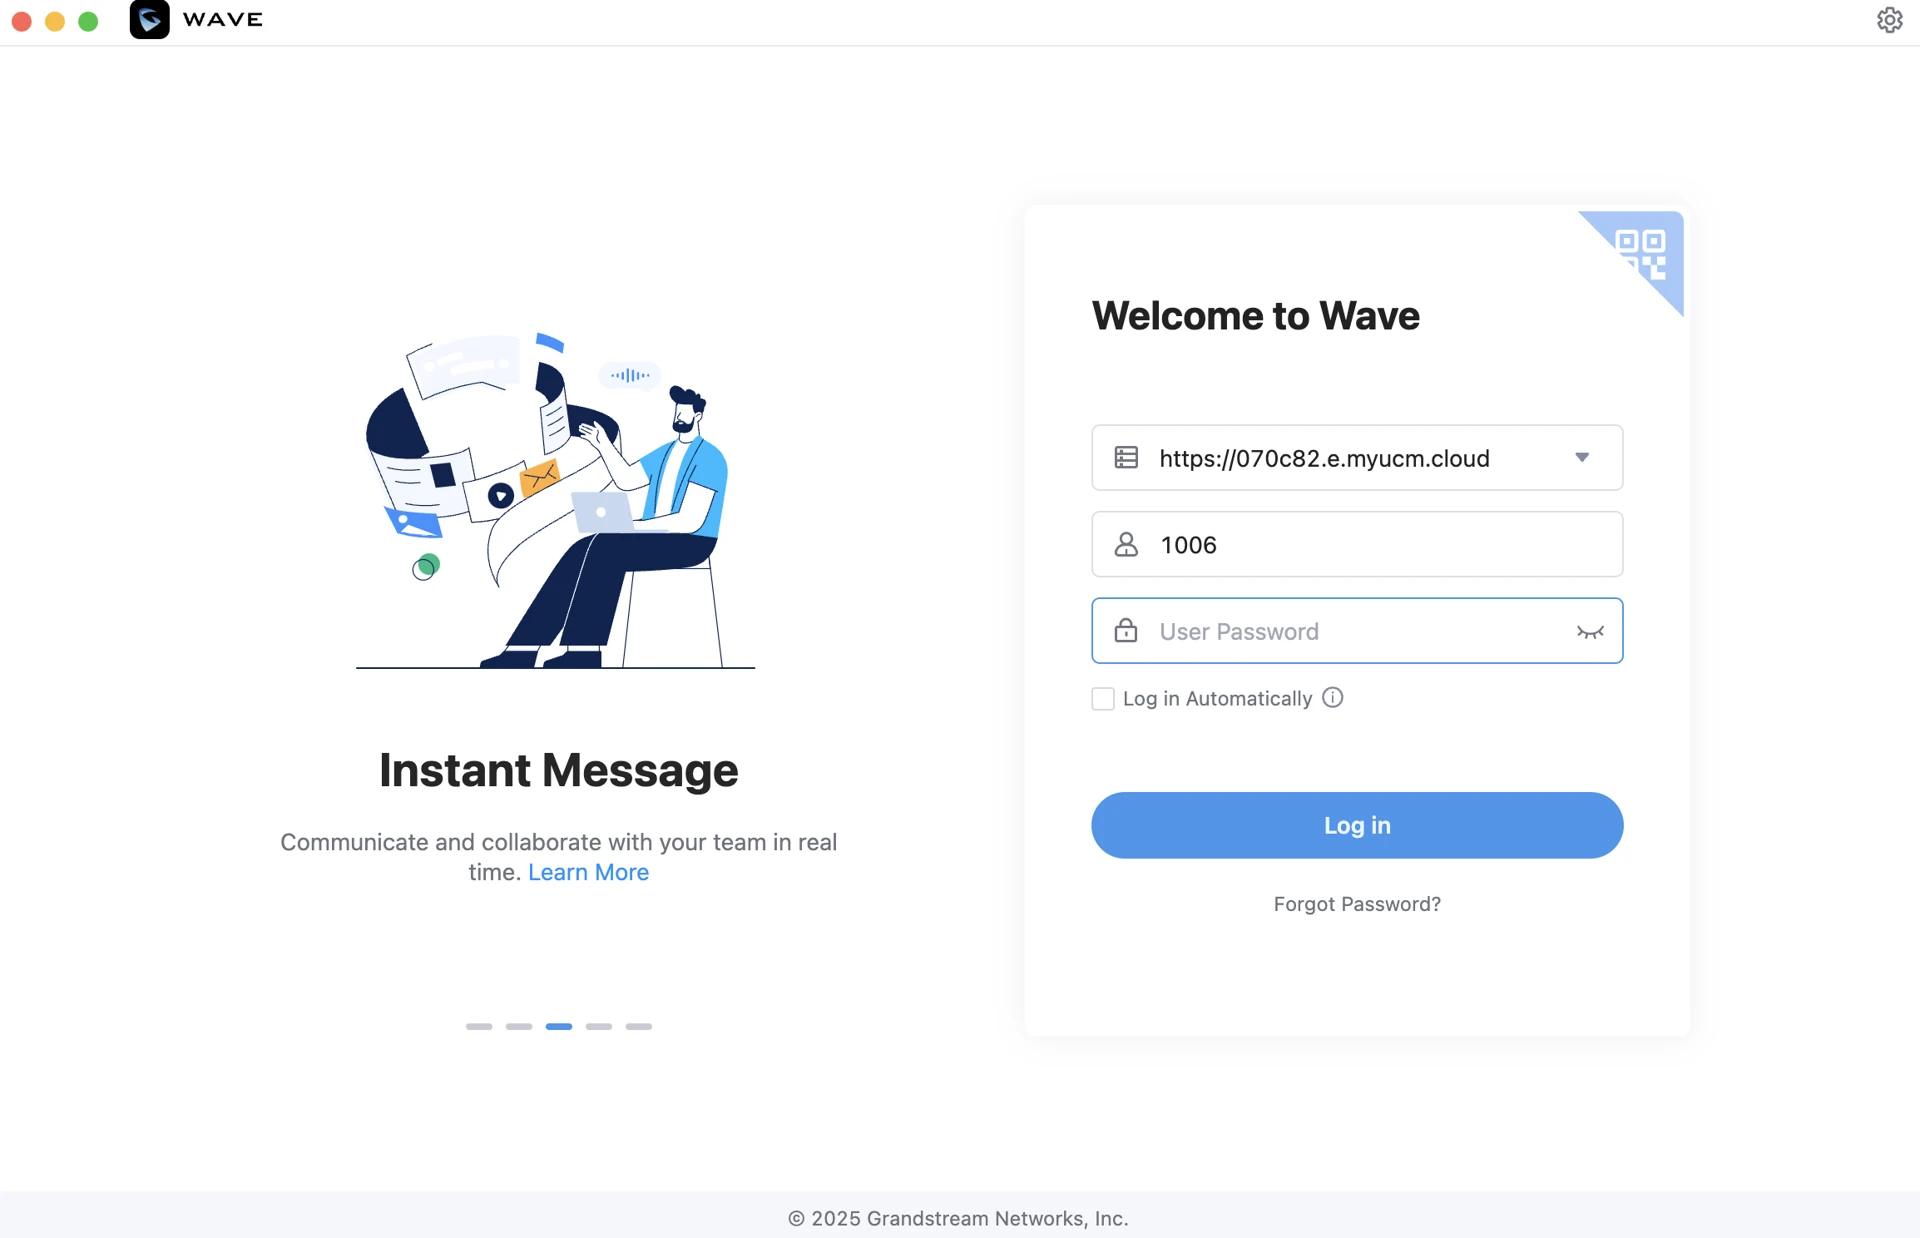
Download the Grandstream Wave application from the Google Play Store or Apple App Store. After installation, open the app, and the login screen will appear. Tap on Log in to proceed:
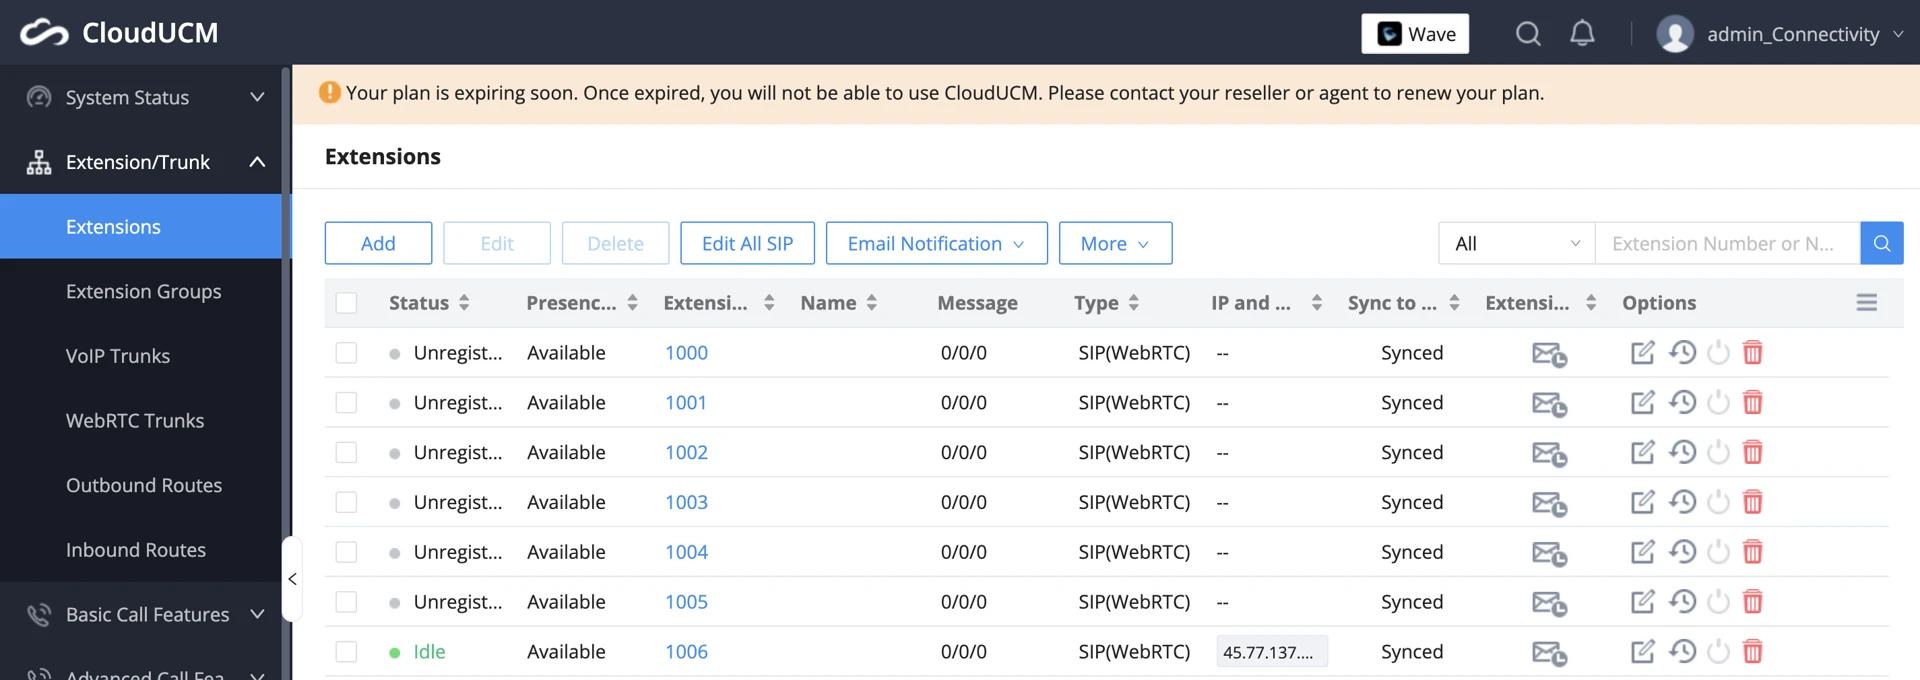
If all details are entered correctly, the extension will be successfully logged in and ready for use. Registration can be confirmed by navigating back to the CloudUCM and opening the Extensions section. A green "Idle" status will indicate successful registration.
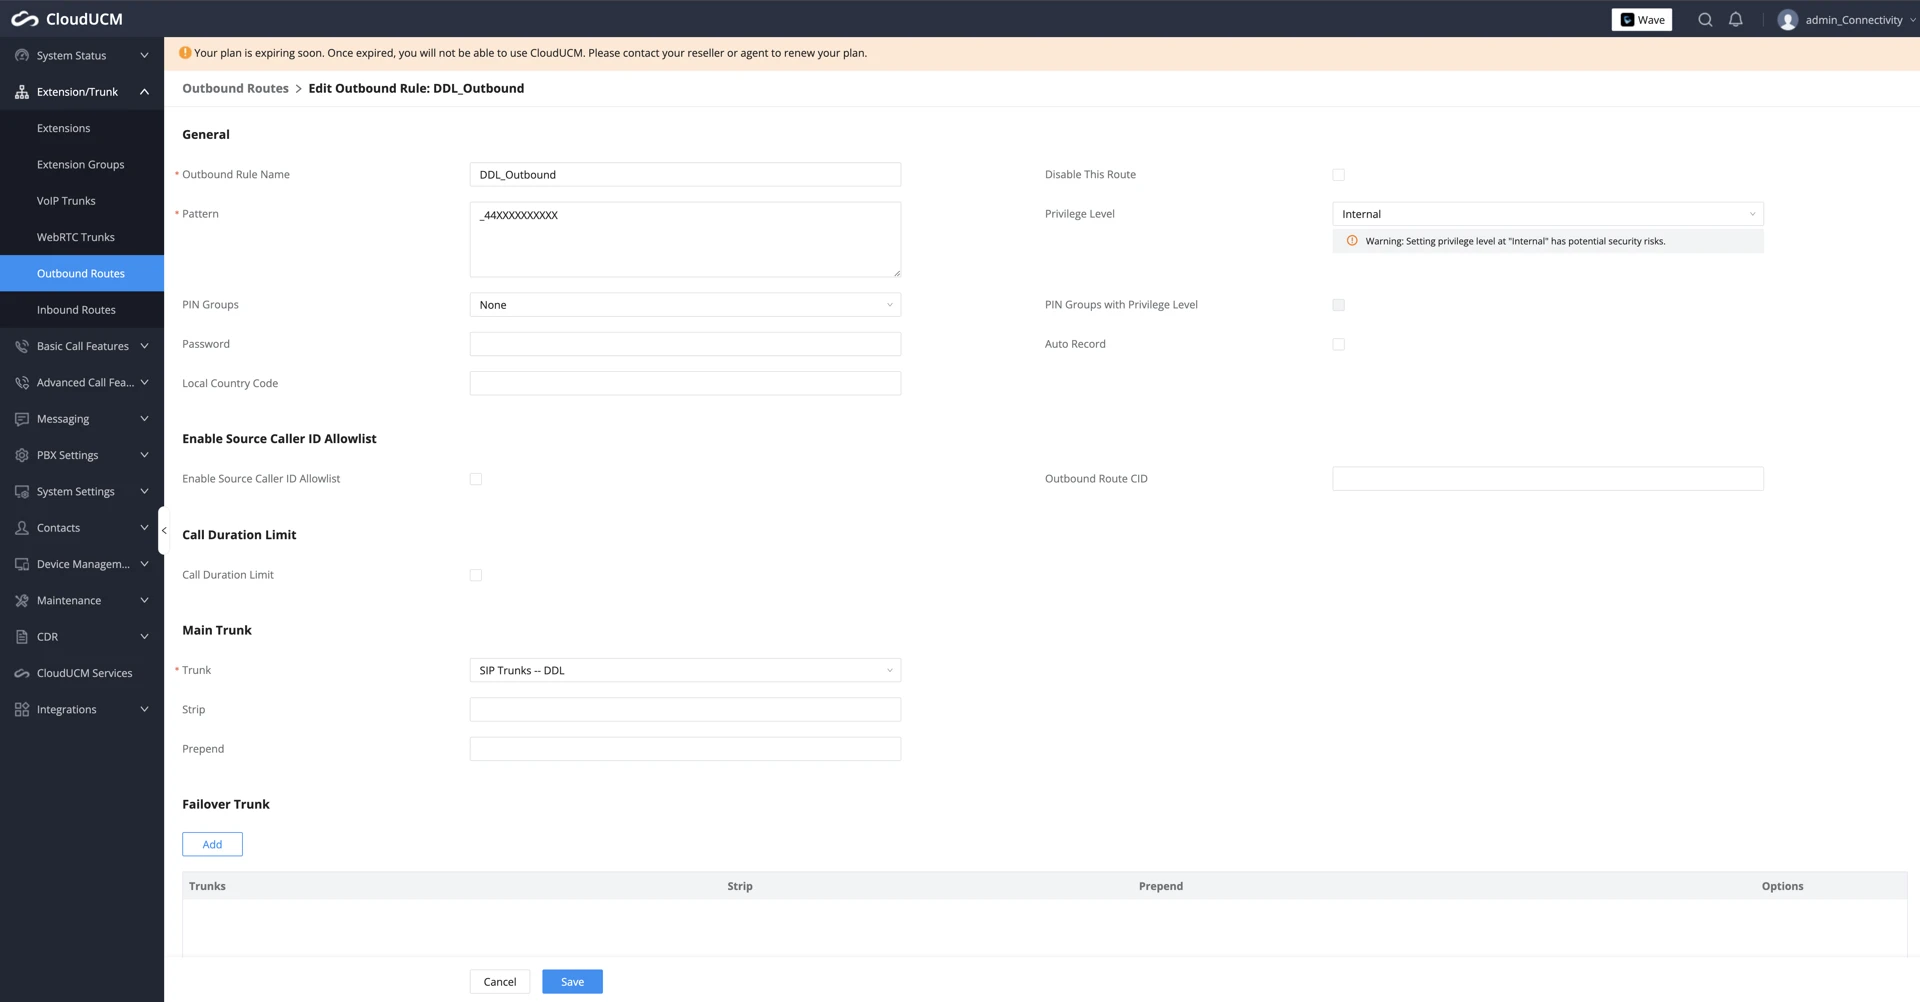
With the Extension ready, the next step is to set up the SIP Trunk. Follow these steps:
- Navigate to Extension/Trunk → Outbound Routes in the left-hand menu.
- Click the Add button to create a new rule.
- Provide a name for your Outbound Rule Name.
- Enter Pattern.
- Choose Main Trunk.
- Choose Privilege Level and Save settings.
The Main Trunk is the default trunk used to route outbound calls; it connects the system to the external supplier through which calls are routed.
The following options are available:
All patterns are prefixed by "" character, but please do not enter more than one "" at the beginning. All patterns can add comments, such as "_pattern /* comment */". In patterns, some characters have special meanings:
- [12345-9] ... Any digit in the brackets. In this example, 1,2,3,4,5,6,7,8,9 are allowed.
- N ... Any digit from 2-9.
- . ... Wildcard, matching one or more characters.
- ! ... Wildcard, matching zero or more characters immediately.
- X ... Any digit from 0-9.
- Z ... Any digit from 1-9.
To make outbound calls, you need to disable Keep Original CID on the VoIP trunks.
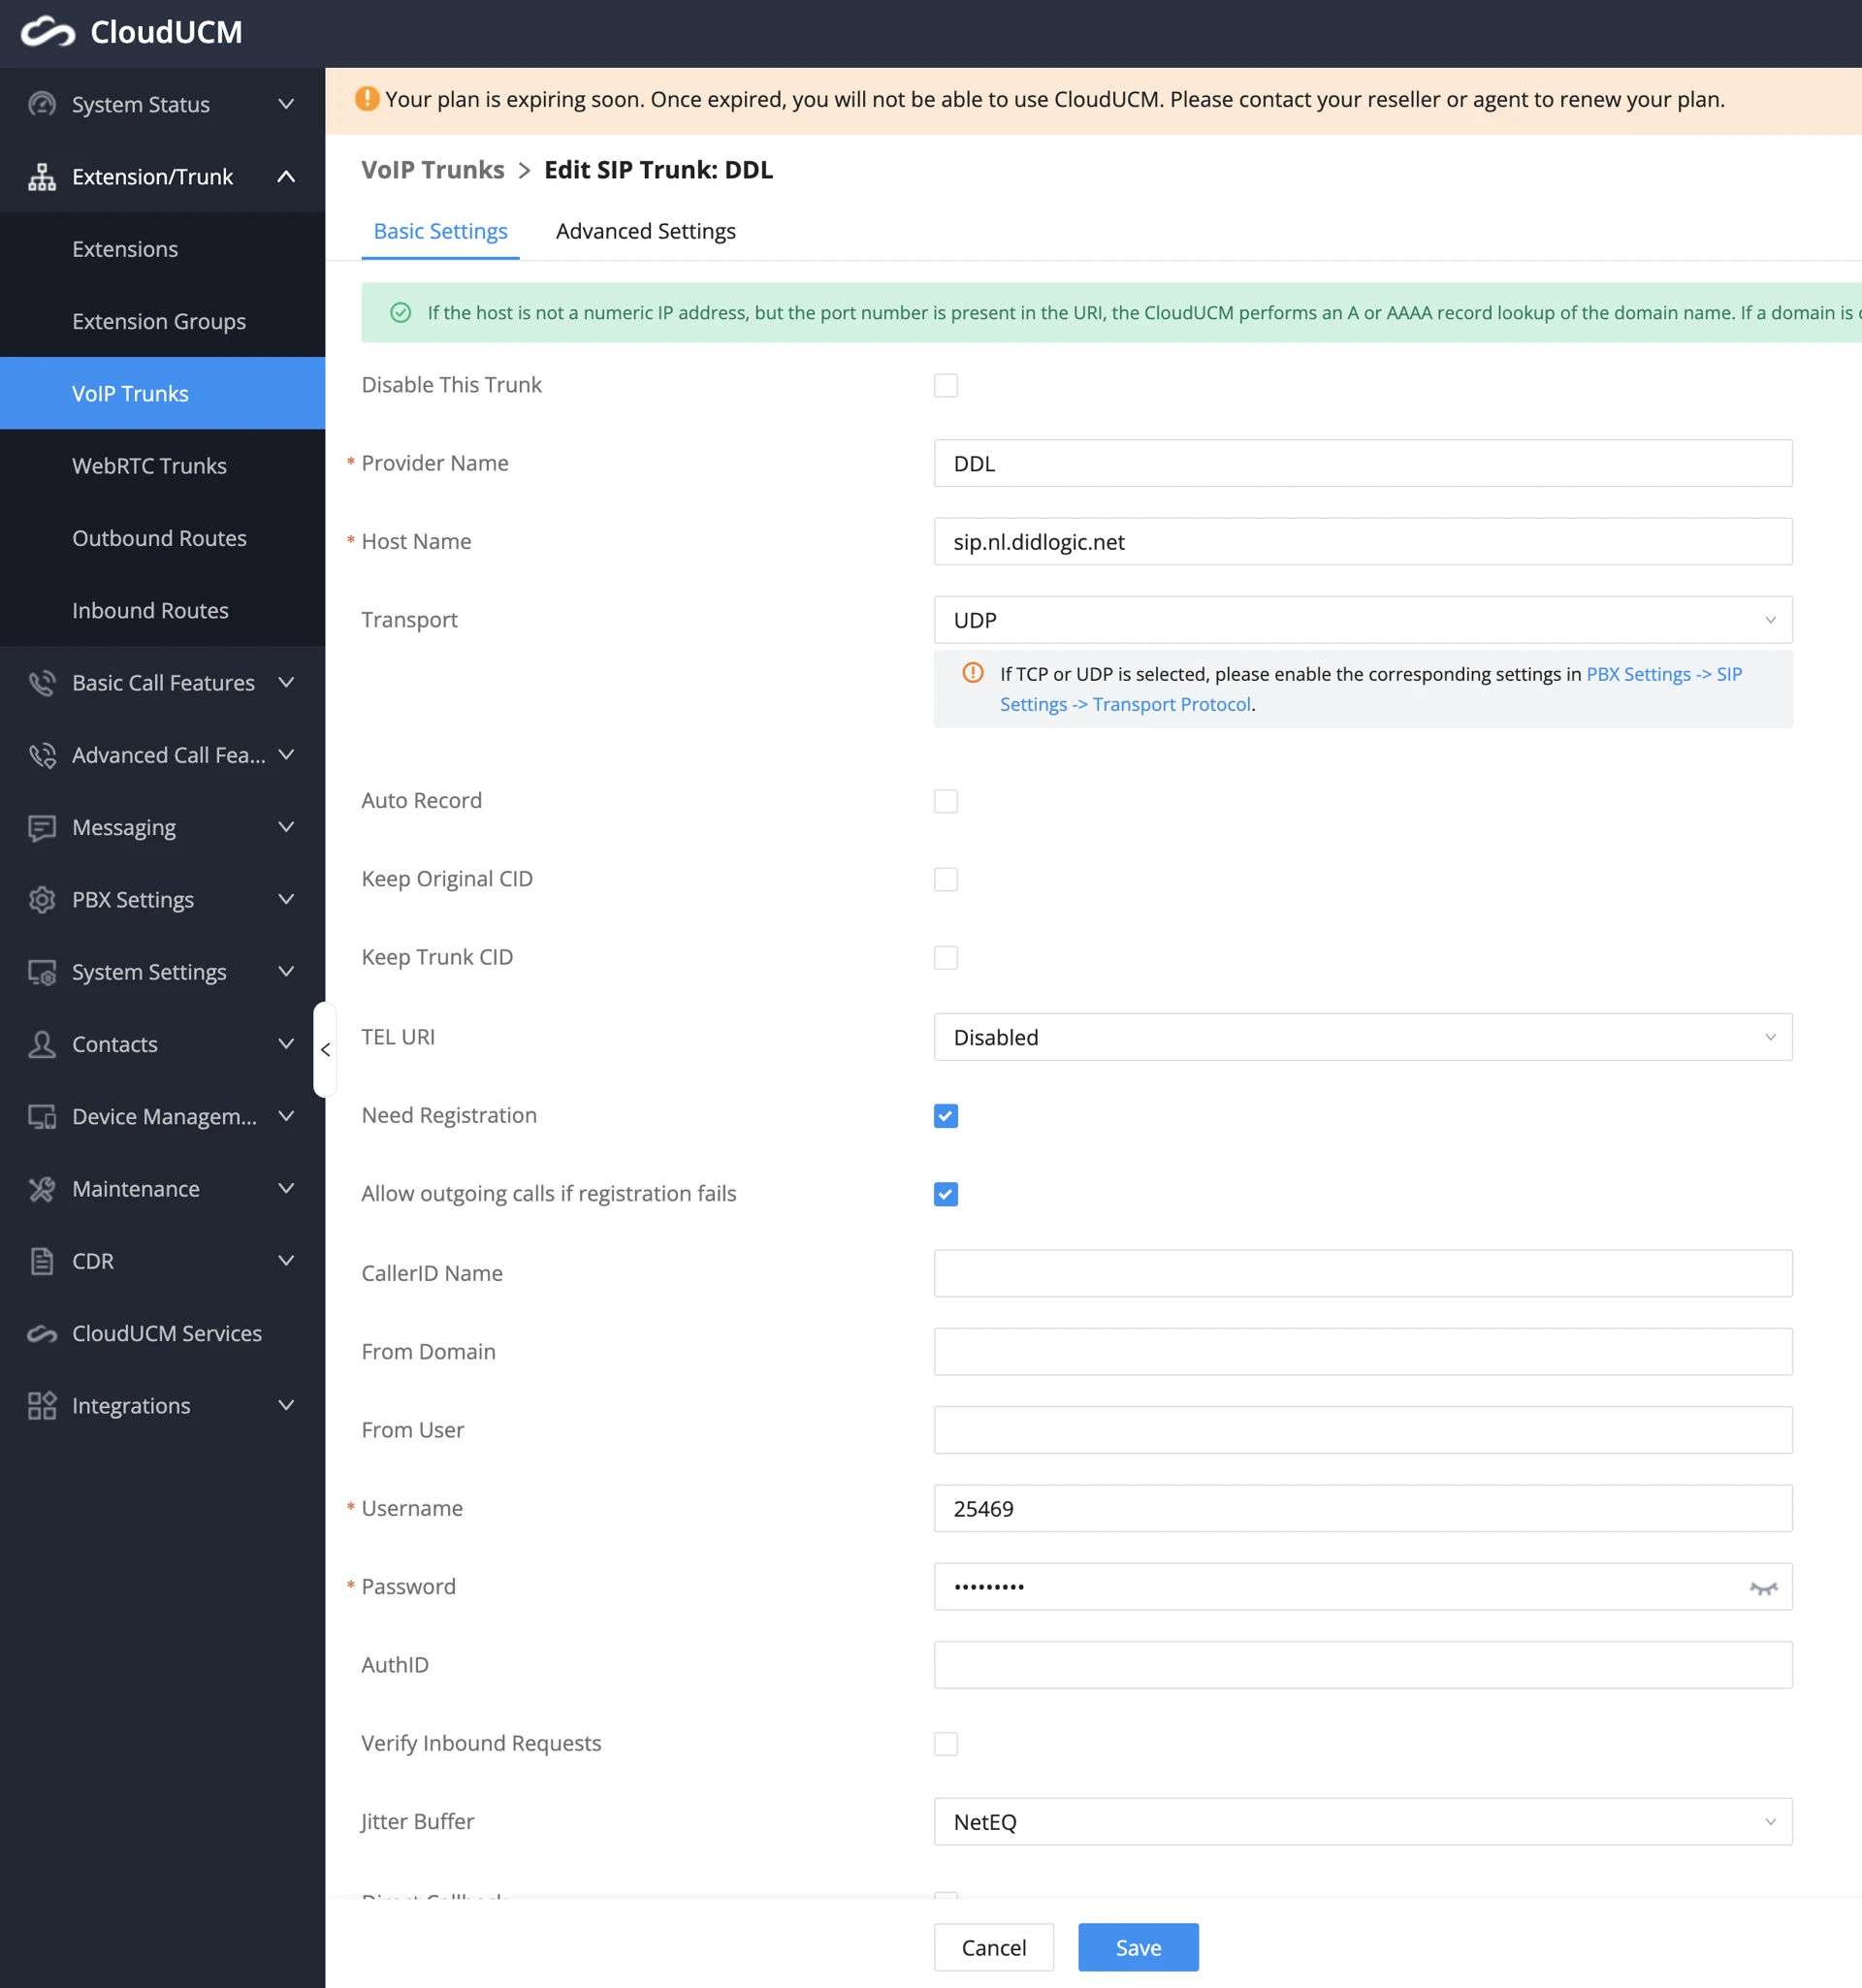
You will be returned to the Trunk dashboard after clicking on the Save button.
Number Format
When making outbound calls through the didlogic trunk, all destination phone numbers must be in the E.164 international format. E.164 numbers can be up to fifteen digits long and are typically structured as: [+][country code][subscriber number with area code]. For example, a US number in E.164 format would be +18312011936. The didlogic platform will reject calls to numbers that do not include a country code.
Below are typical examples of phone numbers incorrectly formatted according to the E.164 international standard:

Configure Inbound Rules
Add an Inbound Rule in CloudUCM
To receive inbound calls, you need to set up Inbound Rules. Follow these steps:
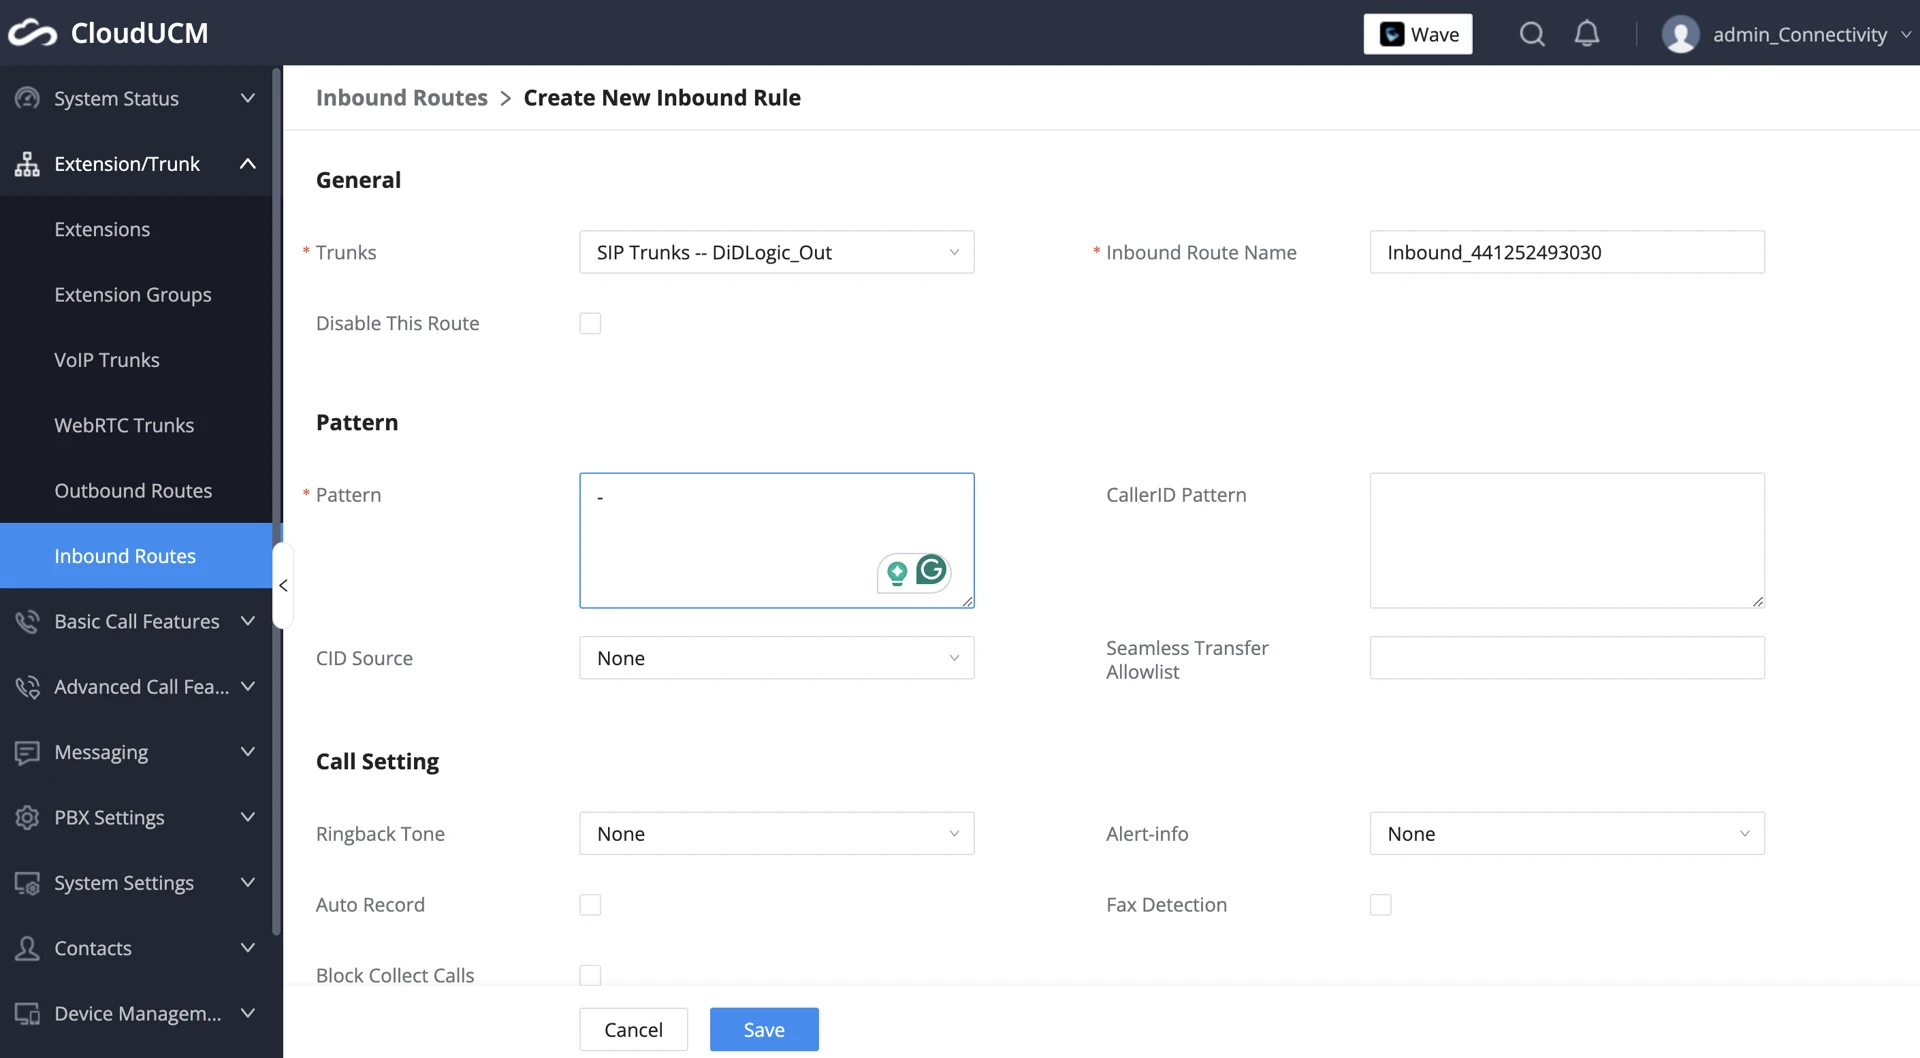
- Navigate to Extension/Trunk → Inbound Rules in the left-hand menu and click the Add button.
- Provide a name for your Inbound Route.
- Click the Choose a Trunk button to select the appropriate trunk.
- Enter Pattern. It will determine which numbers can be called in. Generally, allow any number to call us.
Specify the destination where inbound calls will be routed. In this example, inbound calls are routed to Extension 1006.
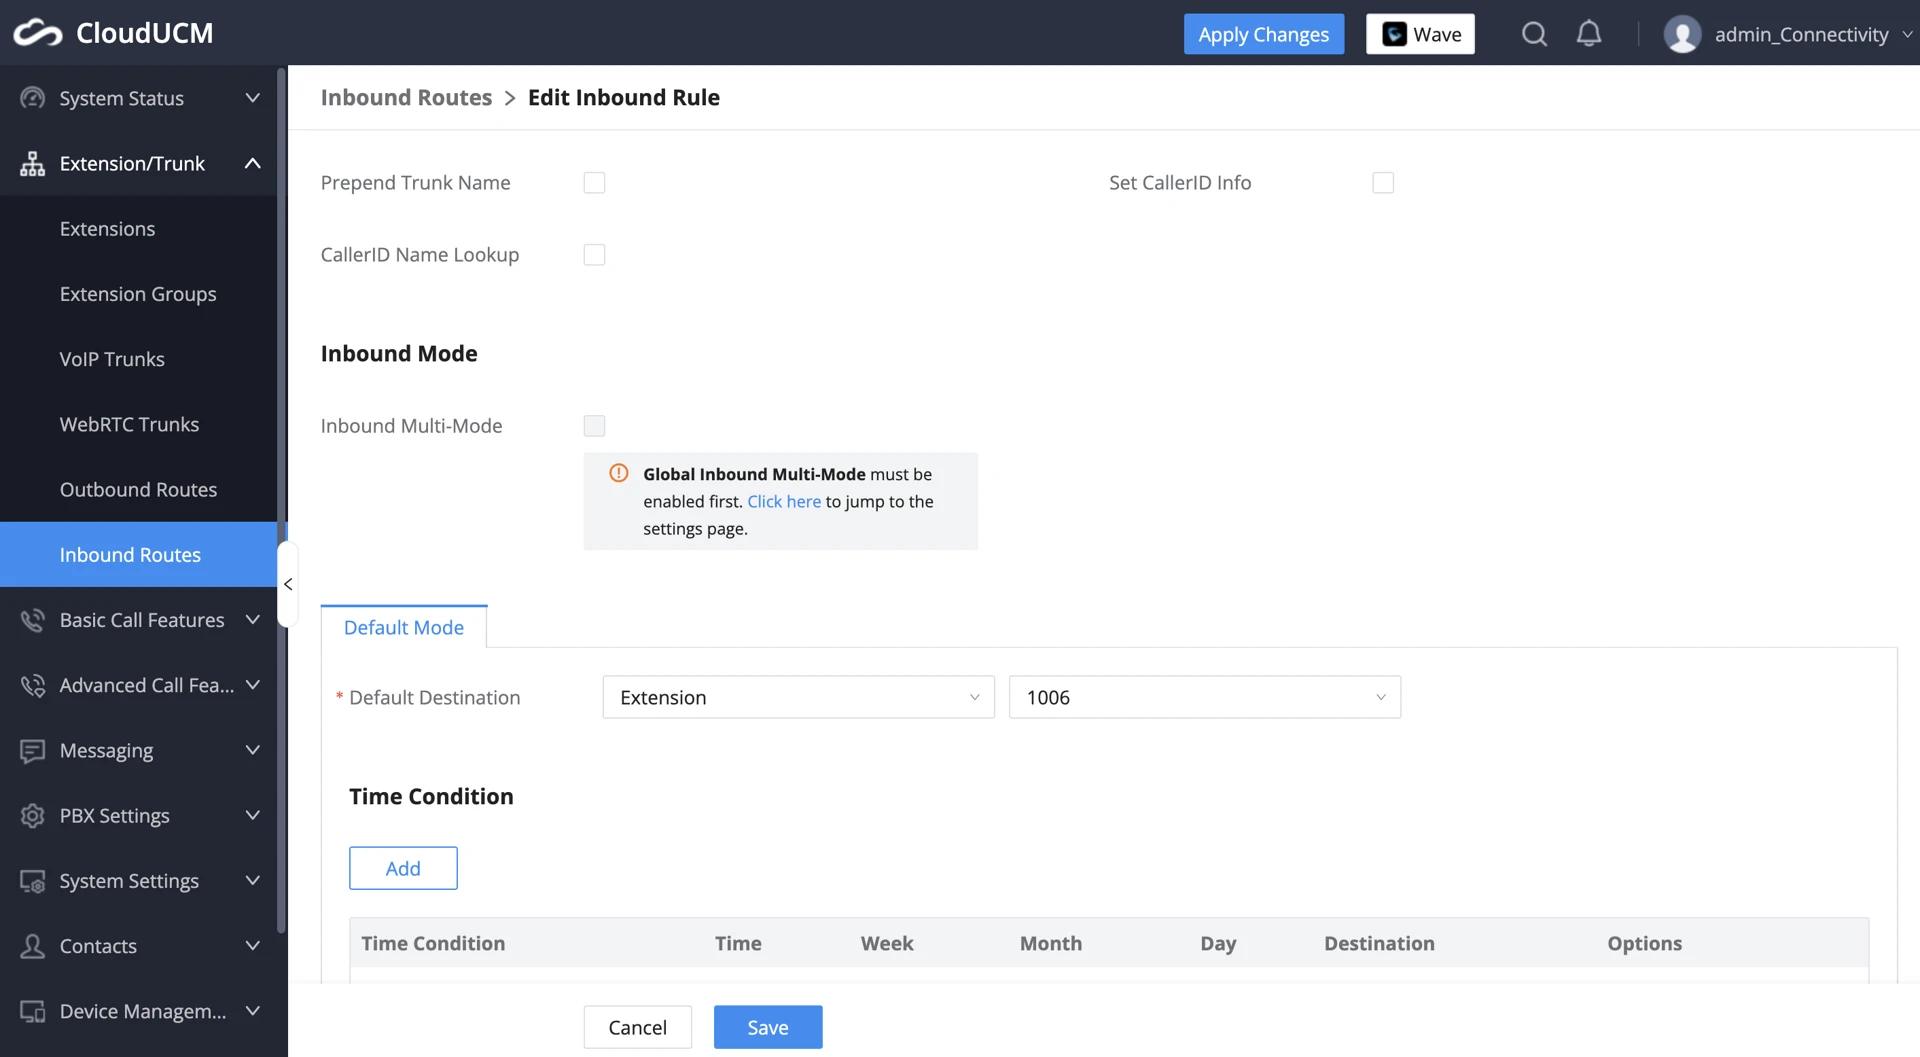
- Save and Apply settings.
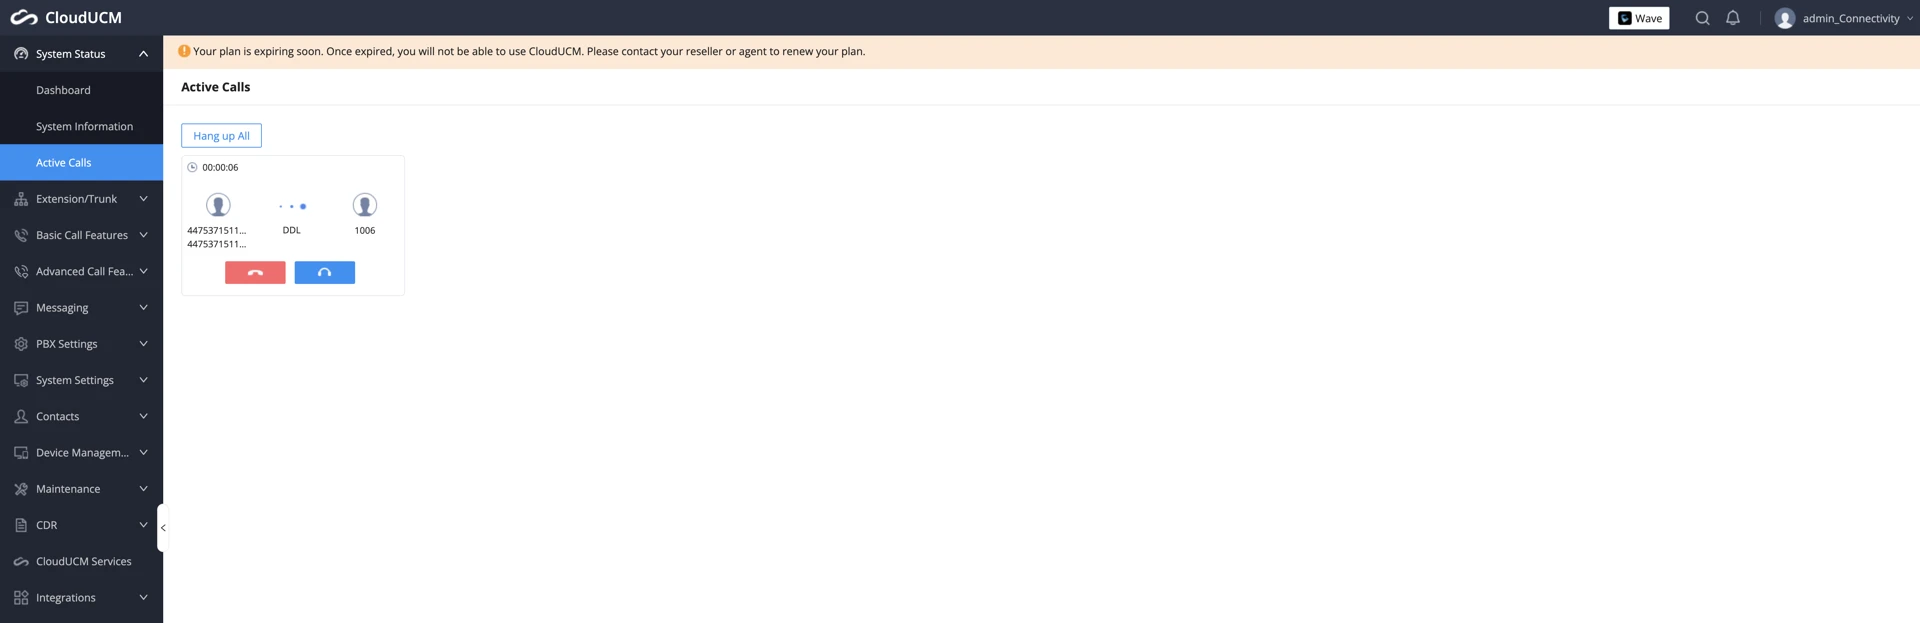
If you would like to monitor test calls, you can navigate to System Status → Active Calls while testing:
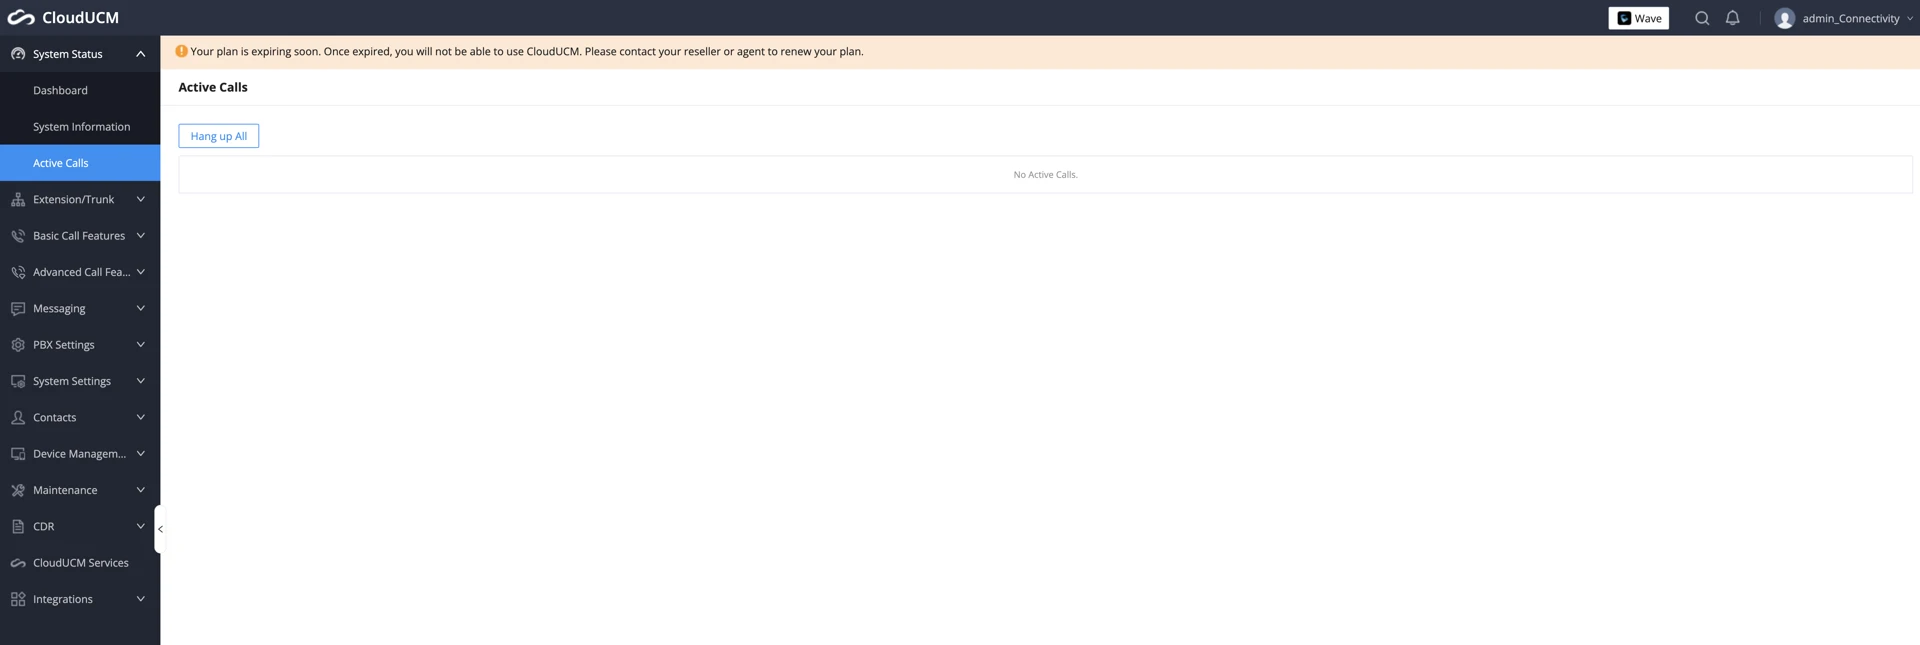
Here you can see that the incoming call was active and ringing from 447537151199 to Extension 1006:
Configure an Inbound Route in didlogic
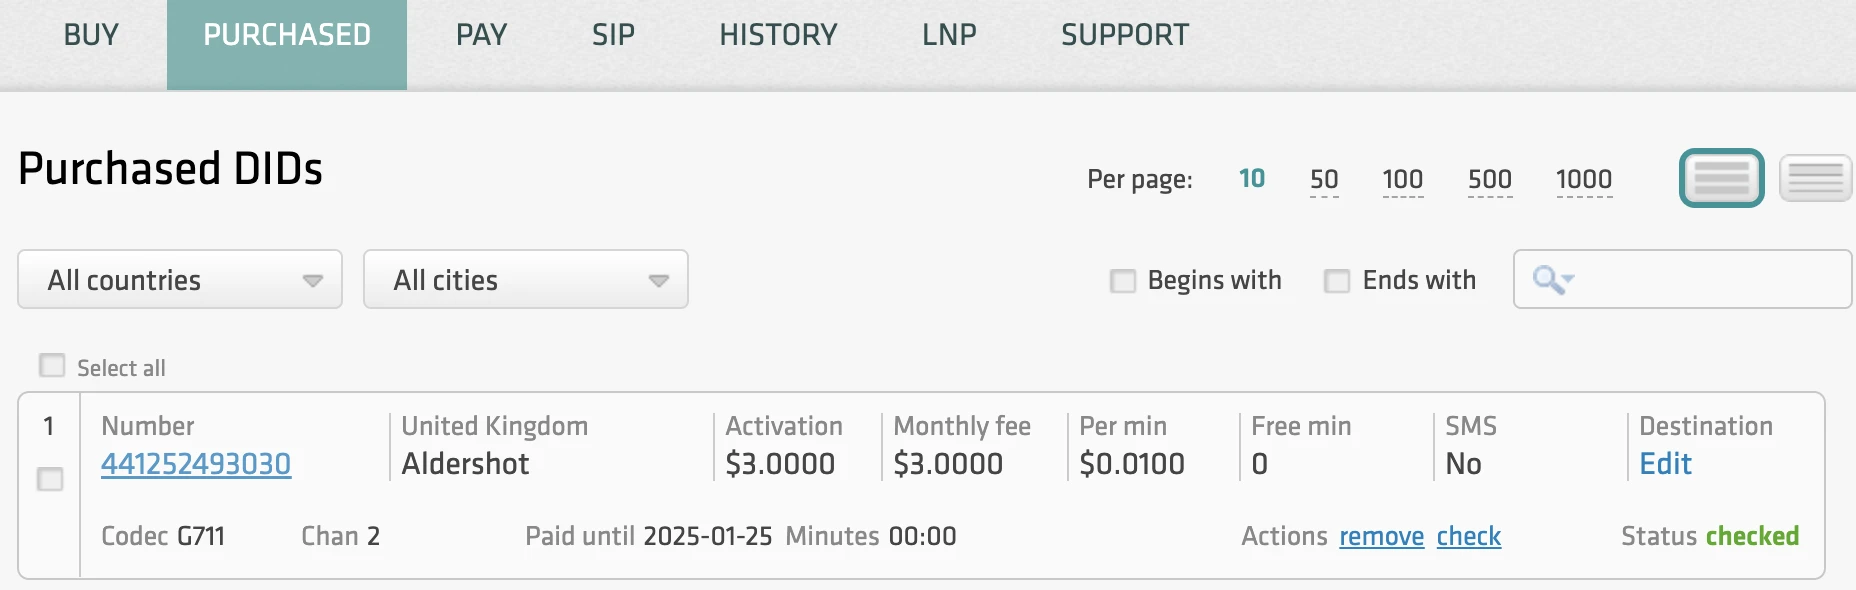
- Log in to your didlogic account and navigate to the PURCHASED tab in the top menu.
- Click Edit under the Destination section.
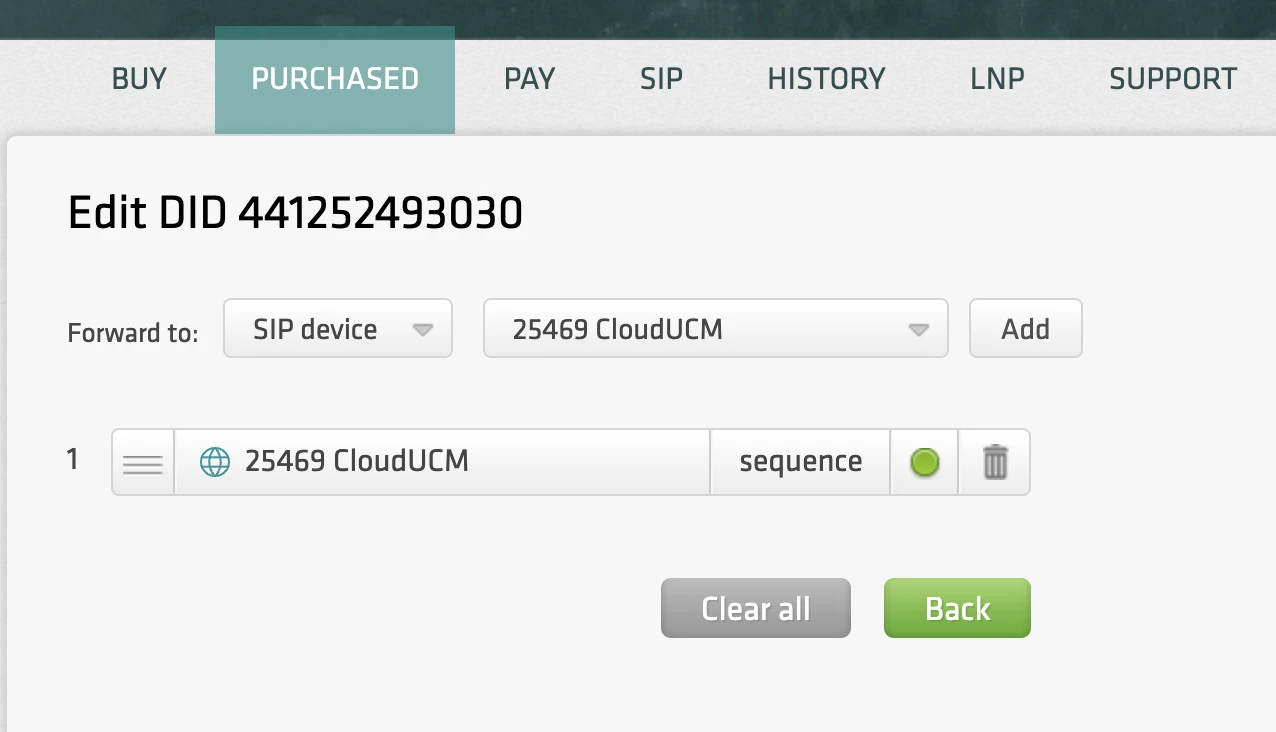
- Select the SIP device and the destination SIP account.
- Click Add to set the destination for the DID.
SIP trunks with IP authentication enabled cannot be used for inbound call routing, as they do not maintain registration with didlogic regional gateways. To set up inbound routing for your numbers, you must use a valid SIP URI address instead.
To do so, select SIP URI as a destination for your number. Enter a valid SIP URI in the following format:
+[did]@FQDN:port;transport=connection, where:
- FQDN is the fully qualified domain name or IP address of your CloudUCM.
- Port is the SIP port used by the UCM.
- A connection can be
udp,tcp, ortls, withudpas the default transport.
For example, if your CloudUCM domain is 070c82.e.myucm.cloud, the static IP is 13.36.64.111, and the PBX uses port 5061 over UDP for communication with the didlogic, the SIP URI can be formatted as follows:
[email protected]:5061;transport=udp[email protected]:5061;transport=udp
Troubleshooting
| Issue | Likely Cause | Solution |
|---|---|---|
| 603 Declined | Registration Failed | Verify that Registration Required is checked and credentials match. |
| 603 Declined | Max Rate Limit | Ensure the destination rate doesn't exceed your account's "Max Rate" setting. If you would like to increase it, please contact [email protected]. |
| No Audio | Firewall/NAT | Ensure UDP ports 10000-20000 are open for RTP traffic. |
| Calls Fail | Wrong Format | Use E.164. Never dial 00 or + unless your ARS handles the conversion. |
| Inbound Calls Don't Come Through | Firewall/NAT or Setup Issue | Make sure IP addresses of didlogic regional gateways are allowed on the firewall. Verify Line Group ID: Ensure the correct Line Group ID is assigned to both the trunk and the route. Use System Monitor in IP Office to see how the call is being presented. This can help you verify the format of the incoming DID and troubleshoot mismatches. |