Bria
This guide outlines the steps to configure Bria to make and receive phone calls using didlogic trunks. Before placing or receiving a call, ensure you have an active phone number and a SIP account created on your didlogic account.
Configure SIP trunk in Bria
Visit the official Bria website and register your personal Bria account. The registration process is simple and only requires your email address.
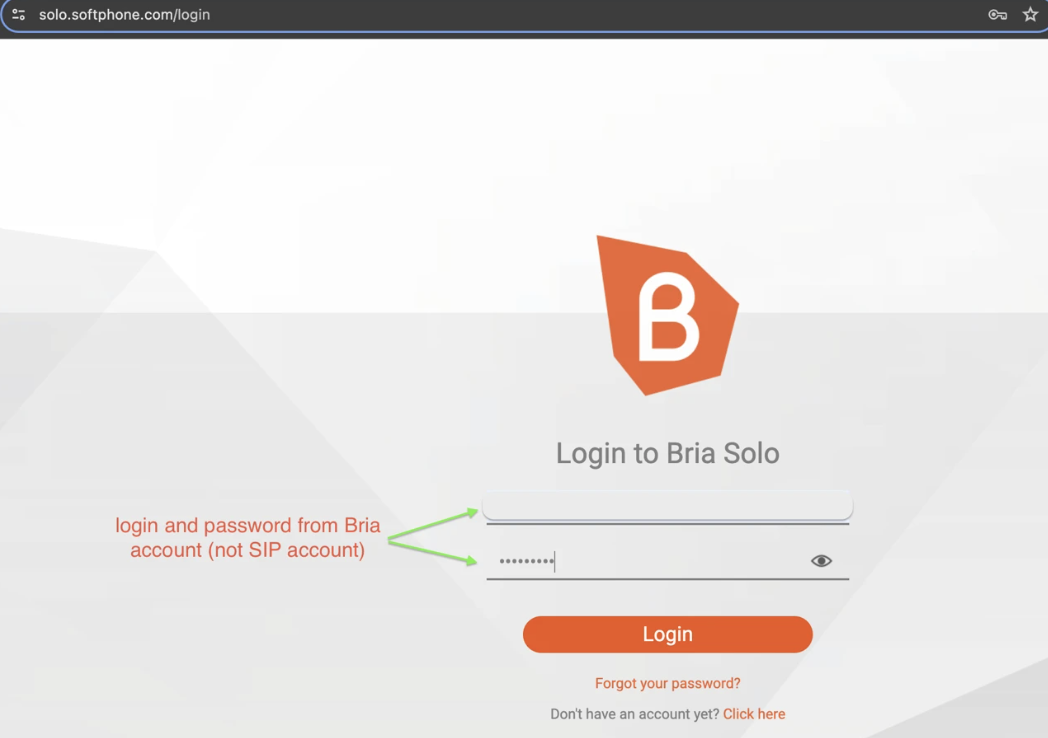 After logging in, go to Settings → Add Voice Configuration → Configure SIP Settings to set up a SIP account.
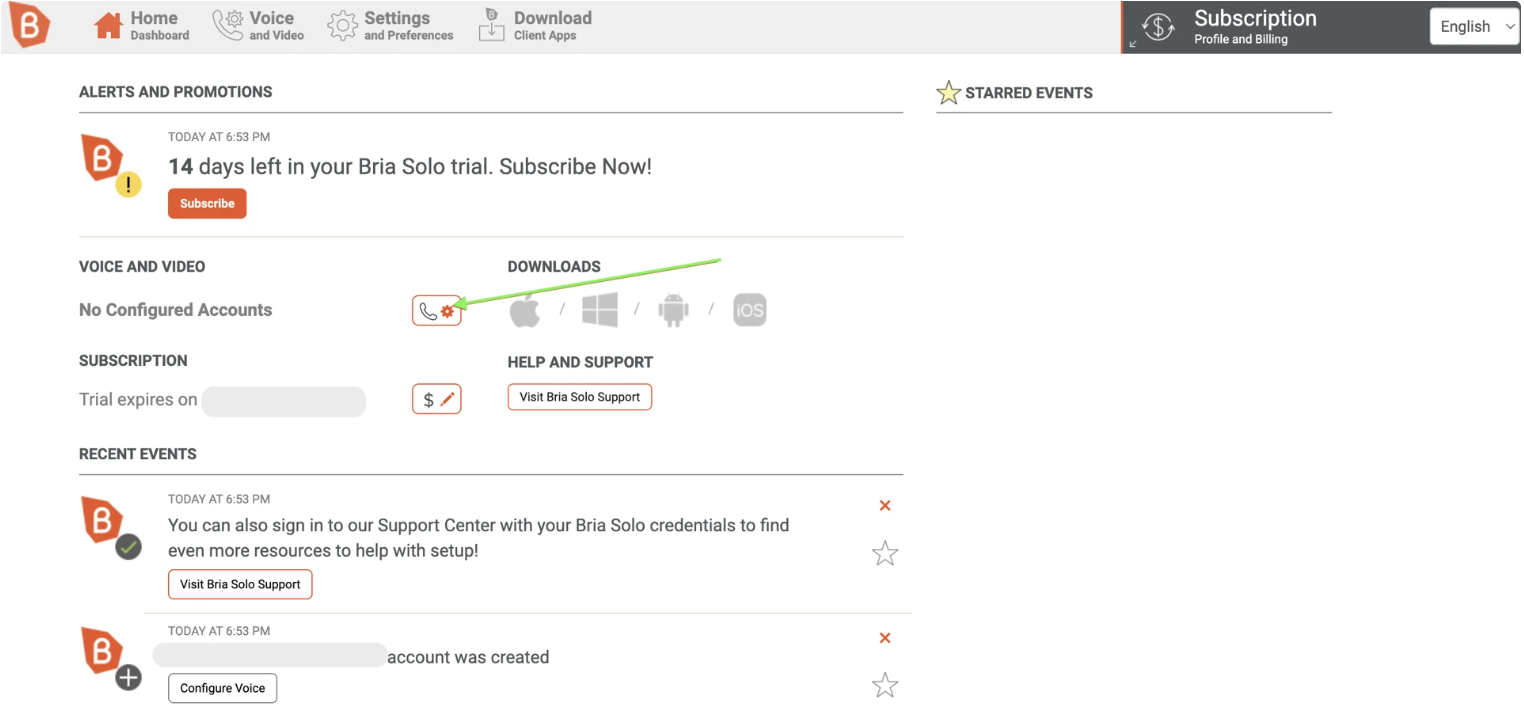
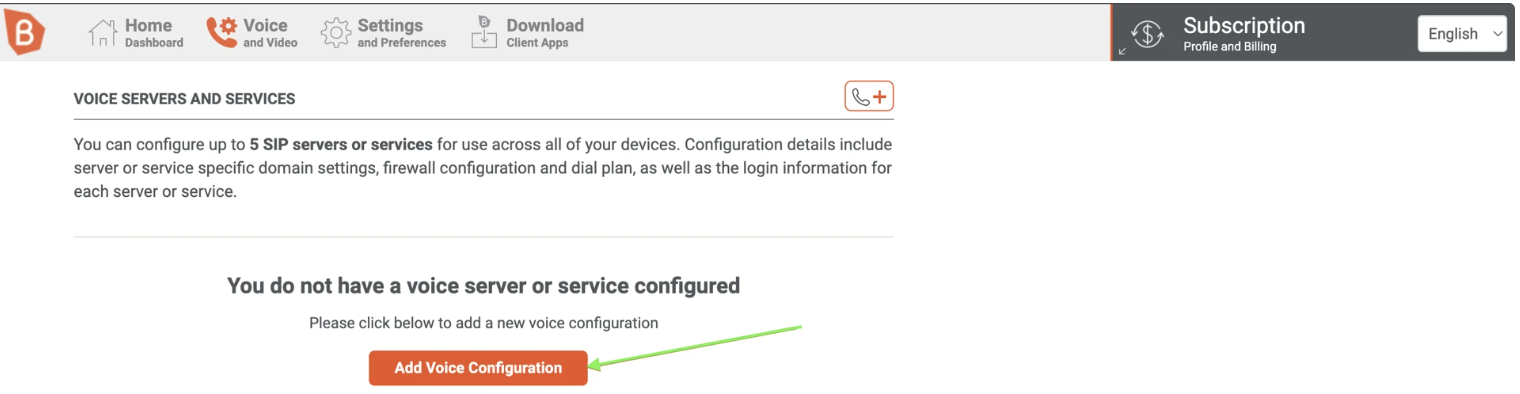
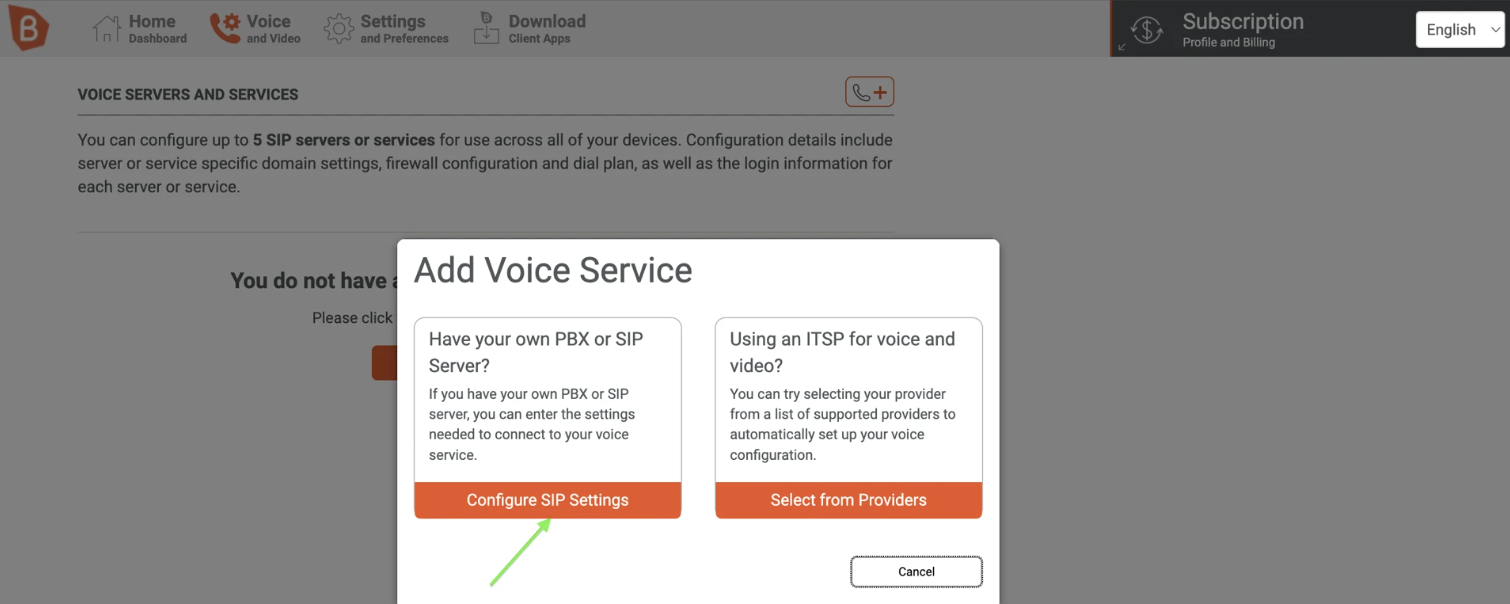
Proceed with the authorization. Fill in the appropriate fields as shown in the screenshots below:
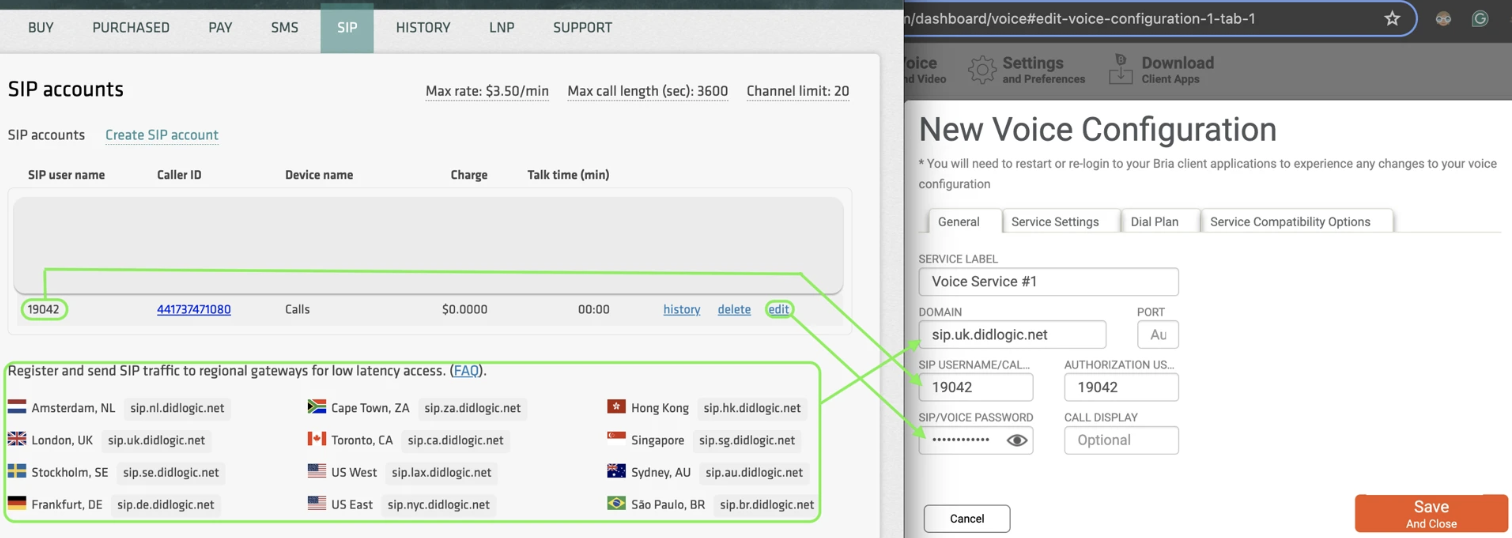
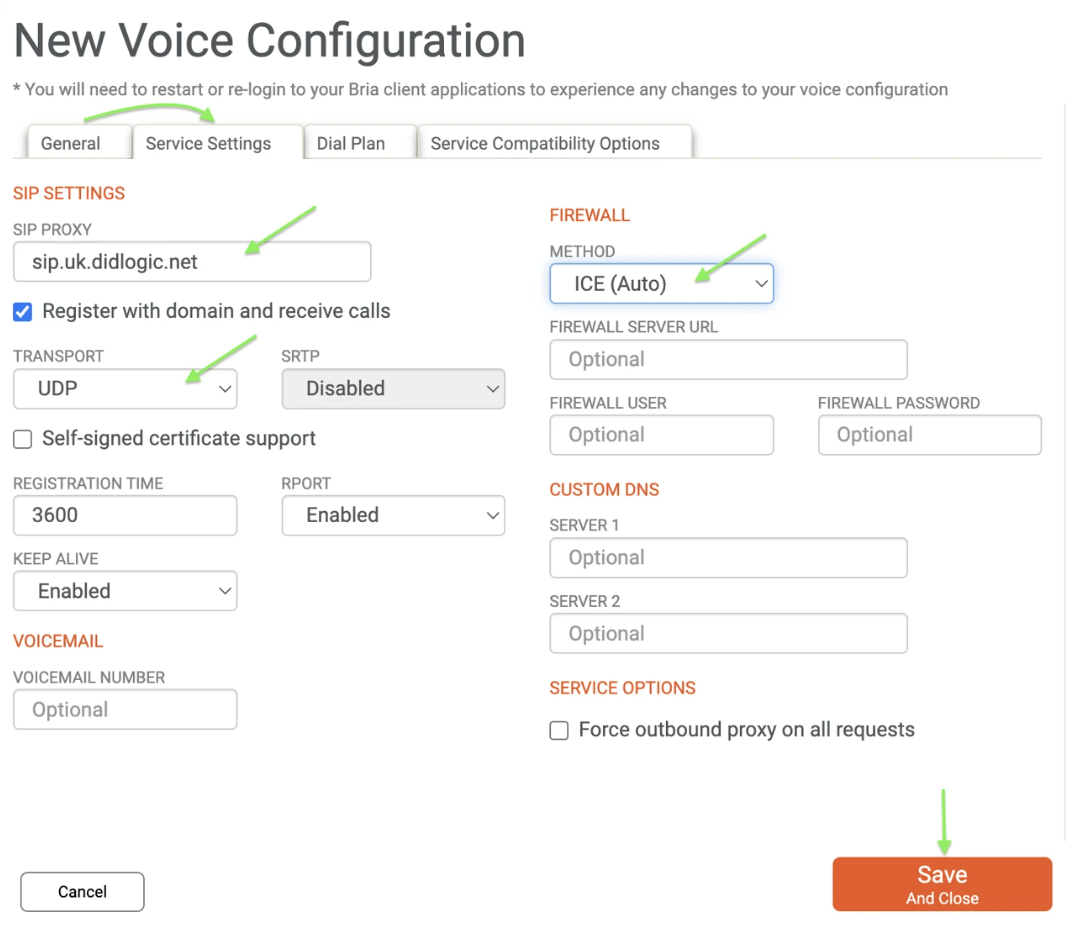
We recommend selecting a SIP proxy with the lowest latency from your public IP address. You can find a full list of our regional gateways here.
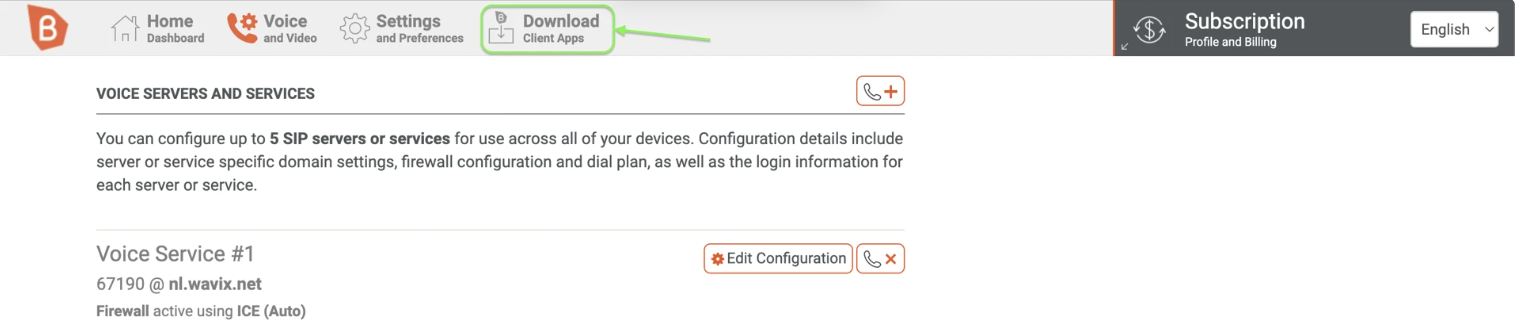
After completing the authorization, download the Bria app.
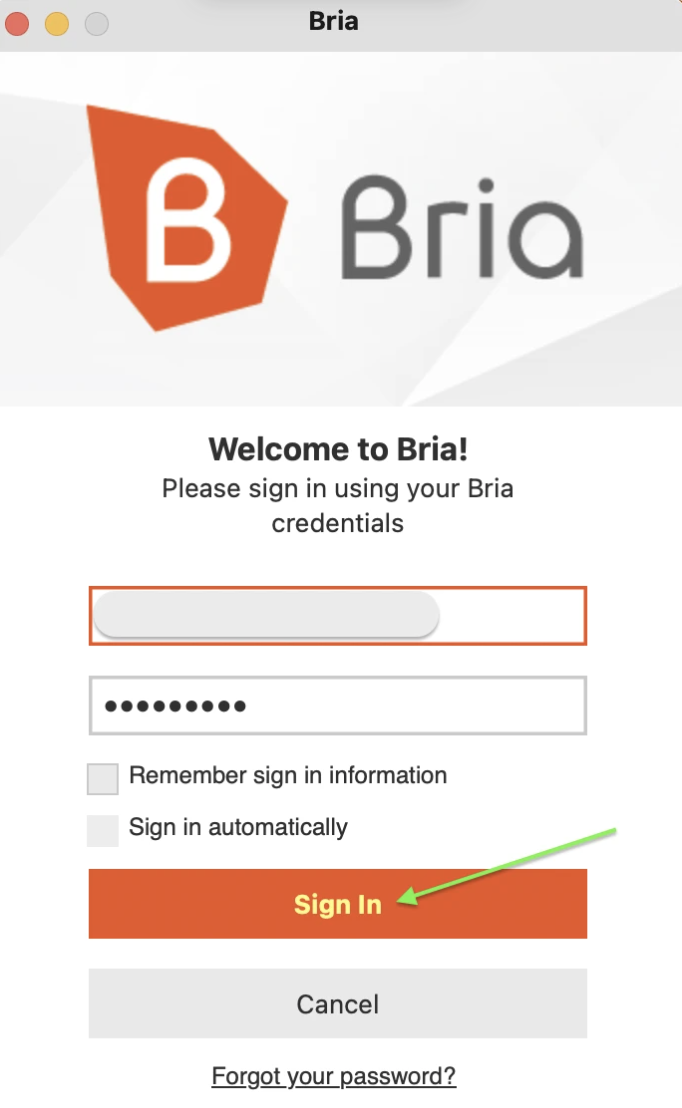
 Open the Bria app and enter your login and password from Bria.
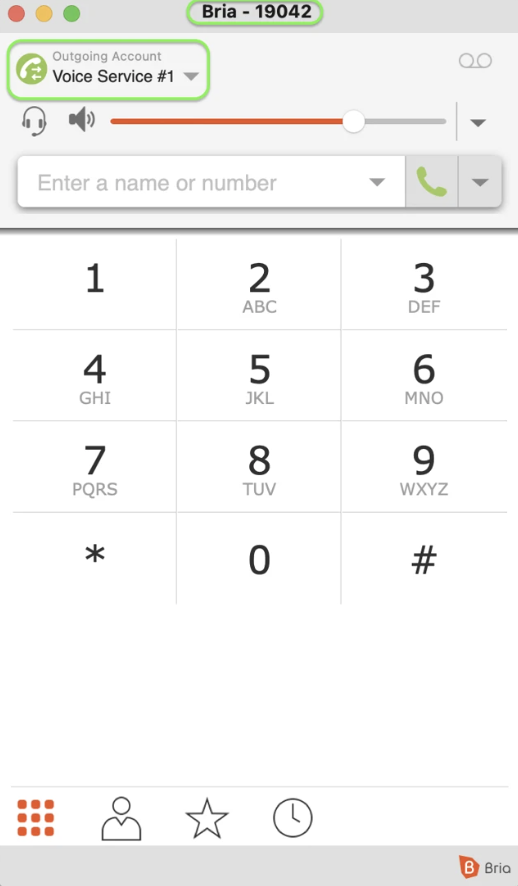
If all was done correctly, you will see a display of the Registered trunk.
Troubleshooting
| Issue | Likely Cause | Solution |
|---|---|---|
| 603 Declined | Registration Failed | Verify that Registration Required is checked and credentials match. |
| 603 Declined | Max Rate Limit | Ensure the destination rate doesn't exceed your account's "Max Rate" setting. If you would like to increase it, please contact [email protected]. |
| No Audio | Firewall/NAT | Ensure UDP ports 10000-20000 are open for RTP traffic. |
| Calls Fail | Wrong Format | Use E.164. Never dial 00 or + unless your ARS handles the conversion. |
| Inbound Calls Don't Come Through | Firewall/NAT or Setup Issue | Make sure IP addresses of didlogic regional gateways are allowed on the firewall. Verify Line Group ID: Ensure the correct Line Group ID is assigned to both the trunk and the route. Use System Monitor in IP Office to see how the call is being presented. This can help you verify the format of the incoming DID and troubleshoot mismatches. |