Vapi
This guide provides technical instructions for integrating the Vapi AI platform with didlogic. By establishing a SIP trunk, you can route inbound and outbound calls between your didlogic numbers and Vapi's AI assistants.
SIP Trunk Configuration
First, you must create a "BYO SIP Trunk" within Vapi to use didlogic as your telephony provider.
-
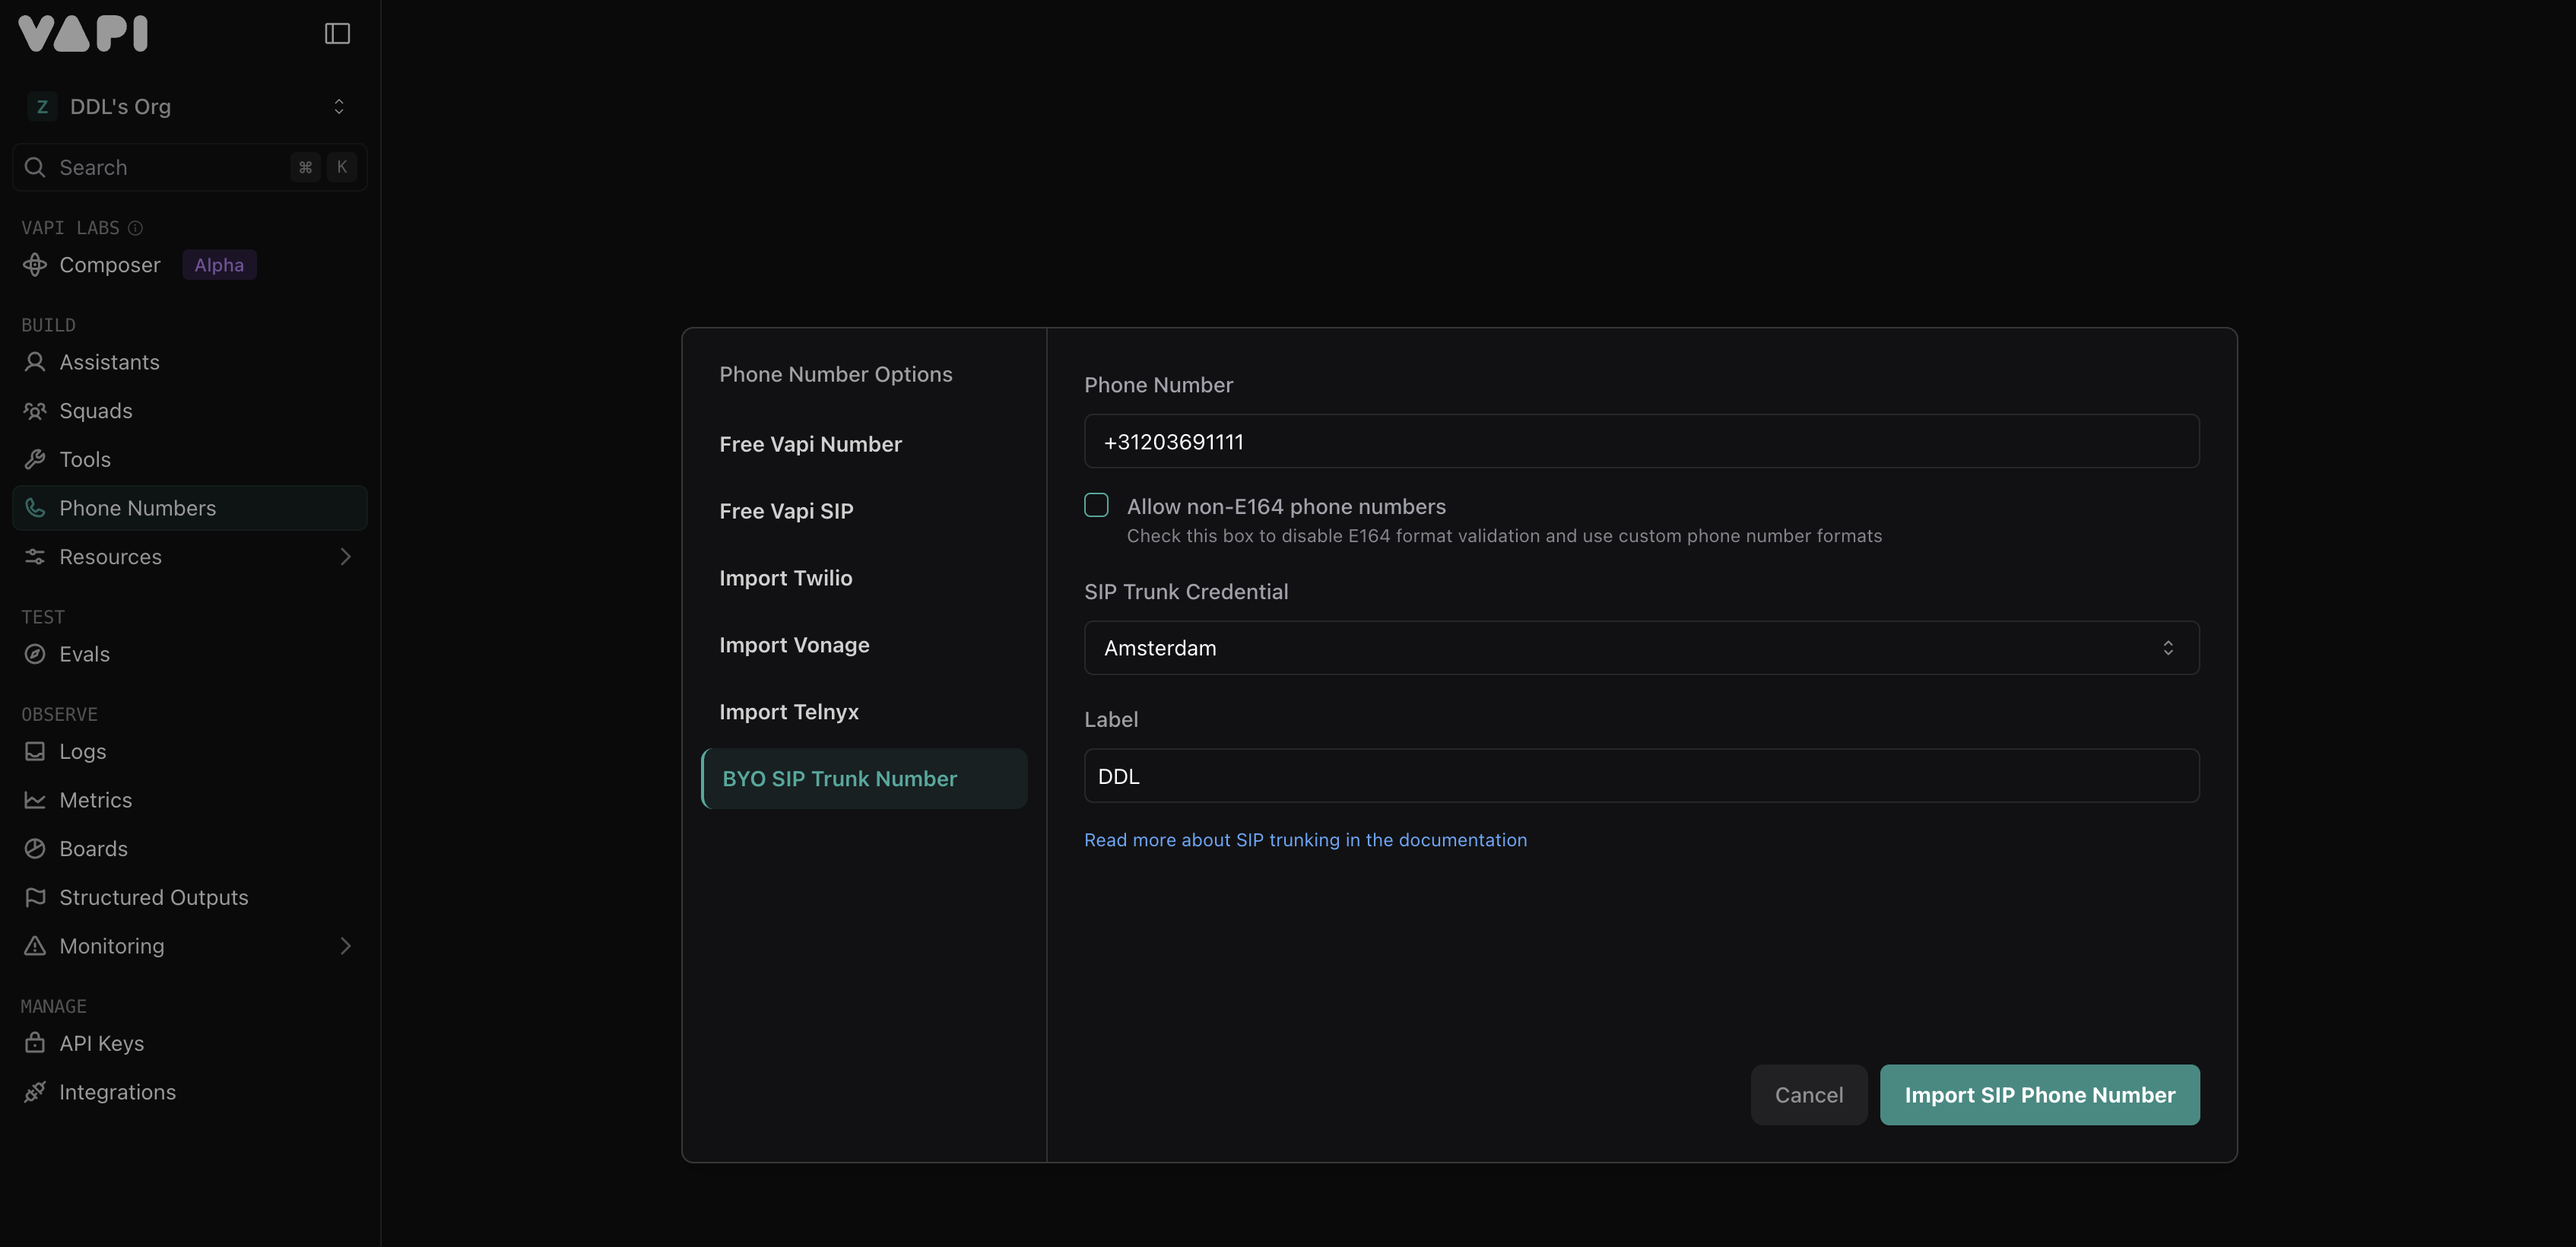
Go to the Phone Numbers section.
-
Click Create Phone Number → BYO SIP Trunk Number.
-
Select SIP Trunk Credential → Create SIP Trunk
-
You will be redirected to the Integrations page. Scroll to Phone Number Providers and select SIP Trunk → Configure New SIP Trunk.
-
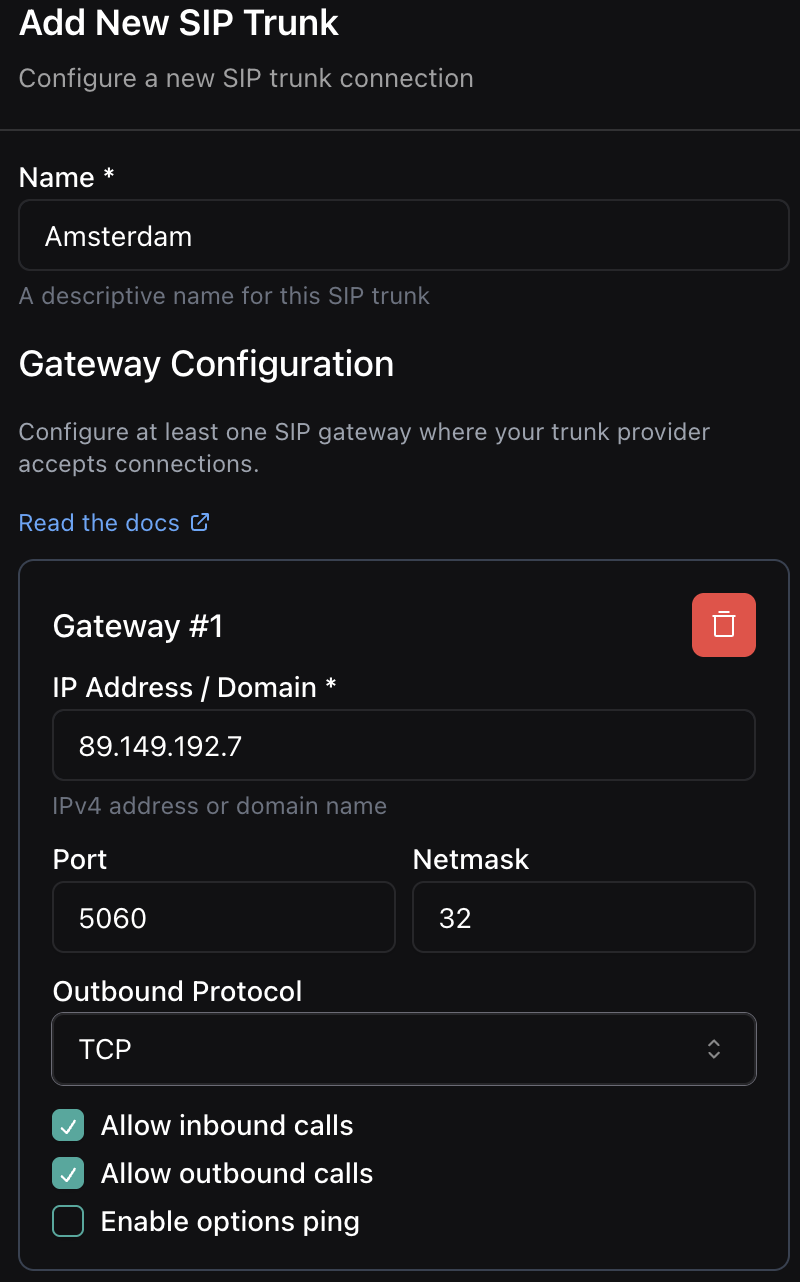
Enter the following configuration:
- Name: Label for the trunk.
- IP Address / Domain: Use a didlogic proxy (e.g.,
sip.nl.didlogic.net). - Outbound Protocol: Select TCP, UDP, or TLS.\n
-
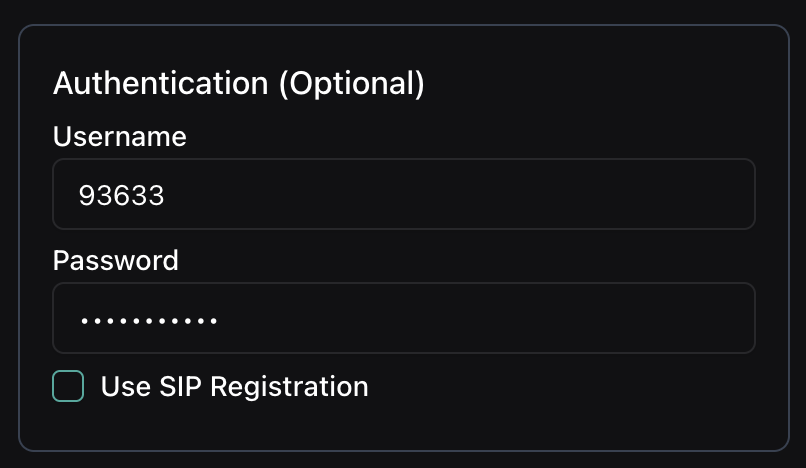
In the Authentication (Optional) window:
- Username: Your 5-digit SIP login from didlogic.
- Password: Your SIP account password.\n
-
Click Save SIP Trunk.
-
Return to Phone Numbers, select your newly created trunk, enter your phone number, and click Import SIP Phone Number.
Creating and Configuring the AI Agent
Once your phone number has been successfully imported, the next step is to create and configure the AI agent that will handle the calls.
To ensure access to the most up-to-date and detailed information, we recommend using the official Vapi documentation.
Once you have created the agent, assign it to the phone number by navigating to Phone Numbers and selecting your agent for both inbound and/or outbound calls. After you have assigned the agent, press Save.
Inbound Routing
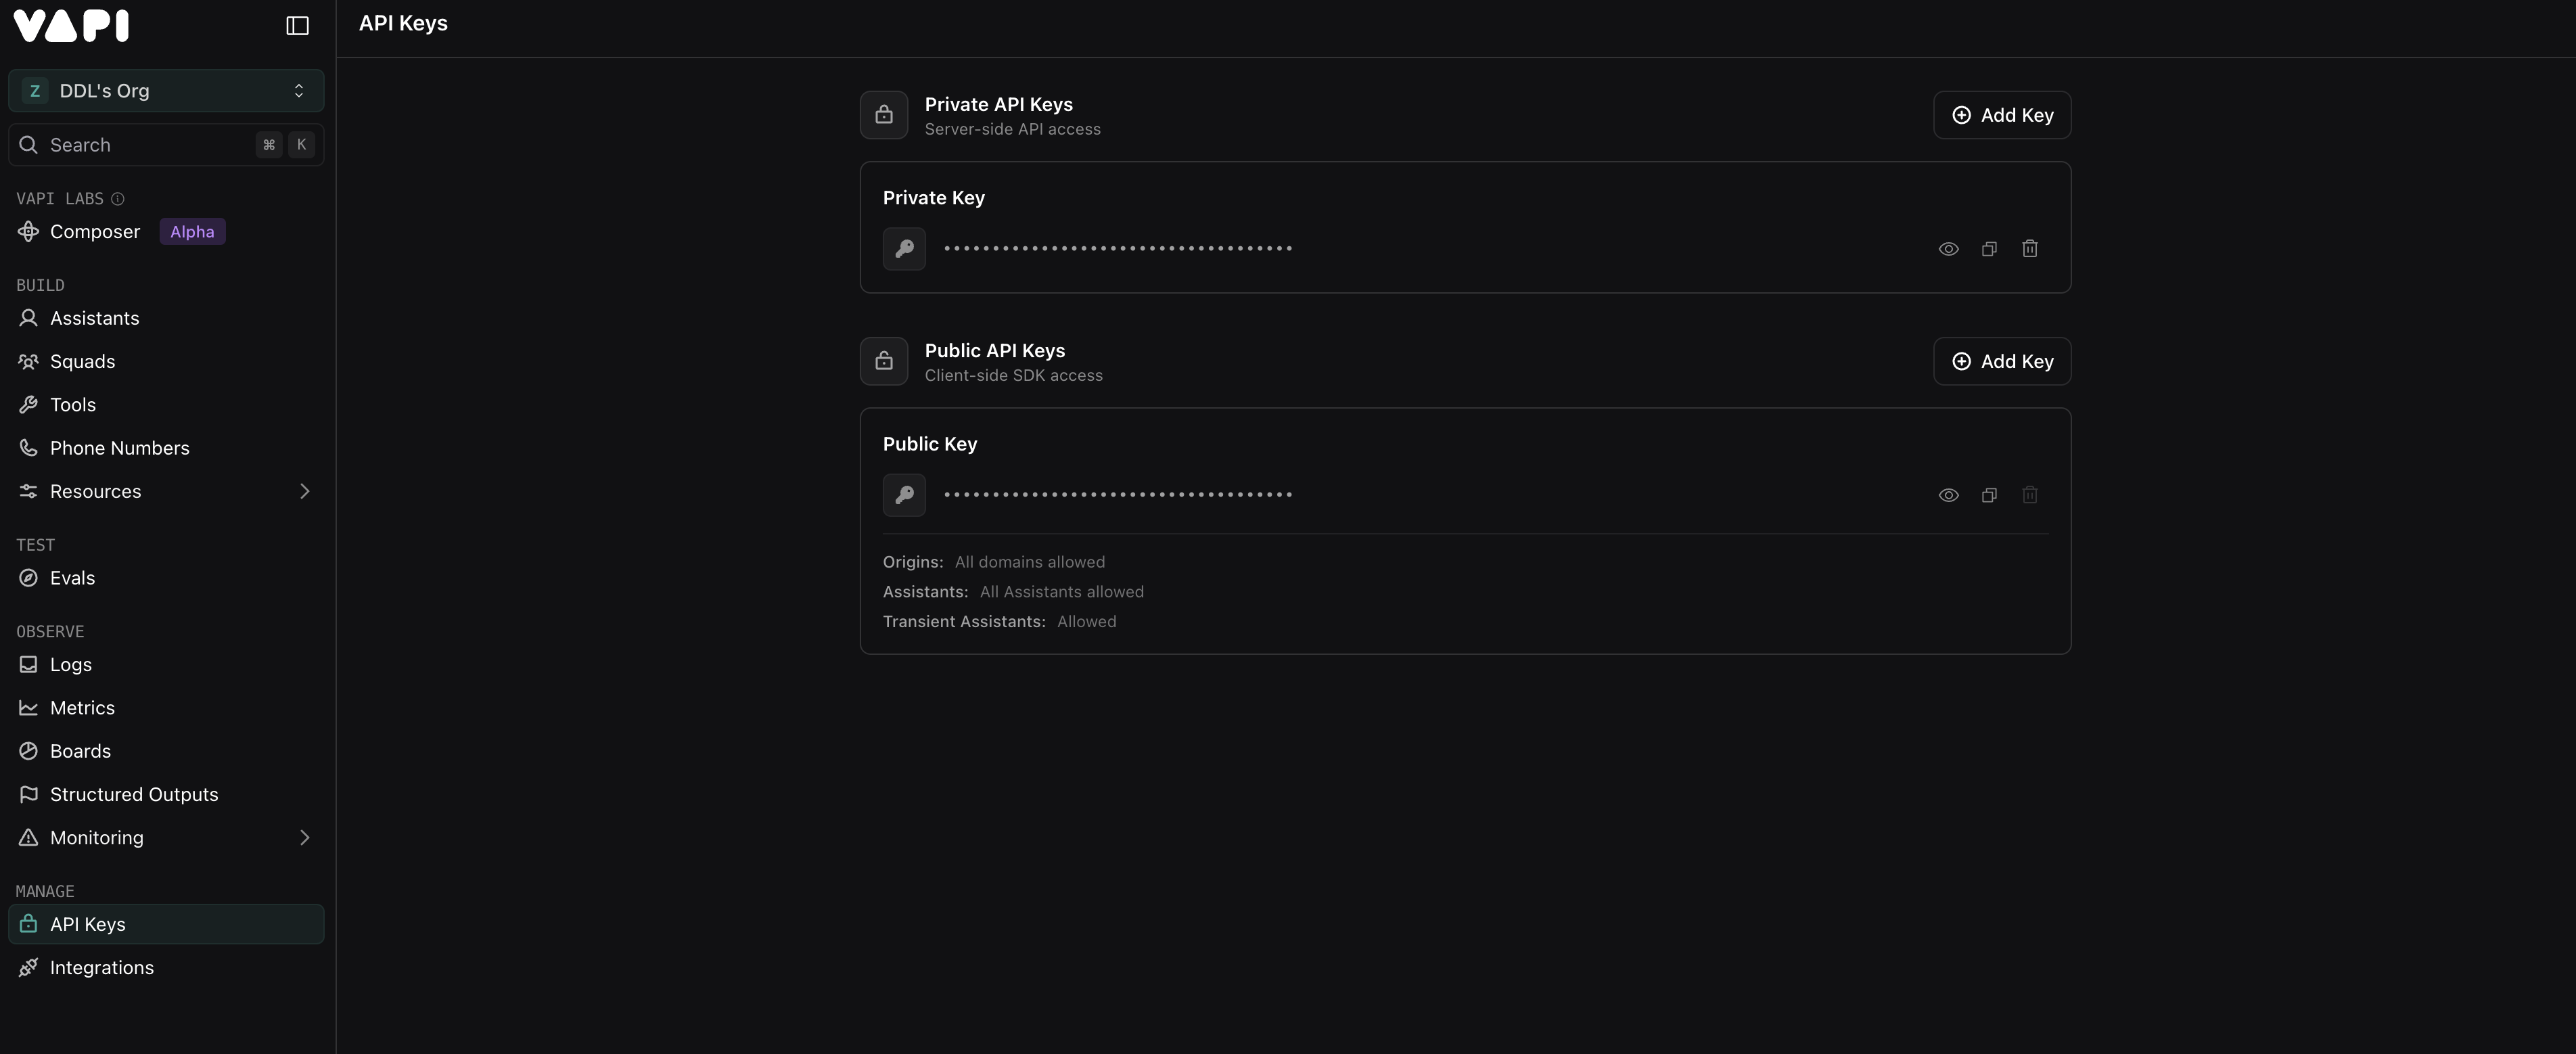
To route incoming calls to your Vapi agent, you must configure a specific SIP URI that includes your Vapi Private Key.
-
Locate API keys on the sidebar and copy your Private Key.
-
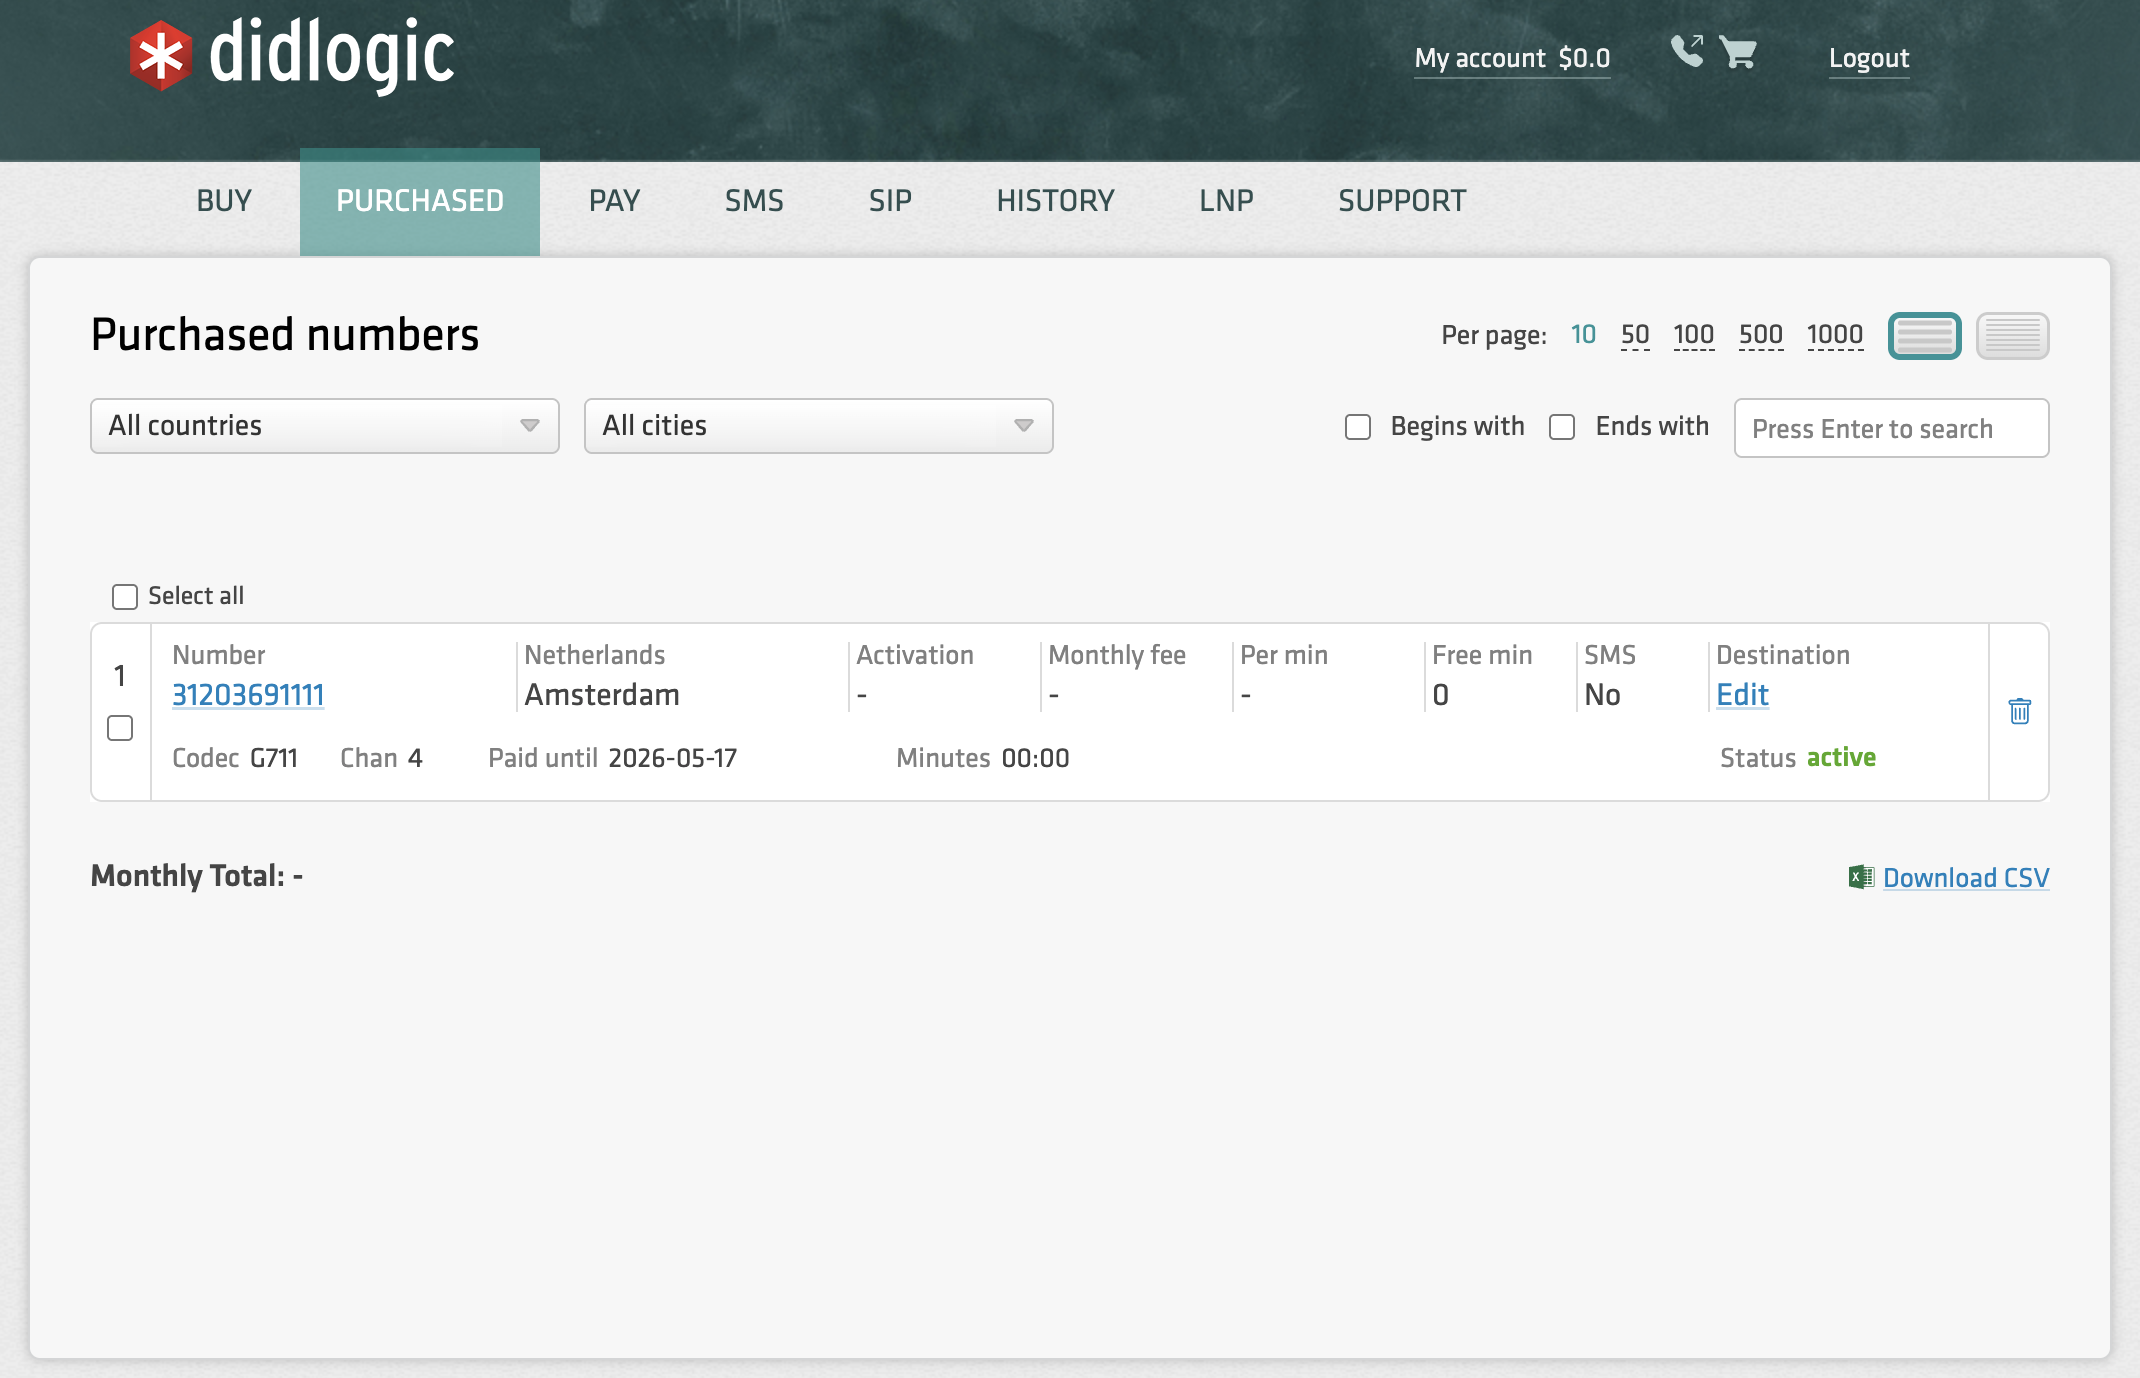
Navigate to your numbers on the didlogic portal, locate which one you wish to integrate with Vapi, and click Edit.
-
In the Forward to dropdown, select SIP URI and enter the destination in the following format:
[YourPhoneNumber]@[VapiPrivateKey].sip.vapi.ai- Example:
[email protected]
- Example:
-
Click Add, and it should appear below. Ensure this destination is at the top of the list if you already have other destinations configured.

Oubound Calling
Once a phone number is configured and assigned to an AI agent, the agent can initiate outbound calls. You can monitor your entire call history in the Call Logs tab in the sidebar.
-
Manual Calls: In the Phone Numbers section, navigate to the Outbound Calls window, enter the number, and click Make a Call.
-
Batch Campaigns: Select Call Many Numbers (Upload CSV) within the Outbound window to schedule high-volume outreach.
-
API Triggered: You can initiate calls programmatically via the Vapi API.
SIP REFER (Human Hand-off)
To enable the "Transfer to Human" feature, you must create a specific tool in Vapi.
SIP REFER must be activated for your didlogic account. Please contact your account manager to enable SIP REFER before proceeding with the configuration.
-
Select Tools on the sidebar and click Create tool.
-
Choose the Transfer Call category.
-
Navigate to Destinations → Add destination → Phone Number.

-
Enter the target phone number and an optional message for the customer.
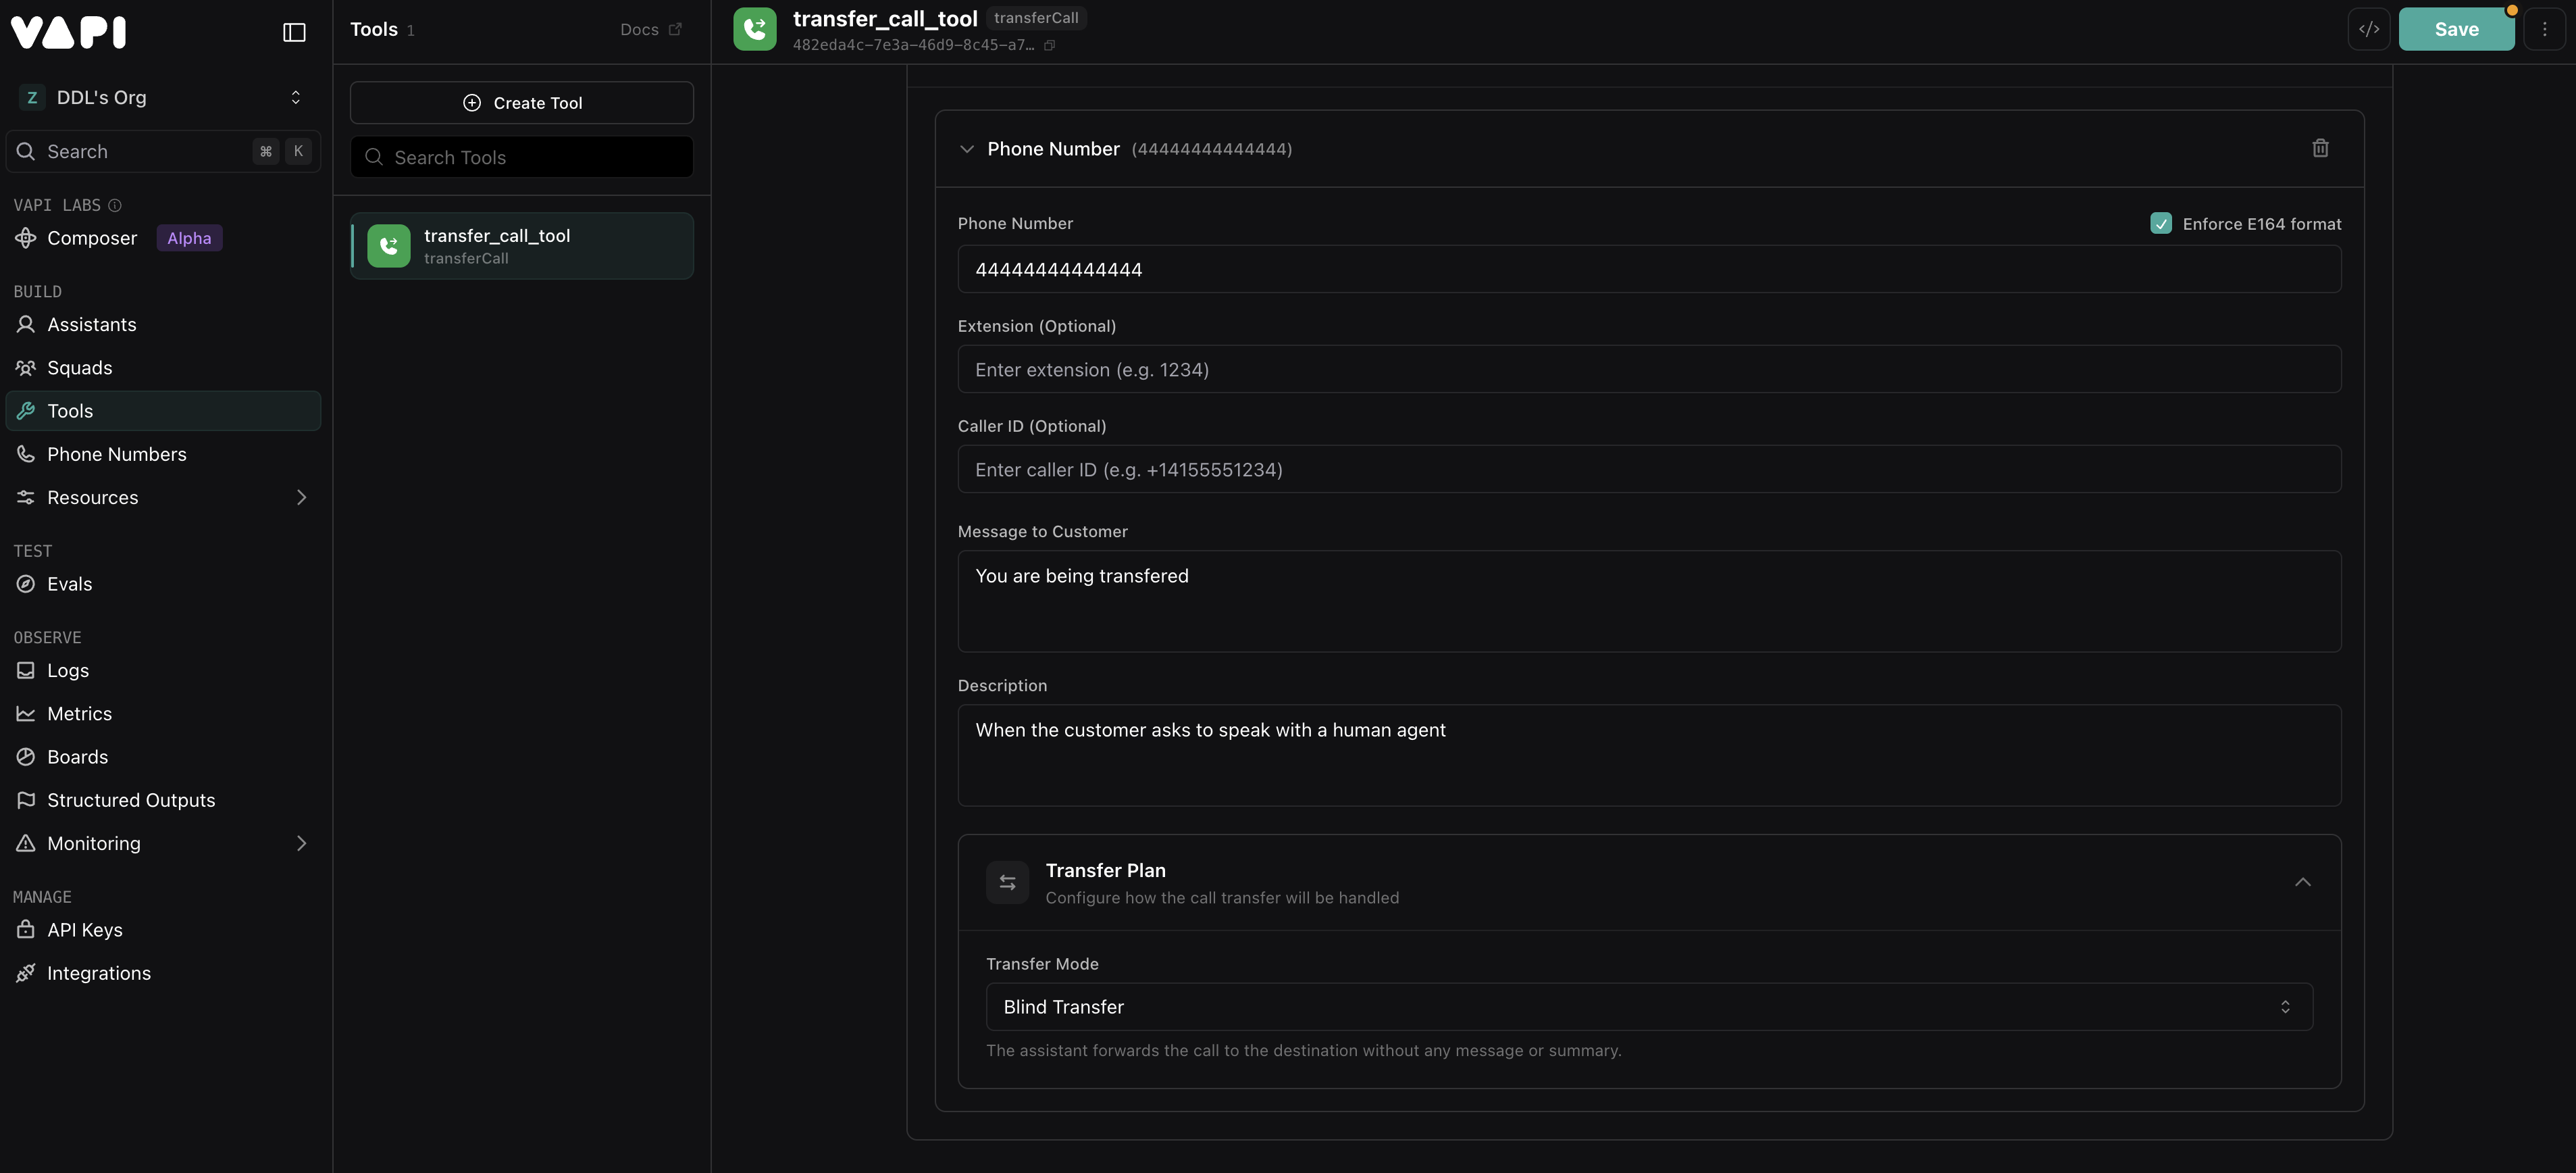
-
Click Save.