LiveKit
This document provides technical instructions for integrating LiveKit Cloud with didlogic. By establishing inbound and outbound SIP trunks, you can connect your didlogic phone numbers to LiveKit's real-time voice and video infrastructure.
Oubound Calling
To allow LiveKit to initiate outbound calls through our network, you must create an outbound trunk.
-
Sign in to LiveKit Cloud.
-
Select Telephony → Configuration and click Create New → Trunk.
-
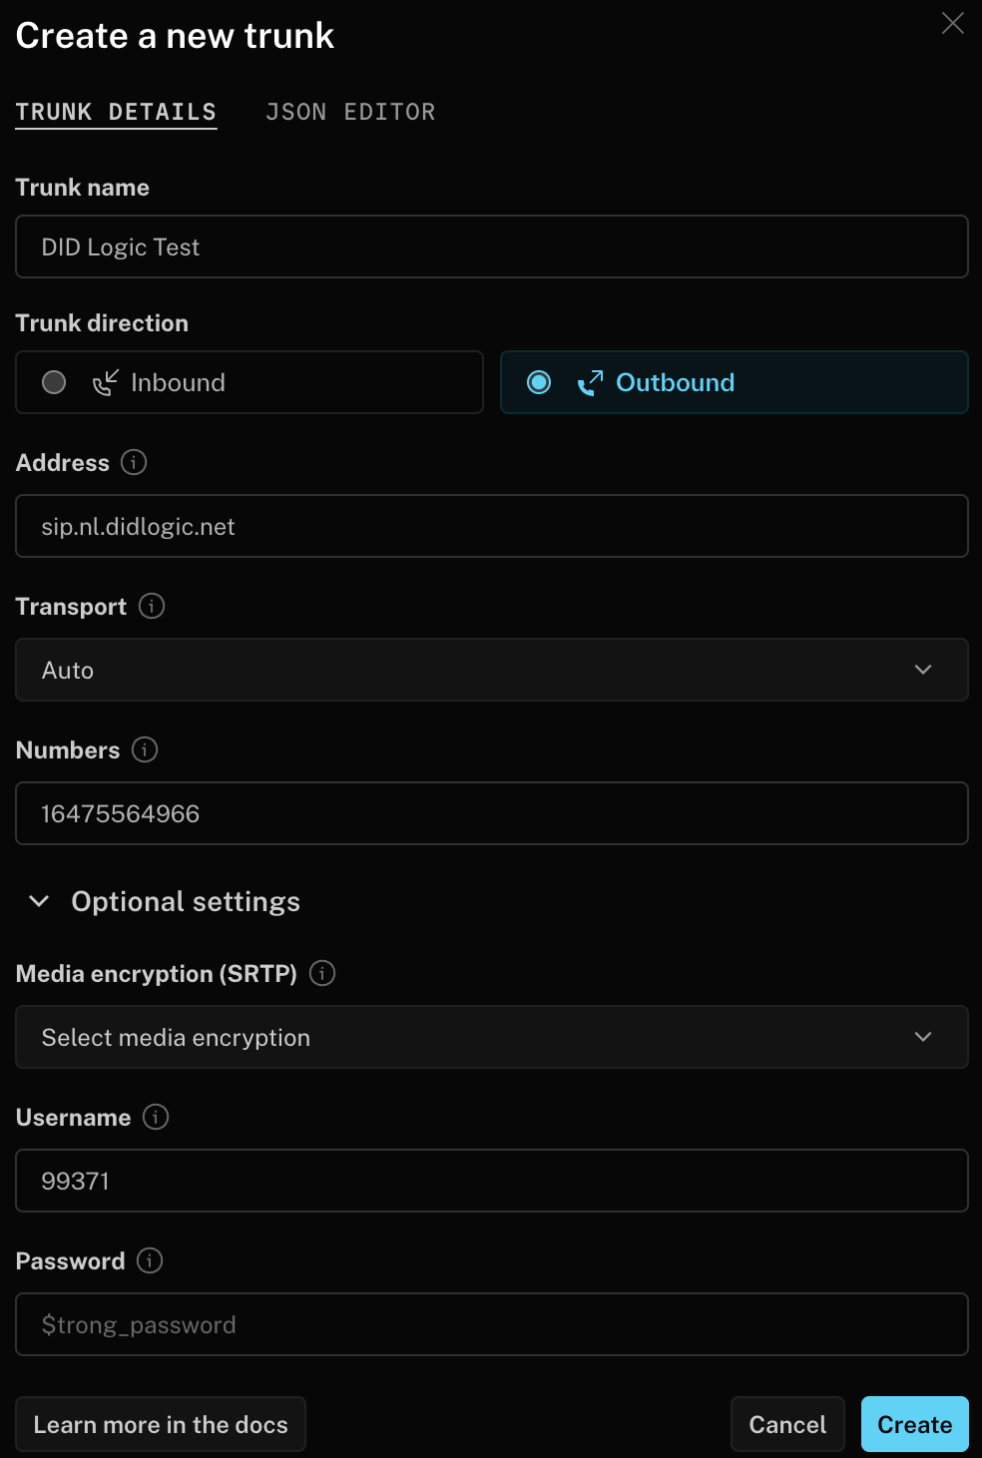
Set the Trunk direction to Outbound and enter the following:
- Address: Use a didlogic proxy (e.g.,
sip.nl.didlogic.net). - Numbers: Enter your purchased didlogic phone number.
- Address: Use a didlogic proxy (e.g.,
-
Open Optional settings and provide your credentials:
- Username: Your 5-digit SIP login from didlogic.
- Password: Your SIP account password.
-
Click Create, and your new trunk will appear in the Outbound trunks section.
Inbound Calls
Creating inbound trunks at LiveKit
-
Sign in to LiveKit Cloud.
-
Select Telephony → Configuration and click Create New → Trunk.
-
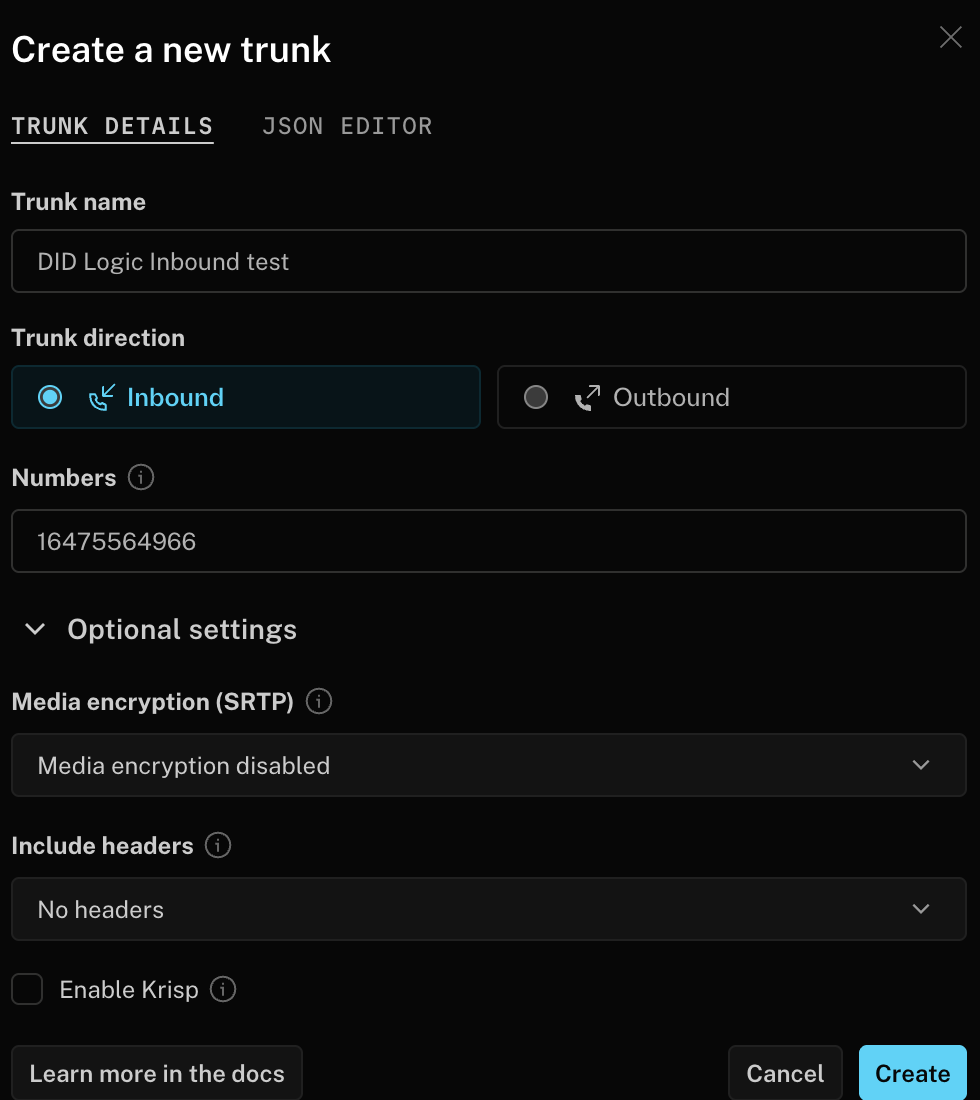
Set the Trunk direction to Inbound and enter the following:
- Trunk name: Give it a descriptive name.
- Numbers: You can enter a specific number or use
*(wildcard) to allow the trunk to handle calls from any assigned number. This is useful if you want to use a different phone number for each call. - Media encryption (SRTP): Configure based on your security requirements.
- Include headers: Option to attach SIP headers to participant attributes.
-
Click Create, and your new trunk will appear in the Inbound trunks section.
Creating Dispatch Rules in LiveKit using LiveKit CLI
Once the inbound trunk is ready, you must create a Dispatch Rule to define which LiveKit room a caller joins. Navigate to Telephony → Configuration → + Create New → Dispatch Rule to link your number to a room.
Dispatch rules define how inbound calls are routed to LiveKit rooms. You can learn more about Dispatch rules on the LiveKit website.

Configuring Inbound Routing at didlogic
Finally, point your didlogic number to the LiveKit SIP gateway to complete the loop.
-
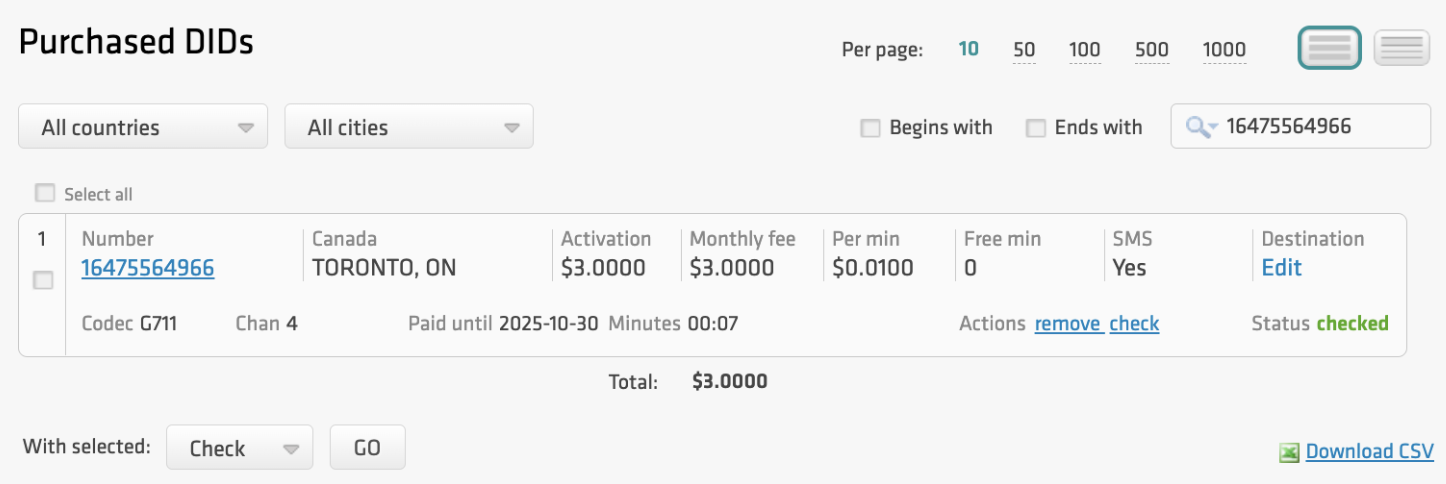
Log in to your didlogic account and go to Numbers → Purchased.
-
Click Edit on the number you are integrating with LiveKit.
-
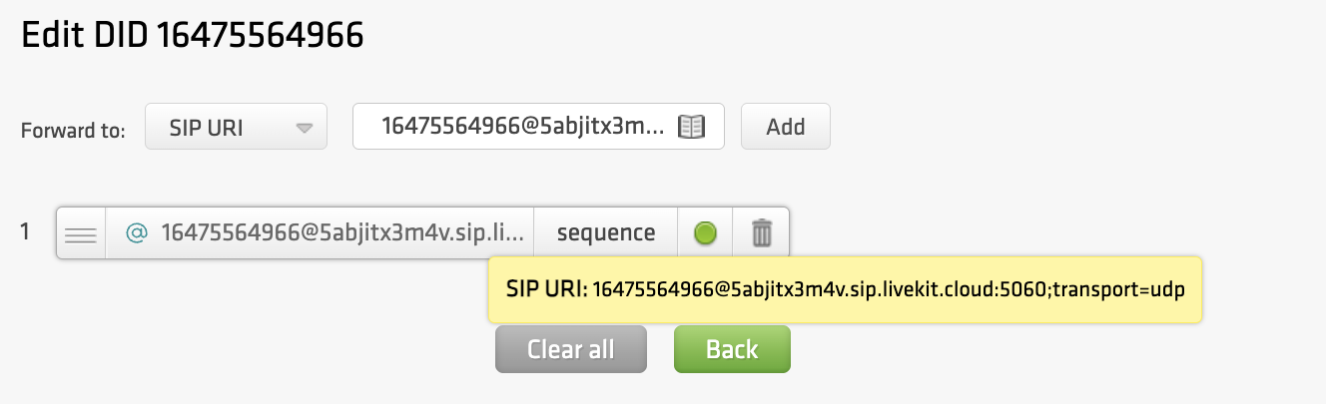
In the Forward to dropdown, select SIP URI.
-
Enter the destination in the following format:
+[number]@[LiveKit_FQDN]:[port];transport=[Protocol], where:- Number: Your didlogic number.
- LiveKit_FQDN: Your unique LiveKit SIP URI (found in LiveKit Settings → Project). We'll use only the part after the colon to configure inbound call routing at didlogic.
- Port is the SIP port used by the LiveKit.
- Protocol: udp (default), tcp, or tls.
-
Click Add, and it should appear below. Ensure this destination is at the top of the list if you already have other destinations configured.